Basic configuration – Exacq S-Series Enterprise Quick Start Guide User Manual
Page 2
S-Series Enterprise Quick Start
S-Series Enterprise Quick Start
www.e
x
acq.com
+1.317.845.5710
+44.1438.310163
USA (Corporate Headquarters)
Europe/Middle East/Asia
www.e
x
acq.com
+1.317.845.5710
+44.1438.310163
USA (Corporate Headquarters)
Europe/Middle East/Asia
2
Basic Configuration
After mounting and powering up the S-series, follow these steps to connect an exacqVision NVR to the S-series.
1. Note the IP address of the S-Series system from the rotating information shown in the LCD panel on the front of the system.
NOTE: If your S-Series displays an IP address in 169.254.x.x format, the server cannot connect to a DHCP server, or a DHCP
server is not available on the network. Connect to the S-Series by configuring a workstation with a fixed IP address in
169.254.x.x format and using a subnet mask of 255.255.0.0.
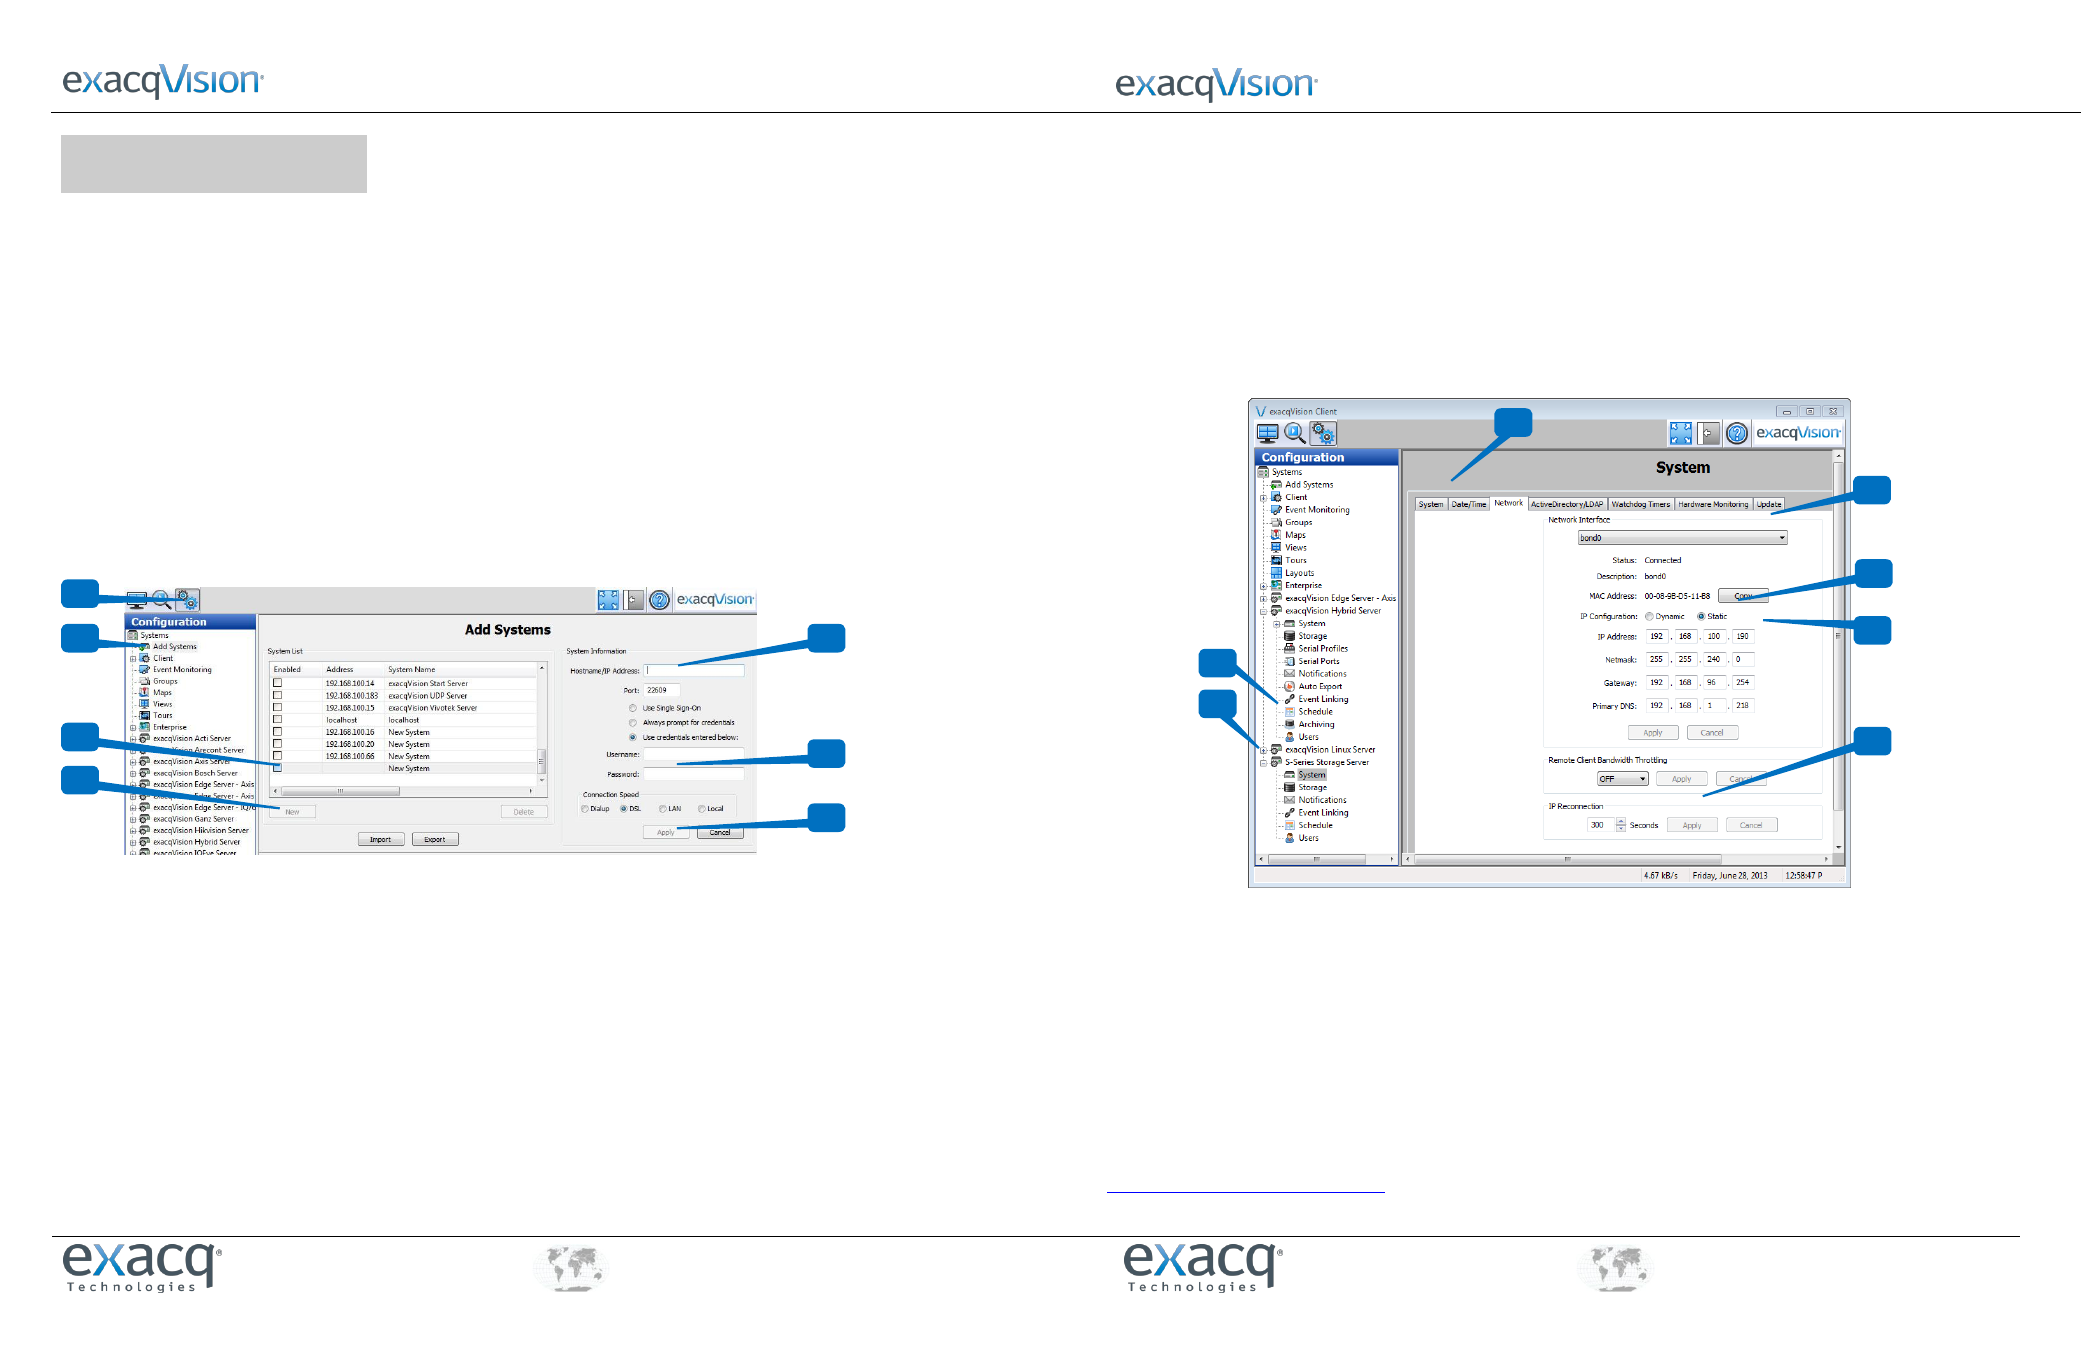
2. Open exacqVision Client on any computer with network connectivity to the S-series.
3. Open the Config (Setup) Page in exacqVision Client.
4. Select Add Systems.
5. Click New.
6. Enter the IP address from step 1.
7. Enter the default username (admin) and password (admin256) of the S-Series system. These can be changed later, if
desired.
8. Click Apply to add the S-Series system to the System List.
9. Click the Enable checkbox next to the S-Series system and ensure that the status changes to Connected.
10. By default, all data ports (black) on an S-Series system are bonded together and configured to connect to a network using
DHCP on a single IP address. It is highly recommended that you configure a static IP address as described in steps 11-16. The
management port (red) is also configured for DHCP, and a static address is recommended.
11. In the site tree, expand the S-Series system and select System.
12. On the System tab, enter and apply any unique name desired for the system.
13. On the Network tab, ensure that bond0 is selected from the drop-down list.
14. Select the Static button.
15. Enter an available static IP address for the system, along with an appropriate netmask, gateway, and primary DNS. (This
information can be provided by the network’s IT administrator.)
16. Click Apply.
NOTE: The drop-down list should remain bond0, which refers to the bonding of the two network ports.
17. Configure each video server’s archiving settings as explained in the exacqVision user manual, or by pressing F1 while on the
archiving configuration screen. Optionally, you may configure event notification to receive e-mail or text alerts about events
such as a drive failure on your S-series.
OPTIONAL NETWORK PERFORMANCE CONFIGURATION: S-series servers are initially configured with all data network ports (black)
bonded to share one IP address. Connect one or more NICs to the same network switch, and follow the switch manufacturer’s
instructions to enable bonding. For maximum performance, configure the network switches for IEEE 802.3ad Link Aggregation, and
enable jumbo frames.
OPTIONAL REMOTE CONNECTIVITY FOR SUPPORT: Enable SSH to allow remote access to the server for administrative support. See
the Exacq Knowledge Base article “Using Secure Shell (SSH) to Manage Linux-based exacqVision Servers” for
more information
3
4
5
6
7
8
9
11
12
14
13
15
16
17