Installing optional controls – Desa (V)CB36N(E) User Manual
Page 12
www.desatech.com
117437-01B
1
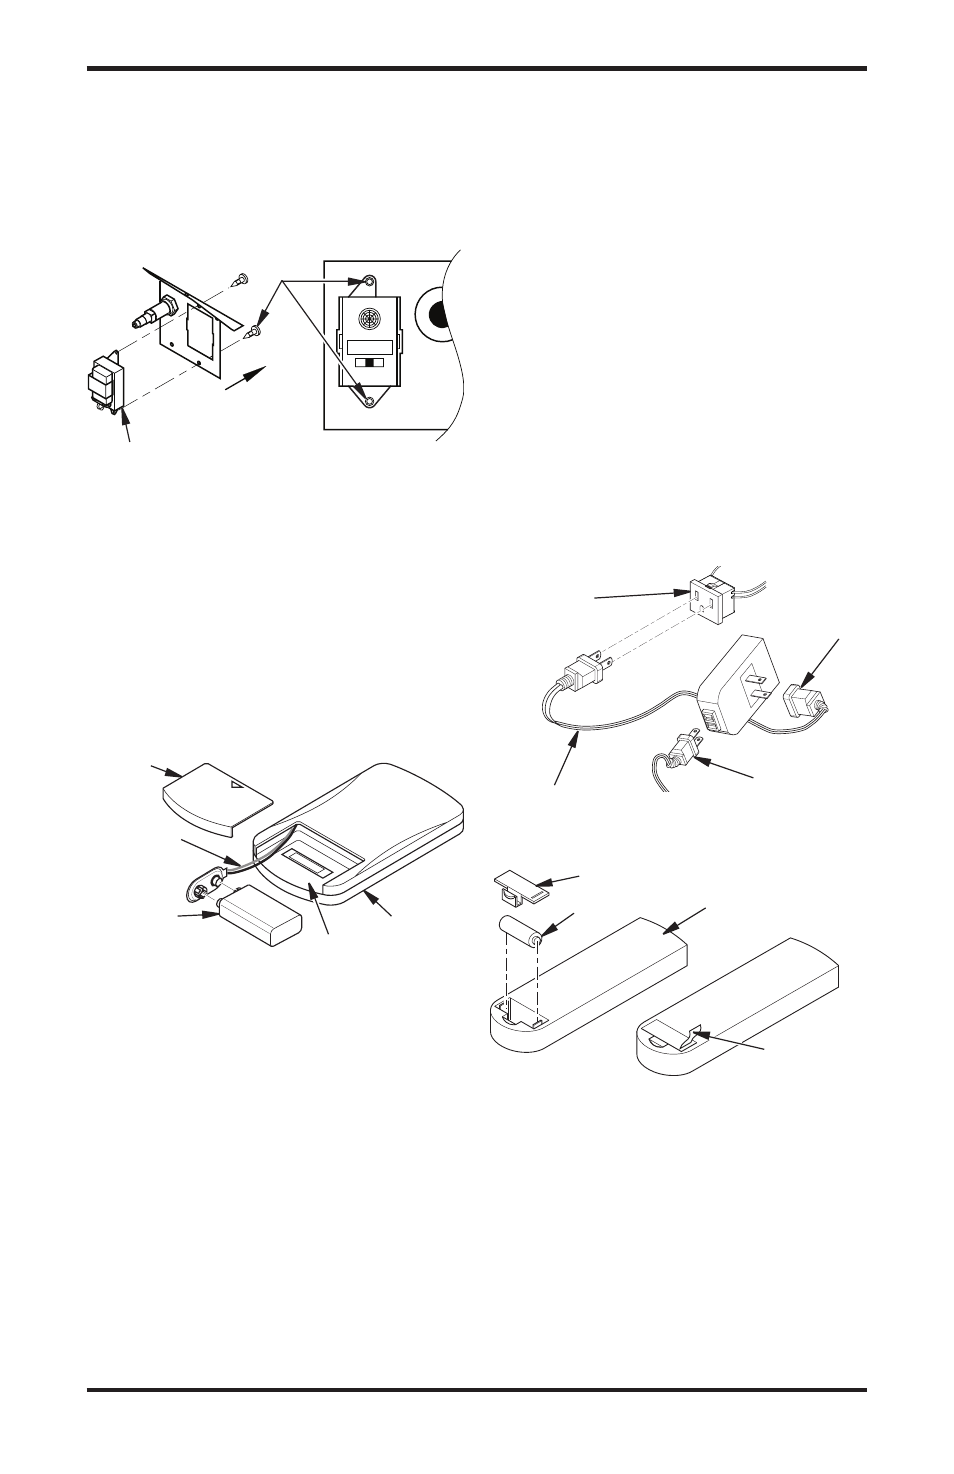
6. Use clips to mount receiver on remote mount-
ing bracket as shown in Figure 16.
INSTALLING OPTIONAL
CONTROLS
Continued
9-Volt
Battery
Battery
Housing
Battery
Cover
Terminal
Wires
Remote
Control
Unit
Towards Front
REMOTE ON OFF
Figure 16 - Mounting Remote Receiver to
Bracket
Figure 17 - Installing Battery in Hand-
Held Control Unit (HRC100 Series)
Figure 18 - Installing WRC Remote Receiver
Figure 19 - Installing Battery into Back of
Handset
Fireplace
Receptacle
Remote
Control
Receiver
Extension Cord
Ignition
Module
Plug
Pull to
Remove
Insulation
Tab
Battery Cover
1 Volt Battery
Back of Handset
Plastic Mounting
Clips
Remote Receiver
Installing 9-Volt Alkaline Battery in Hand-
Held Remote Control Unit
1. Remove battery cover on back of remote
control unit.
2. Attach terminal wires to a 9-volt alkaline bat-
tery (not included). Place battery into battery
housing (see Figure 17).
3. Replace battery cover onto remote control unit.
INSTALLING OPTIONAL WIRELESS
REMOTE CONTROL - MODEL WRC
(Electronic Ignition)
Installing and Activating the Remote
Receiver
1. Open bottom louver and locate plug recep-
tacle. The plug receptacle is located either on
the right or left side of cabinet.
2. The WRC model receiver does not require
a battery. Receiver can be installed by first
plugging short extension cord into fireplace
receptacle. Then plug receiver unit into exten-
sion cord. Finally plug ignition module plug
into receiver unit (see Figure 18).
3. Activate remote handset battery by removing
insulating tab on back of handset (see Figure
19). Battery is included preinstalled.
4. Once battery is activated unit is ready to use.
5. Replace bottom louver panel.