Number configuration – Daktronics FLR3-100 User Manual
Page 3
FLR3-100 Installation Quick Guide
Page 3 of 5
DD2291475 Rev 05
6 August 2014
PO Box 5128 201 Daktronics Drive, Brookings, SD 57006-5128
tel: 800-325-8766 fax: 605-697-4700
www.daktronics.com
3. While the display slowly flashes, press the +2 button until the appropriate line number is shown
on the display (L01, L02, etc).
4. Once the line number is set, press and hold the -2 and +2 buttons until the next display face
begins to slowly flash.
5. Repeat these steps until all display faces have been correctly mapped.
Note: If a display gets set incorrectly, complete the process with the remaining displays then
repeat to correct.
6. Exit configuration mode by pressing and holding the -2 and +2 buttons until the displays show
prices and they no longer flash; about five seconds.
Note: All displays are programmed with a default price matching their line number. Use this to
easily identify that all displays are addressed correctly.
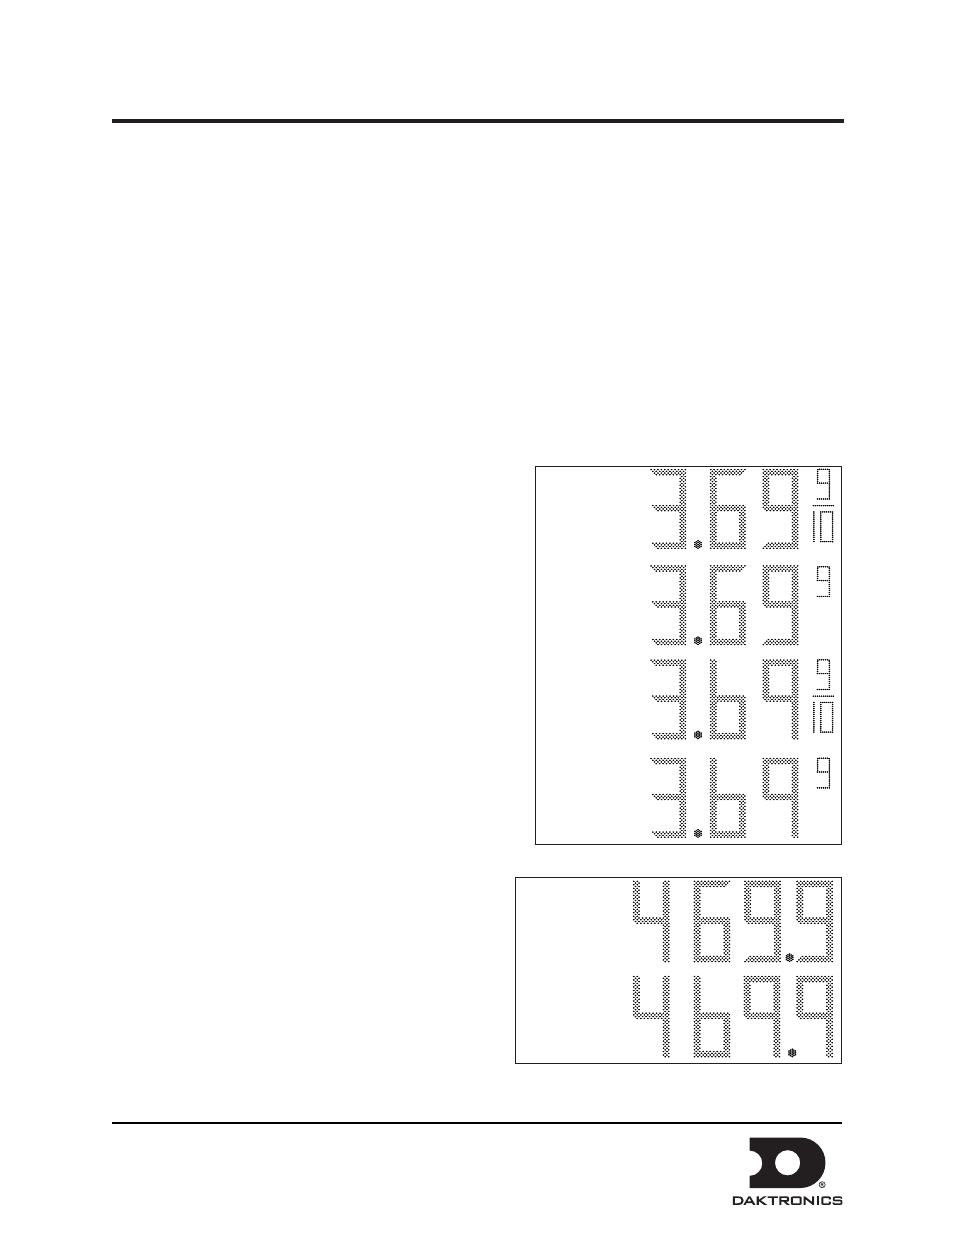
Number Configuration
This section steps you through configuring the numbers six
and nine and the fraction display preferences.
1. Make sure display is turned on.
2. Press and hold the -3 and +3 buttons on the key
fob until all displays show the numbers 6 and 9.
The number scheme will be either 3.69 9/10 or 4.69
9/10. Refer to
3. Press the Plus (+) or Minus (-) keys to scroll
through the different configuration options.
Note: For Domestic displays with a 9/10s digit, the
number 3 needs to show in the first column for the
desired format. For International displays, make
sure the number 4 shows in the first column for the
desired format.
International displays offer two configuration
options - tails and 9 and no tails and 9, as shown
in
4. When the desired configuration is shown on the
displays, press and hold the -3 and +3 buttons to
exit configuration mode.
No Tails and 9
No Tails and 9/10
Tails and 9
Tails and 9/10
Figure 5: Digit Configurations
No Tails and 9
Tails and 9
Figure 6: International Digit Configuration