Section 2: mechanical installation, 1 wall mounting, Section 2 – Daktronics TI-2022 Portable LED Timer User Manual
Page 11: Mechanical installation, Wall mounting
Mechanical Installation
5
Section 2:
Mechanical Installation
This section describes the mounting details of the TI-2022. Use this section when mounting a display
to a wall or on the tripod kit. Other mounting methods can be used, but Daktronics engineers do not
recommend those not documented here. Daktronics is not responsible for mounting the display.
Note: Daktronics does not assume any liability for any installation derived from the information
provided in this manual or installations designed and installed by others.
2.1 Wall Mounting
The TI-2022 mounts to a wall using an optional mounting bracket (Daktronics part number
0M-173125). This bracket then attaches to two wall anchors. A qualified engineer must
specify the anchor type according to national and local building codes.
Note: Do not attempt to permanently suspend the TI-2022 by its carrying handle.
Also, do not permanently mount outdoor displays or leave in wet weather.
Before beginning installation, place the bracket against the mounting surface, level it, and
then mark the surface through the anchor holes on the bracket with a marker or heavy pencil.
Drill holes in the wall and install anchors at the marked locations. Minimum steel anchor size
is 3/16" diameter (4.7 mm).
Note: Daktronics does not provide wall mounting anchors and screws.
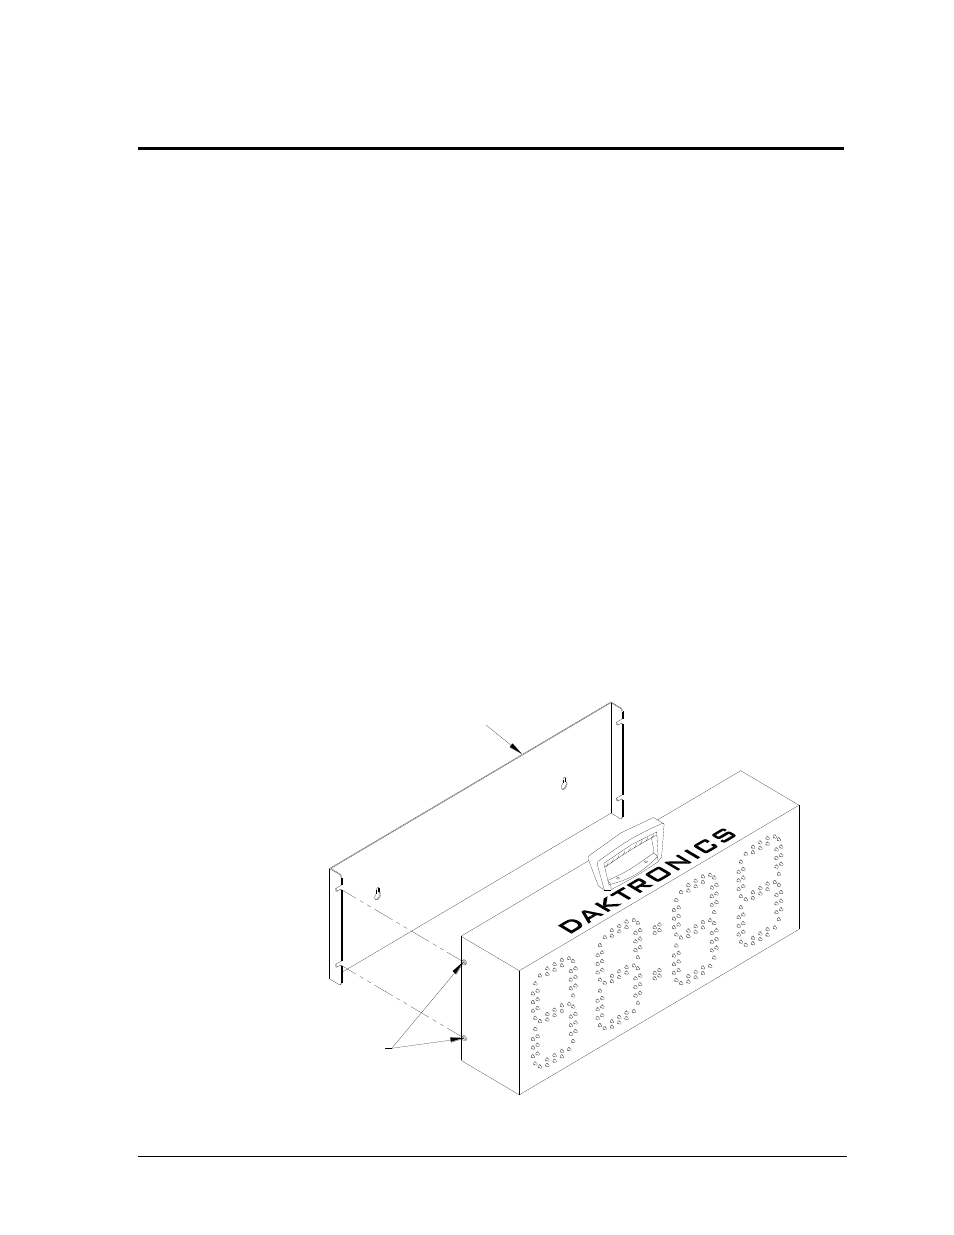
Refer to Figure 4 for display mounting instructions:
2. Loosen these screws on
both sides of the display
and slip the screws into
the slots on the bracket.
Tighten the screws.
1. Mount the bracket to the wall.
Wall mounting bracket
(0M-173125)
Figure 4: Wall Mounting Kit Installation
Wall-mounting Bracket
(0M-173125)
1. Mount the bracket to
the wall.
2. Loosen 4 screws on
sides of display, slip
them into slots on
bracket, and tighten.