Comtest Networks 4048 SYSTEM 5 Splitter Shelf User Manual
Page 4
Rev 2-5 June 2009
Page 4 of 6
Existing Installations
Please note that the Comtest Model 4048 shelf ships with DSL, LOOP and PSTN female connectors. If you are
replacing existing splitter shelves with the new Comtest 4048 shelf, you may wish to use a 25-pair male to
female direction changer on the PSTN connector - do not install it on the DSL or LOOP connector. A direction
changer consists of a plug/receptacle connector with a 2 ¼ inch long screw to attach to the existing RJ-21
connector on the shelf.
Comtest recommends the use of Anixter P/N: T886881.
Installing Splitter Cards
Before proceeding, verify that your cabling has been correctly installed before proceeding and that all RJ-21
plug connectors are properly and securely seated on the shelf’s RJ-21 receptacle connectors.
Two cards may be inserted into the 4048 shelf. The order of card insertion is not important that is, you may
insert either the top or bottom card first. Note, if a card is removed from the shelf, or not installed, the POTS
service is maintained but high speed data is not. The POTS connectors (PSTN and LOOP) are equipped with
life-line contacts so that POTS tip and ring pairs are shorted together on the PSTN and LOOP connectors.
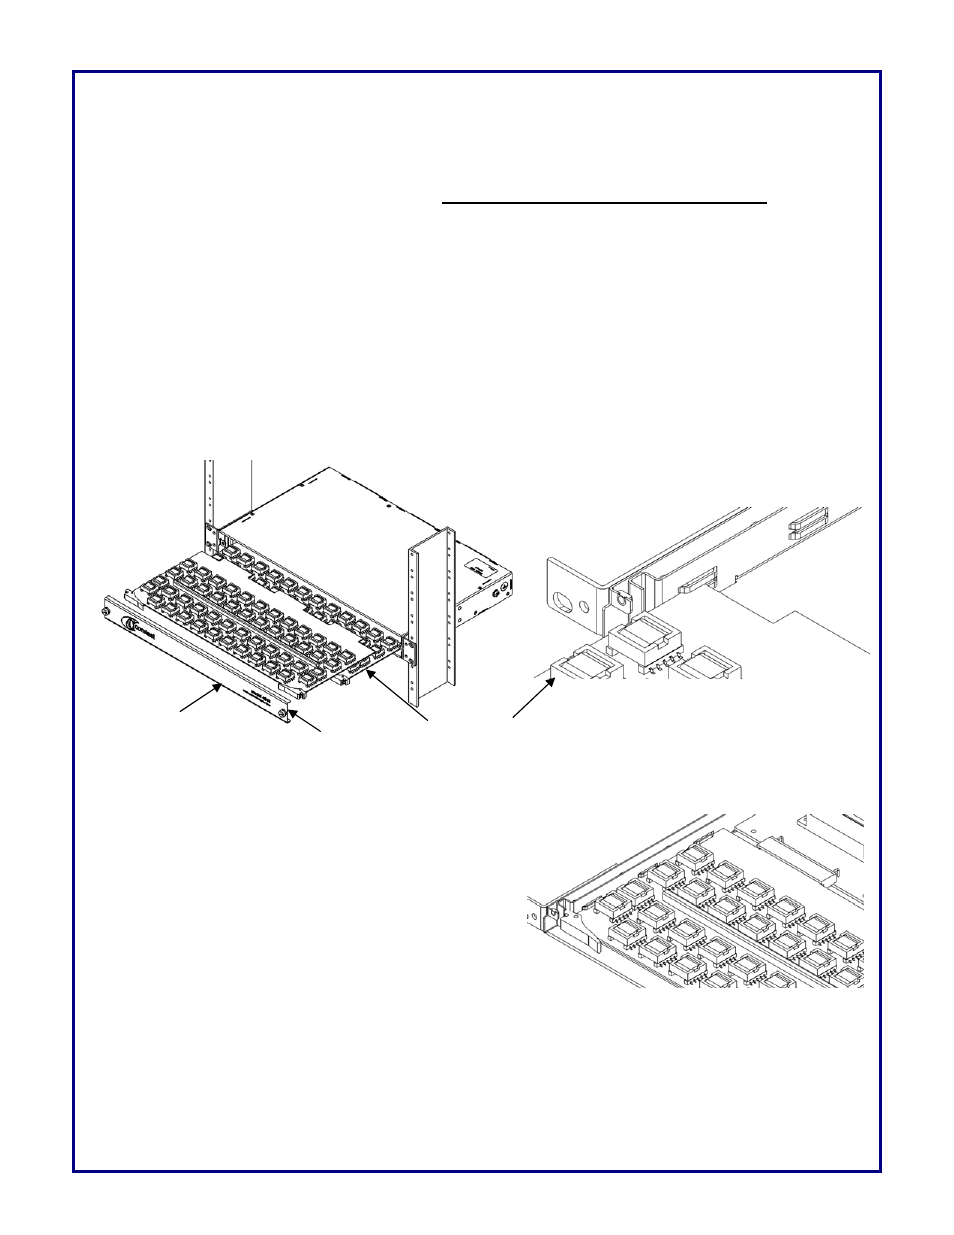
The 4048 shelf is equipped with a Front Panel that is held in place by two 6-32 captive screws. Carefully
unscrew the Front Panel’s captive screws (either by hand or with a ¼” [6.5mm] slotted screwdriver). Remove
the Front Panel and set aside.
Insert the cards into the shelf with the card inserters/ejectors
turned outward roughly 90
o
. When the card gold fingers
reaches the rear connectors, make sure that the
inserters/ejectors mate with the inside of the curved front
metal of the card guide brackets on each side of the shelf.
Placing your thumbs on the inserters/ejectors and pushing
inwards will cause the card to seat fully into the card edge
connectors located inside the back of the shelf.
After the cards are inserted into the shelf, re-install the
shelf’s Front Panel. Insert one end of the Front Panel into position first and then slowly press the panel into
place towards the other end. Tighten the captive screws to the shelf being careful not to over tighten them.
Front Panel
6-32 captive
screw
Splitter Cards