Assembly – Brinly SAT-40 BH Spike Aerator User Manual
Page 6
L-1643BH-F
5.
!
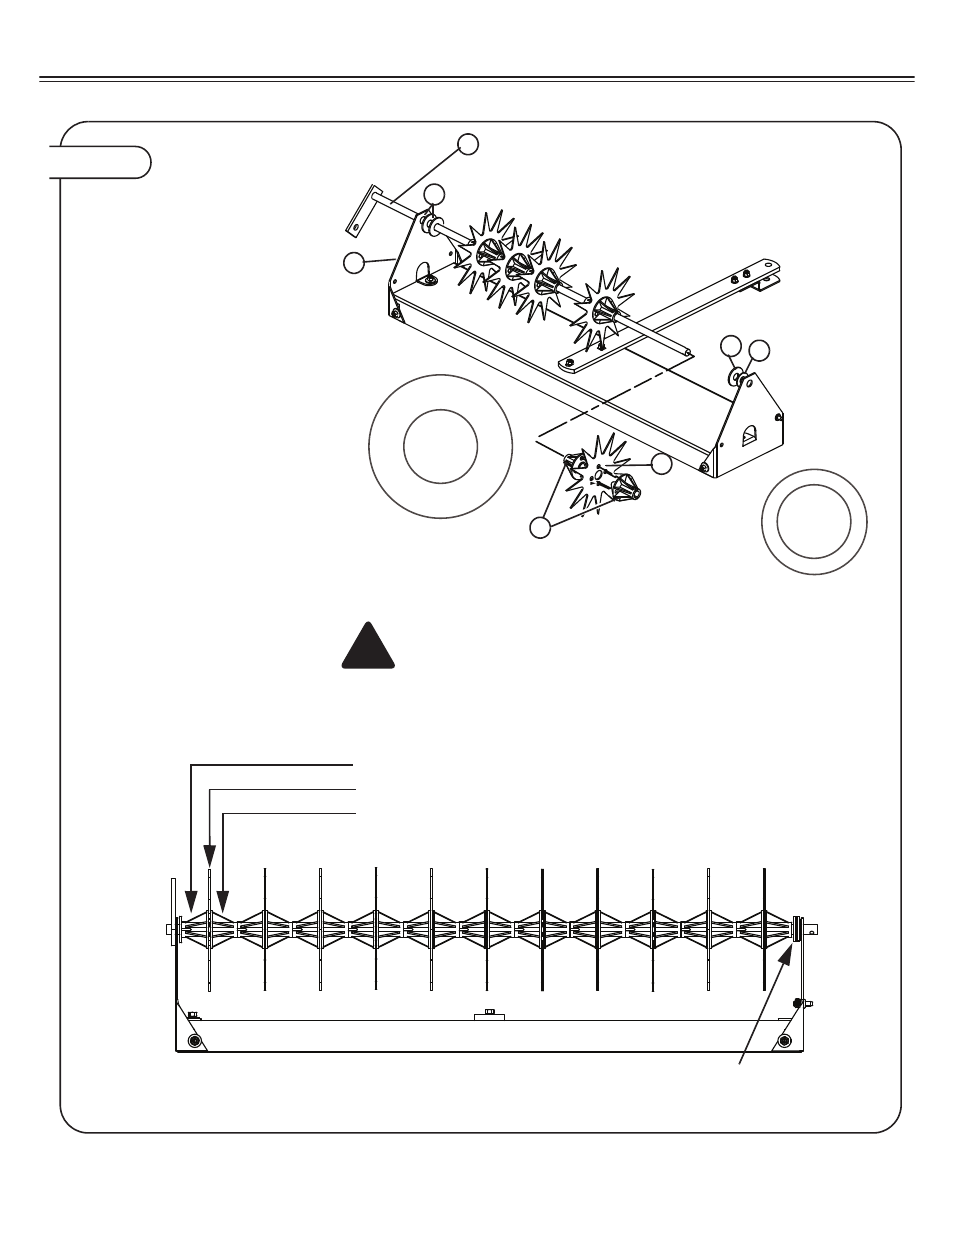
Step 3.
ASSEMBLE TINES TO AXLE
3a) Place a 5/8” Flat Washer, Thick
(17) onto the Axle Assembly (6), then
slide it through the hole in End Panel
(5 right Side) and add another Flat
Washer Thick (17) if needed.
3b) Position the eleven Tines (7) and
twenty-two Spacer/Bearing Tubes
(27) onto the Axle Assembly (6) as
follows:
• Bearing, small end first
• Aerator Tine
• Bearing, large end first
Note: Round projections on Spacer/
Bearing flanges must fit into small
holes in aerator tines and into two
holes of opposite Spacer/Bearing
3c) Position one or two Washers (17
or 28) as needed to eliminate any
side-to-side movement and push
Axle Assembly (6) through hole in
the left End Panel (5) as far as possi-
ble. See layout below
28
5/8” Washer (thin)
Qty. 2
17
5/8” Washer (thick)
Qty. 4
WARNING : Gloves are required when handling
aerator tines. Tines have extremely sharp
points. Use caution when handling.
5
17
17 28
27
7
6
Note:
Tines must not move from side to side inside opening of end panels. If looseness exists, use additional 5/8”
Thick or Thin Washers (17 or 28) inside End Panel to eliminate any side movement.
Tine and Spacer/Bearing Tube Layout
:
•
Spacer/Bearing Tube (small end first)
•
Aerator Tine
•
Spacer/Bearing Tube (large flange first)
ASSEMBLY