Starting to serge, Chaining off and test sewing, Presser foot markings – Baby Lock Diana (BL480A) Getting to Know Guide User Manual
Page 24: Presser foot lifter
22
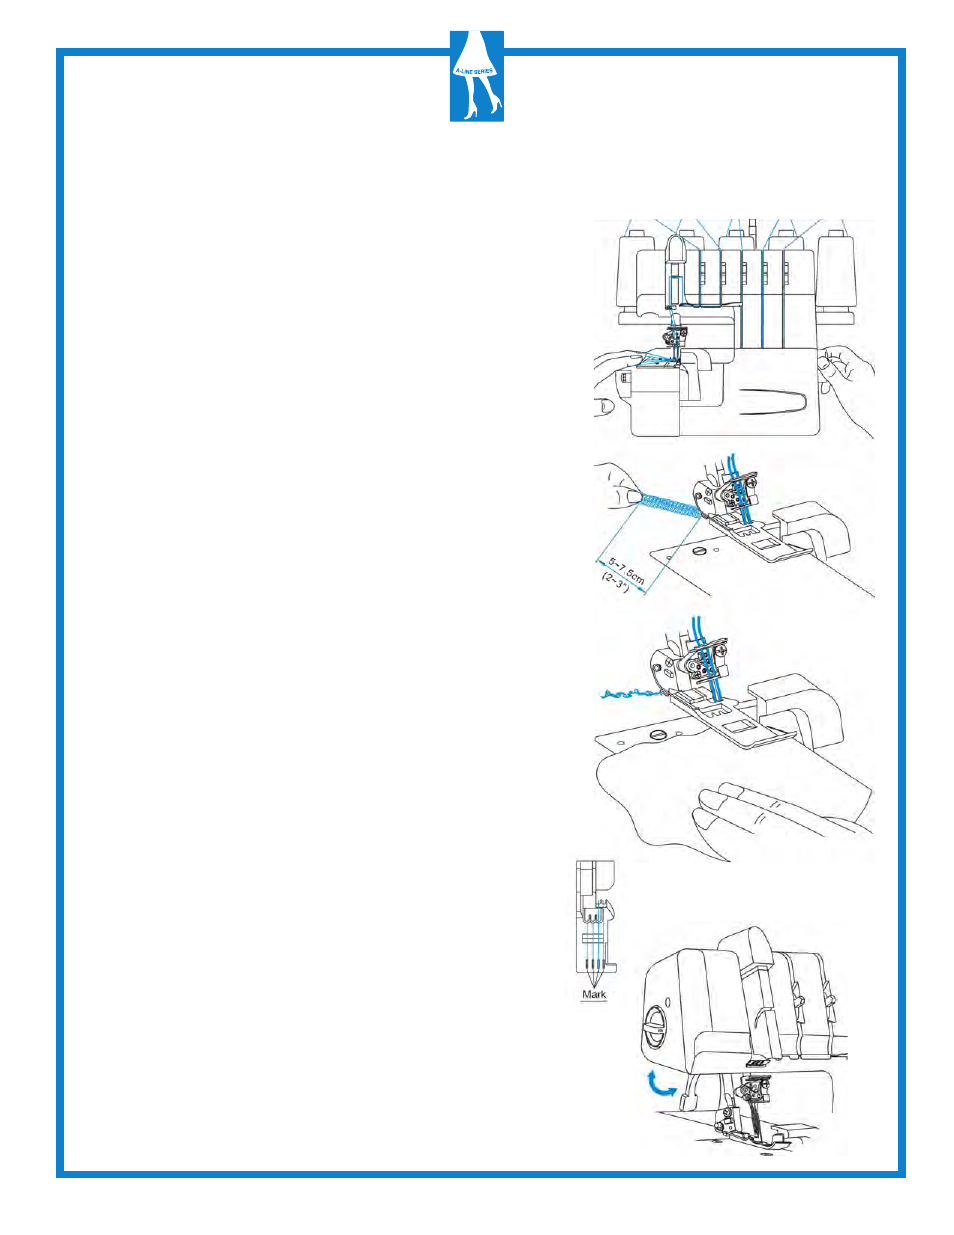
Chaining Off and Test Sewing
Note: The following instructions do not apply to cover
stitch.
For instructions on cover stitch, see page 48 “How to
Sew a Cover Stitch”, in the instruction manual.
• When the machine is completely threaded, bring all of
the threads across the throat plate and slightly to the
left under the pressor foot.
• Hold the threads and apply a slight tension.
• Turn the hand wheel toward you 2 or 3 complete turns
to start the thread chain.
• Lower presser foot.
• Continue holding the chain and press on the foot
controller until chain is 5-7.5cm (2-3 inches) in length.
• Place fabric under the front of the presser foot and
sew a test sample.
Note: Do not pull on the fabric while sewing as this may
deflect the needle, causing it to break.
• At the end of the sample, continue to run the machine
with the presser foot down until the chain reaches
15-20cm (6-8 inches) in length.
Note: In case it is difficult to chain off when chain
stitching, pull the fabric lightly backward.
Presser Foot Markings
• A mark to indicate the needle location is provided on the
presser foot fitted on this machine. Use this mark as a
guide when sewing.
Presser Foot Lifter
• Put the presser foot lifter in the raised position to lower
the presser foot for sewing.
• Swing the presser foot lifter down to lift the presser foot.
• For bulky fabrics, pull forward on the presser foot lifter
to allow additional clearance under the foot.
Starting to Serge