Desa BRICK LINER KIT HFL300 User Manual
Page 2
www.desatech.com
116466-01A
2
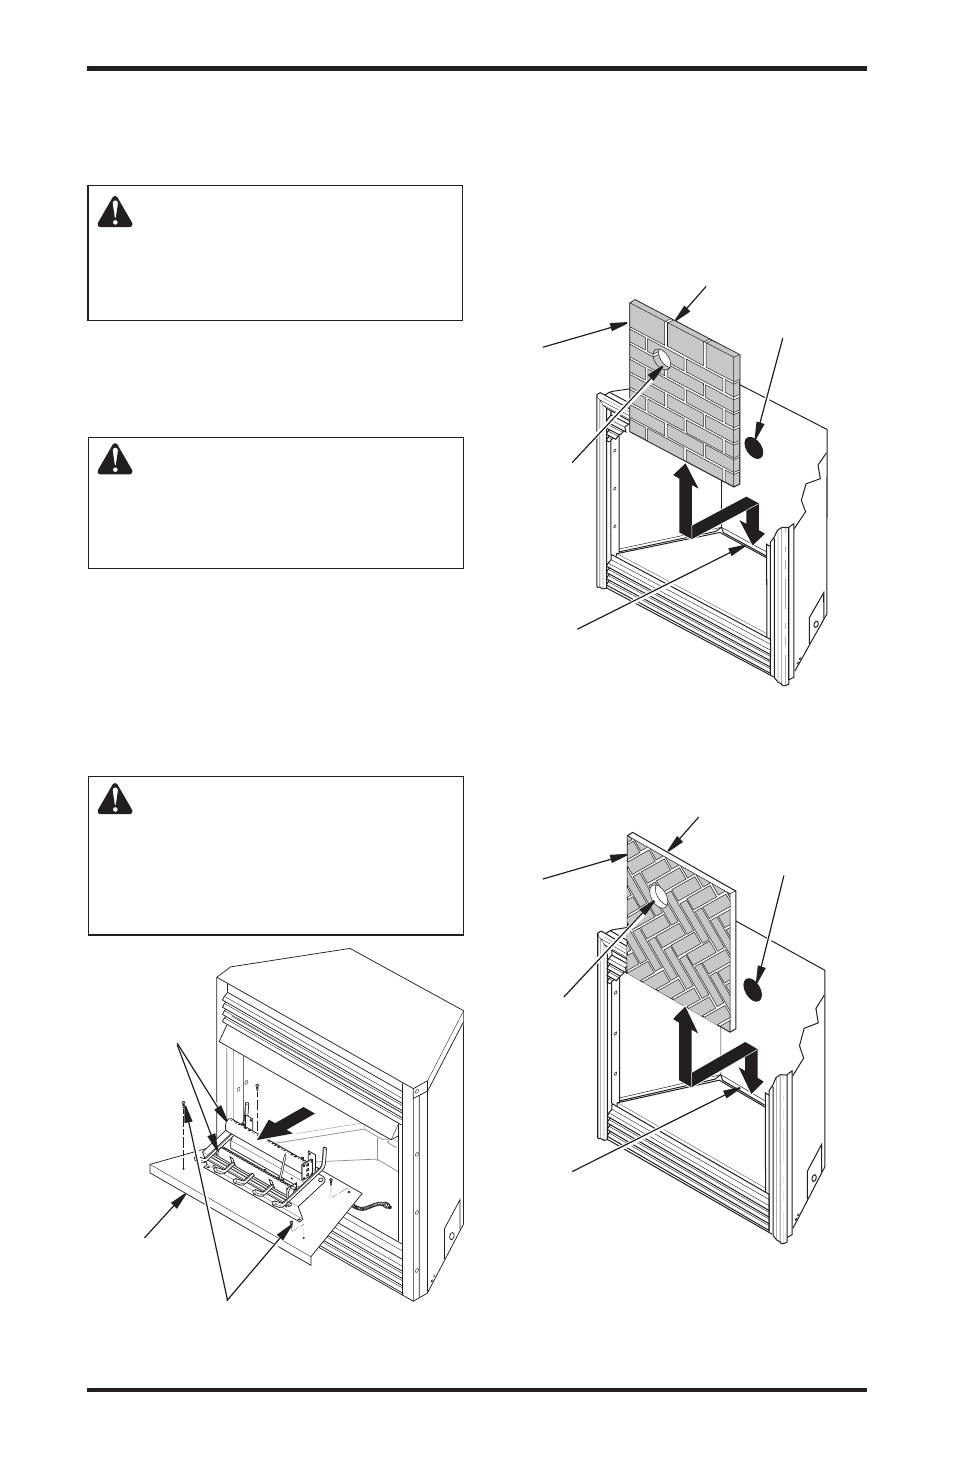
2. Remove logs. Remove two screws that attach
log base assembly to fireplace. Carefully lift
log base assembly and remove from fireplace
(see Figure 2).
CAUTION: Do not pick up log
base assembly by burners. This
may damage burners. Only pick
up base by the grate.
Note:
Some installations may require the gas
supply line to be disconnected before removing
log assembly. If so, call a qualified service per-
son to disconnect gas supply from fireplace.
WARNING: A qualified ser-
vice person must connect and
disconnect fireplace to gas sup-
ply. Follow all local codes.
3. Install rear firebrick panel on back wall first.
Standard brick panel has larger bricks at the
top while the Herringbone panel has smaller
bricks at the top. Rest the bottom edge of
firebrick panel on liner flange. Stand firebrick
panel straight up against the back of fireplace
(see Figure 3). The side brick panels will hold
the rear panel in place.
CAUTION: Always handle
firebrick panels with two hands.
Do not force firebrick panels into
place. Excessive force will break
firebrick panels.
Note:
If your fireplace has a thermodisc plate,
make sure you position the hole in rear fire-
brick panel over the thermodisc plate on rear
wall of fireplace (see Figure 3). If you cover
the thermodisc plate with the firebrick panel,
the fan will not run properly.
Figure 2 - Removing Log Base Assembly
from Fireplace
Burners
Two Screws
Log Base
Assembly
Liner Flange
Hole
Standard Brick
Panel
Rear
Firebrick
Panel
Thermodisc Plate
(not on all models)
Figure 3 - Placing Rear Firebrick Panel
on Flange in Fireplace
Liner
Flange
Hole
Herringbone
Brick Panel
Rear
Firebrick
Panel
Thermodisc Plate
(not on all models)