3 installation of hdd – Aplex Technology ACS-2675C User Manual
Page 8
ACS-2675C User Manual
8
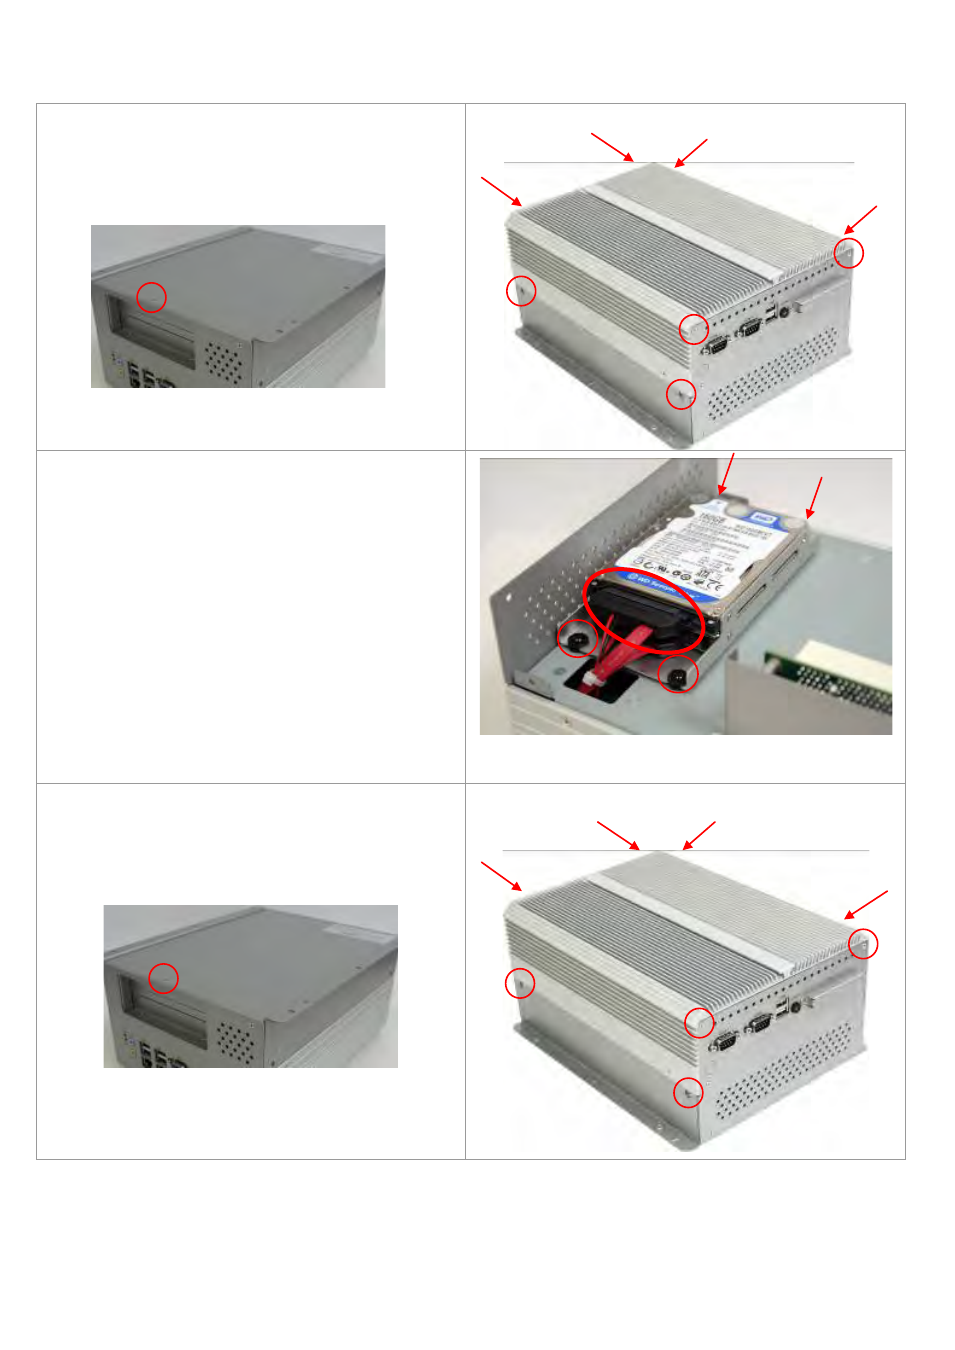
1.3 Installation of HDD
Step 1
There are 9 screws to deal with when enclosing
or removing the chassis.
Step 2
Get the HDD screwed to the bracket with the
four screws as shown by the arrows in the
picture.
Connect the cable to the HDD as shown in the
picture, making sure the red stripe of the cable
is rightly positioned
Step 3
That’s how it should look after it has been
installed.
See also other documents in the category Aplex Technology Computer hardware:
- APC-3597B (77 pages)
- ARCHMI-921P (114 pages)
- APC-3791A (77 pages)
- APC-3985A (94 pages)
- APC-3585A (65 pages)
- APC-3918 (102 pages)
- APC-3228A (96 pages)
- APC-3917B (91 pages)
- APC-3249A (88 pages)
- APC-3765 (80 pages)
- APC-3919 (87 pages)
- APC-3918P (87 pages)
- APC-3081 (58 pages)
- ACS-2110 (91 pages)
- ACS-2110 (89 pages)
- ARCHMI-715P (108 pages)
- ARCHMI-721P (114 pages)
- AHM-6077 (63 pages)
- ARCHMI-821P (121 pages)
- AHM-6120 (27 pages)
- ACS-2645 (69 pages)
- AHM-6196A (89 pages)
- ACS-2665C (72 pages)
- ACS-2685 (82 pages)
- ACS-2695A (97 pages)
- ACS-2120 (59 pages)
- ACS-2160 (56 pages)
- ADP-1198P (29 pages)
- ACS-2170 (77 pages)
- ACS-2702 (48 pages)
- ARCDIS-115P (41 pages)
- ACS-2210A (72 pages)
- ADP-1196 (16 pages)
- ARCDIS-121P (54 pages)
- ADP-1224A (44 pages)
- ADP-1081A (12 pages)
- OPD-1156 (39 pages)
- OPD-1086B (29 pages)