4 installation of pci add-on – Aplex Technology APC-3918P User Manual
Page 11
APC-3918P User Manual
11
1.4 Installation of PCI Add-on
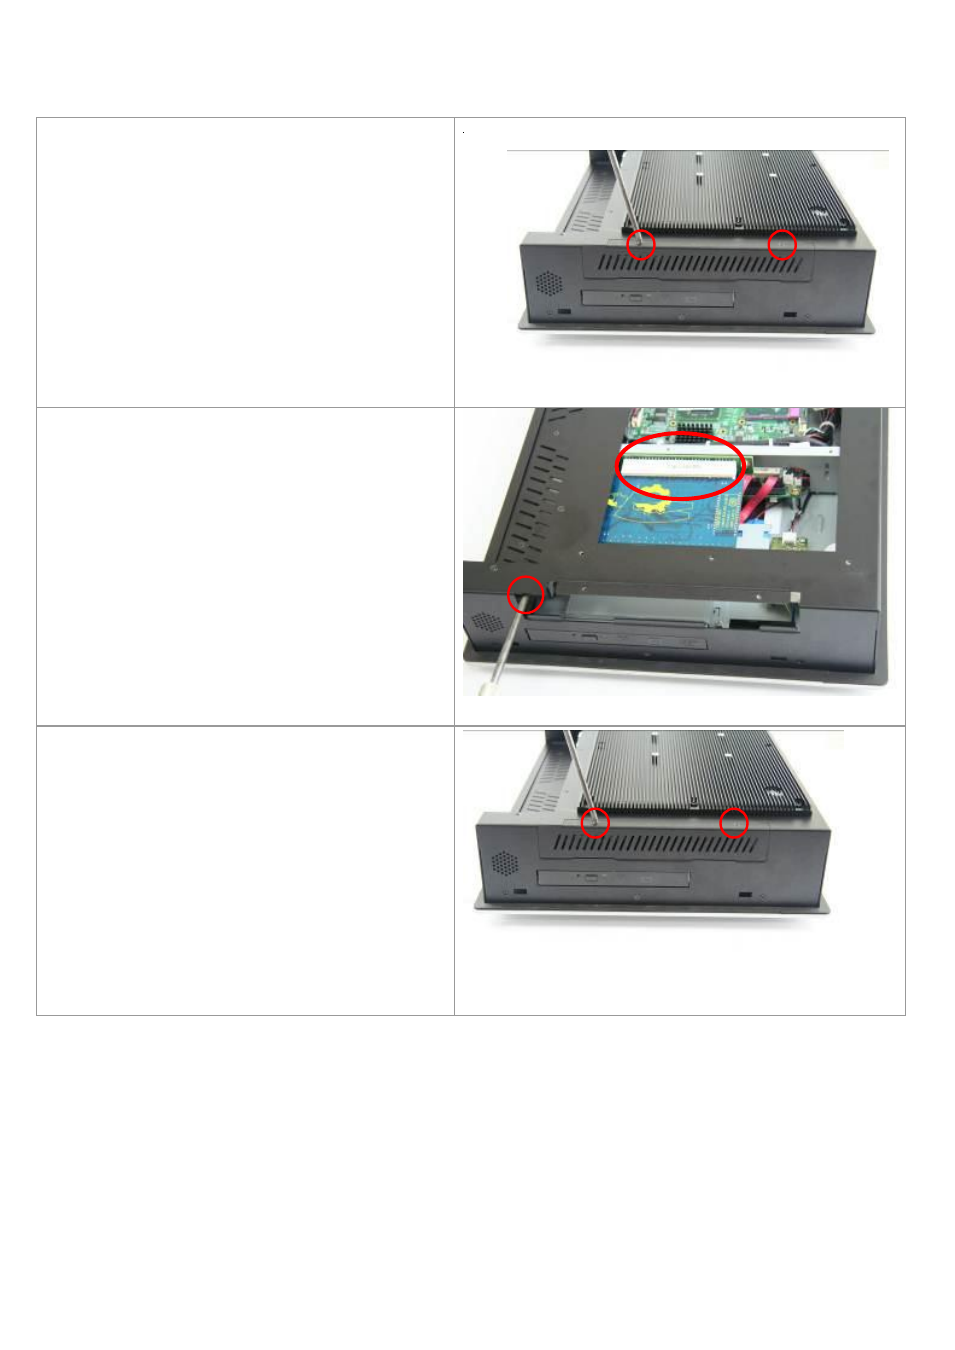
Step 3
To finish the job, just fasten the 2 screws as
shown in the picture.
Step 1
There are 2 screws to deal with when
enclosing or removing the chassis.
Step 2
Now slide the add on into the PCI slot, making
sure the golden part faces the slot. When the
part that is interfaced together come into the
right contact, slightly push the add on into the
rail of the slot.
After sliding the add on into the PCI expansion
slot, get the one screw as circled tightened to
finish the connection.
See also other documents in the category Aplex Technology Computer hardware:
- APC-3597B (77 pages)
- ARCHMI-921P (114 pages)
- APC-3791A (77 pages)
- APC-3985A (94 pages)
- APC-3585A (65 pages)
- APC-3918 (102 pages)
- APC-3228A (96 pages)
- APC-3917B (91 pages)
- APC-3249A (88 pages)
- APC-3765 (80 pages)
- APC-3919 (87 pages)
- APC-3081 (58 pages)
- ACS-2110 (91 pages)
- ACS-2110 (89 pages)
- ARCHMI-715P (108 pages)
- ARCHMI-721P (114 pages)
- AHM-6077 (63 pages)
- ARCHMI-821P (121 pages)
- AHM-6120 (27 pages)
- ACS-2645 (69 pages)
- AHM-6196A (89 pages)
- ACS-2665C (72 pages)
- ACS-2685 (82 pages)
- ACS-2695A (97 pages)
- ACS-2120 (59 pages)
- ACS-2675C (73 pages)
- ACS-2160 (56 pages)
- ADP-1198P (29 pages)
- ACS-2170 (77 pages)
- ACS-2702 (48 pages)
- ARCDIS-115P (41 pages)
- ACS-2210A (72 pages)
- ADP-1196 (16 pages)
- ARCDIS-121P (54 pages)
- ADP-1224A (44 pages)
- ADP-1081A (12 pages)
- OPD-1156 (39 pages)
- OPD-1086B (29 pages)