Retrofit / pre-skimmed surfaces, Patch plastered finish, Retrofit / pre-skimmed plasterboard – Amina AIW750i User Manual
Page 17: Solid wall installation with backbox continued, Alignment and plastering preparation
Top View
05
Solid wall installation with backbox
continued...
1 2
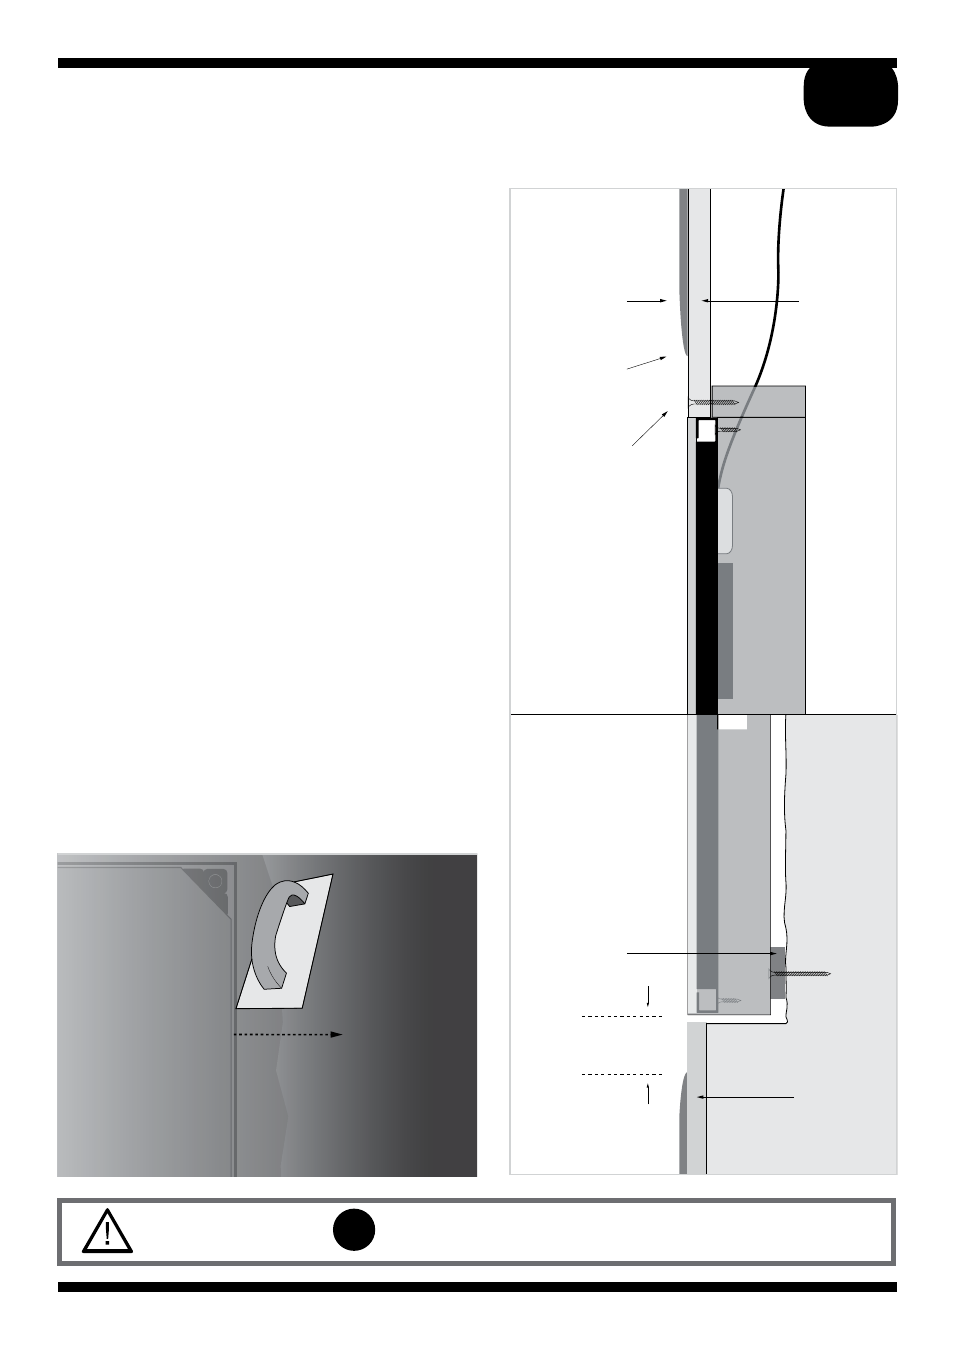
Secure the speaker
Ensure the speaker cable is laid behind the
mineral wool and cannot rest against the
speaker itself.
Remove the backing paper from the 6
adhesive pads on the backbox mounting
tabs, carefully position the speaker onto the
support tabs and apply moderate pressure.
There should be an equal perimeter gap
between the backbox and the edge of
the speaker.
Use the flange head screws (supplied with
the backbox) to fix the corners of the
speaker to the four corner support tabs.
If the correct steps are taken to align the
backbox with the front face of the render, the
loudspeaker, when screwed in place, will also
sit flush with the front face of the render.
Do not adjust the screws in any way, make
sure they are tightly screwed in place and
the whole assembly is firm.
Continue on to Section C (page 18 - testing)
05
Reference page for correct retrofit alignment and plastering method: 13, 14 + 15
screw through
here
3
Shim
Brickwork/concrete
Expanding
foam
Render
Retrofit / pre-skimmed surfaces
Patch plastered finish
Alignment and plastering preparation
1 3
Speaker alignment required for plastering
After removing a 30-50mm (3/16 - 2”) wide
section of existing finishing plaster
surrounding the cutout, the front face of the
speaker should be flush with the paper face
of the plasterboard or render.
To patch plaster:
Skim across the speaker front and blend with
the existing finished plaster.
Amina recommend British Gypsum Easi-fill®
which allows a smooth accurate finish using
fine sandpaper or a wet sponge.
For walls /ceilings that have already been
plaster finished.
sand down to
create taper
existing plaster
remove existing
plaster from
plasterboard
around perimeter
of hole
1
30-50mm
(2”)
shims
Continue to section
plasterboard
stud wall or
ceiling
solid wall
plasterboard
render
Retrofit / pre-skimmed plasterboard
Patch plastered finish
Alignment and plastering preparation
For walls /ceilings that have already been plaster
finished.
Speaker alignment required for plastering
After removing a 30-50mm (approx 2”) wide
section of existing plaster surrounding the cut
out, the front face of the speaker should be
flush with the paper face of the plasterboard.
To patch plaster:
Skim across the speaker front and blend with
the existing finished plaster.
Amina recommend British Gypsum Easi-fill®
which allows a smooth accurate finish using
fine sandpaper or a wet sponge.
13
Retrofit / pre-skimmed surfaces
Patch plastered finish
Alignment and plastering preparation
1 3
Speaker alignment required for plastering
After removing a 30-50mm (3/16 - 2”) wide
section of existing finishing plaster
surrounding the cutout, the front face of the
speaker should be flush with the paper face
of the plasterboard or render.
To patch plaster:
Skim across the speaker front and blend with
the existing finished plaster.
Amina recommend British Gypsum Easi-fill®
which allows a smooth accurate finish using
fine sandpaper or a wet sponge.
For walls /ceilings that have already been
plaster finished.
sand down to
create taper
existing plaster
remove existing
plaster from
plasterboard
around perimeter
of hole
1
30-50mm
(2”)
shims
Continue to section
plasterboard
stud wall or
ceiling
solid wall
plasterboard
render
Continue to section
C
B1