American Time Synchronous Wired and Electronic Movement User Manual
Page 3
American Time - 140 3rd Street South - PO Box 707 - Dassel, MN 55325-0707
3
Manual Time Setting
Synchronous-wired and electronic secondaries can be
manually set to the correct time in accordance with the
following procedure:
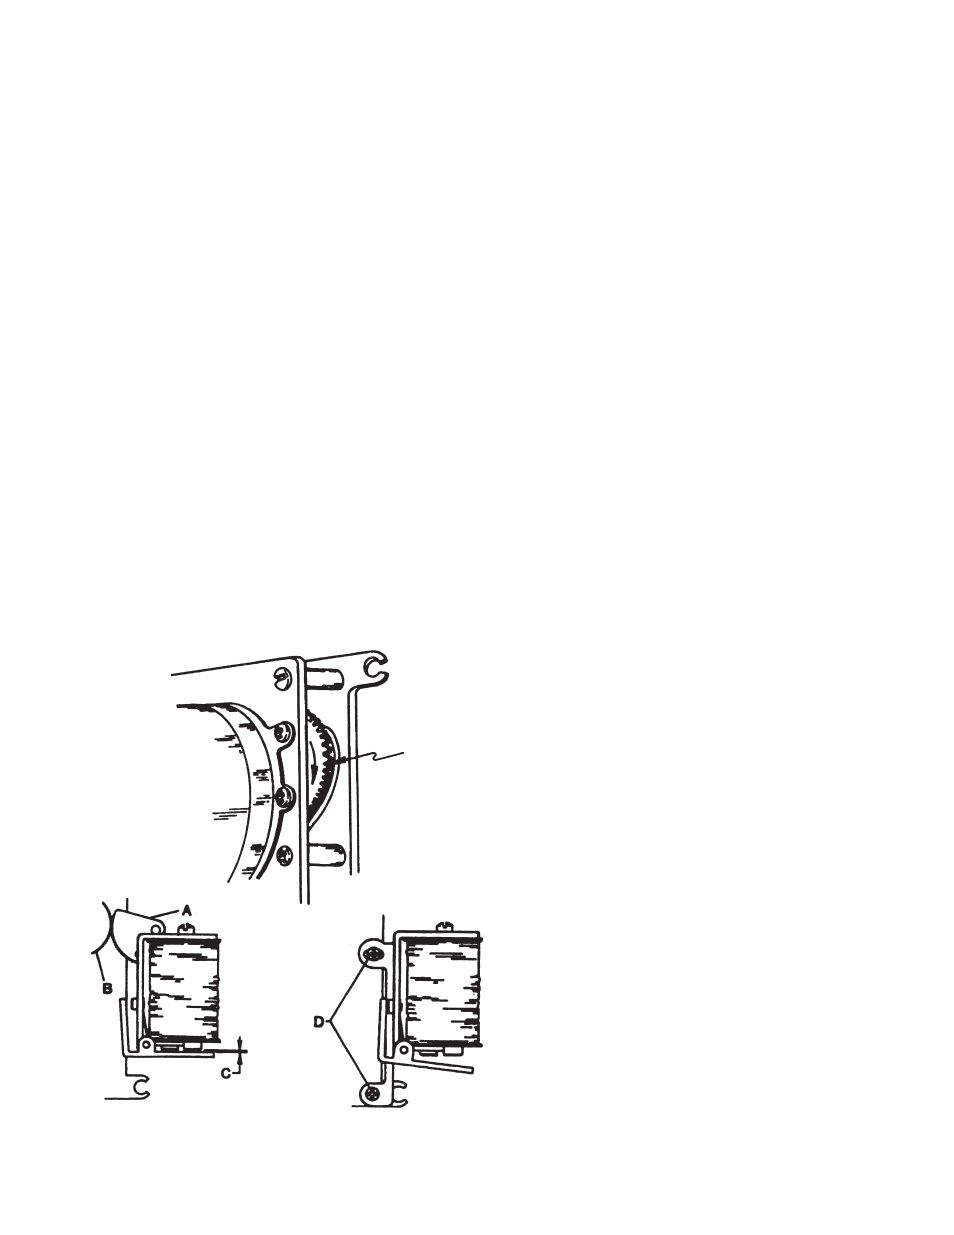
See Fig. 59
1. If the secondary is not reading the hour desired
or if it is ahead of the correct time, initiate an hourly
correction cycle by manually lifting throwout lever T just
enough to allow pick-up pawl S to engage ratchet R (see
NOTE below).
2. The secondary will advance to the 59th minute at
a rate 60 times normal speed. Repeat step 1 until the
secondary reads one minute before the desired hour.
3. The minute hand will then be advanced to the
correct minute by rotating the seconds to minutes
reduction gear as illustrated by Fig. 61. It is advisable
to set the secondary slightly behind the correct time so
that it will be synchronized with the master clock upon
completion of the next automatic hourly correction.
NOTE: If the throwout lever is raised high enough,
it latches in a 12 hour correction position. It may be
released by gently pushing downward on the latching
portion of the 12 hour latch lever (B-Fig. 60A), or it may
be left in this position to allow the secondary to advance
to 6 o’clock.
Positioning of Hands
Synchronous-wired and electronic secondaries can be
manually set to the correct time in accordance with the
following procedure:
See Fig. 59
The following procedure should be used when replacing
or repositioning the hands of any synchronous-wired or
electronic secondary: (to gain access to the hands, it
is necessary to remove the crystal from the secondary.
To do so, first remove the clock case and then lift the
crystal out. Replace in the reverse order)
Minute Hand
1. With power “ON” manually initiate and hourly
correction cycle. Immediately remover power when
throwout lever T causes pick-up pawl S to disengage
ratchet R (Fig. 59); a slight “click” can be heard.
2. The minute hand should be directly over the 59th
mark of the dial. If it is not, move the hand counter-
clockwise until it is directly over the 59th minute mark.
(Make certain that the minute hand retaining nut is tight)
Repeat step 1 to check adjustment.
Second Hand
1. With power “ON”, manually initiate an hourly
correction cycle, remove power as soon as the second
hand stops.
2. The second hand should stop on the 00 seconds
mark of the dial. If it does not, loosen its retaining nut
and position the hand accordingly. Re-tighten the nut.
Repeat step 1 to check adjustment.
Hour Hand
1. With power “ON”, lift the throwout lever (T-Fig. 59)
so that it latches in a raised position.
2. Manually advance the minute hand until the
throwout lever returns to its normal position. Then
advance the minute hand to the hour. The hour hand
should be directly over the 6 o’clock mark of the dial.
If it is not, position it accordingly. (The hour hand is
frictionally held to its drive shaft and may be moved in
either direction)
Fig. 61
Fig. 63A
Fig. 63B