Rigging, 9 lowering the array – Adamson E-Series User Manual
Page 34
Page 34
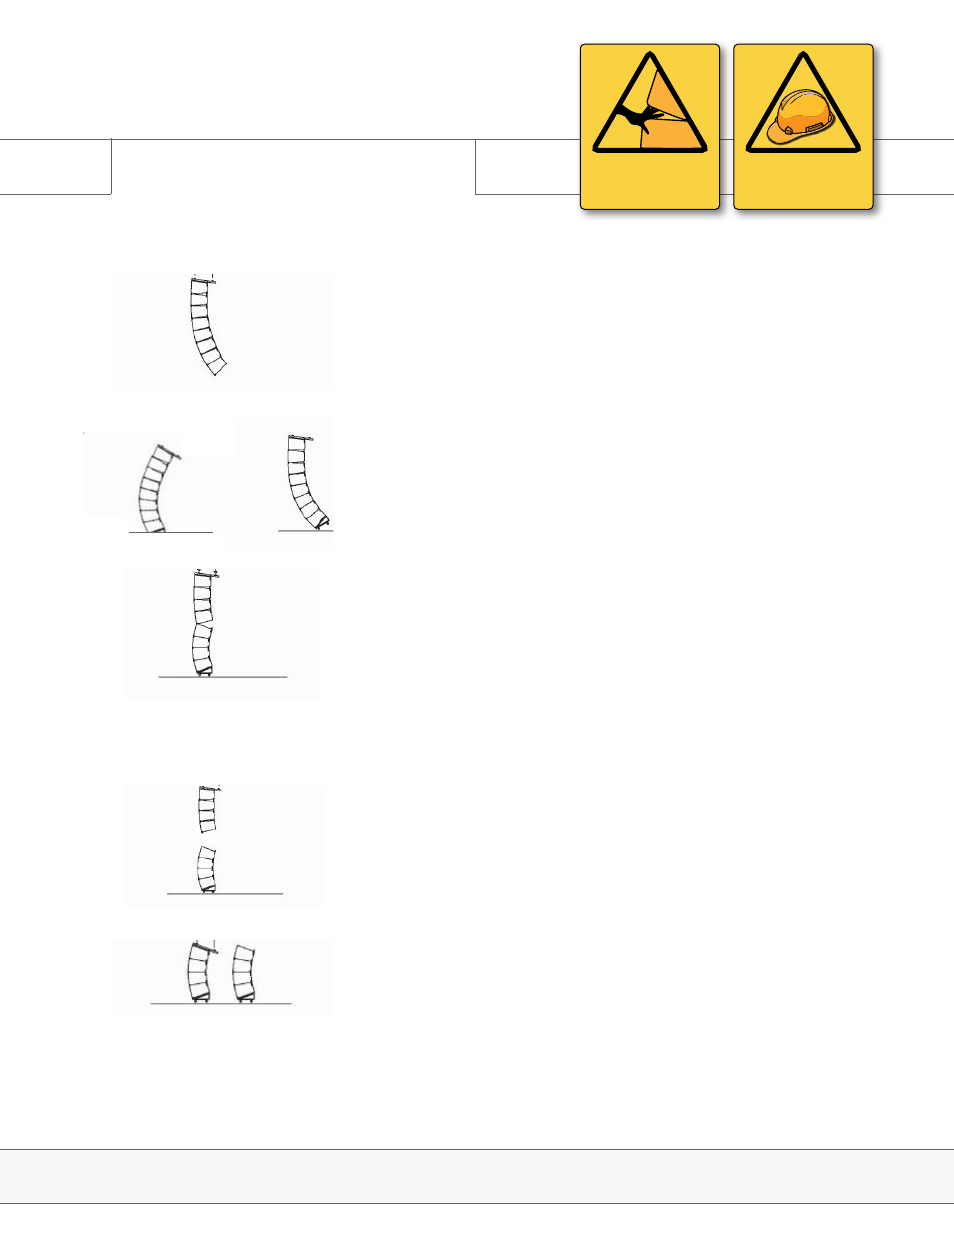
Fig. 1
3.9 Lowering the Array
Rigging
E-Series | Rigging
To Lower a Steep Angled Array
1. Lower the array until it is just above the floor. (Fig. 1)
2. Make sure the rear red lever on the bottom box is set to “spring” mode
to receive the dolly.
3. Connect the dolly to the bottom cabinet.
4. If the bottom cabinets are at a steep angle and it is unsafe to continue
to lower the array, two crew members should be used to support the
weight of the cabinet at all times; before the dolly has ground contact,
(the dolly should never tip over as in (Fig. 3) push the hang to the front
in order to prevent the dolly to tip over, then proceed lowering the array
(Fig.2); release the red lever above this cabinet to free the rear of the
bottom cabinet.
5. All front levers should stay connected. This will allow you to raise the
motors until the frame is no longer steeply angled. (Fig. 4)
6. Set front blue lever on top cabinet in 4 stack to open. and allow the
bottom 4 cabinets to separate from the array.
7. Lift the array just above the 4 stack and wheel 4 stack out from under
array. (Fig. 5)
If the bottom cabinet in the array is still at a steep angle - repeat this
procedure.
To Lower a Moderately Angled Array
1. Lower the array till it is just above the floor. (Fig. 1)
2. Make sure the rear red lever on the bottom box is set to “spring” mode
to receive the dolly.
3. Connect the dolly to the bottom cabinet.
4. Lower the array till all the rear angles collapse in the bottom 4 stack.
5. Set the front blue lever on the top enclosure of the 4 stack to open.
6. Set the rear red lever on the bottom of the upper array to open.
7. Lift the array above the 4 stack (Fig. 5)
8. Wheel 4 stack out of the way
Repeat procedure until done. (Fig. 6)
Fig. 2
Fig. 3
Fig. 5
Fig. 4
Fig. 6
WARNING
SAFETY RISK
PAY SPECIAL ATTENTION
PINCH POINT
CAN CAUSE SEVERE
PERSONAL INJURY