Rigging, 5 setting angles – Adamson E-Series User Manual
Page 28
Page 28
Setting the angles on all 4-stacks and basic preparation.
Before attaching cabinets together, use Blueprint AV™ to plan your cabinet angles for desired coverage. Prepare all
the cabinet angles before beginning to attach and lift the array. The top cabinet, which attaches to the rigging frame
is number 1, and the cabinets gain numerically as the descend. Make sure you are setting the correct angle on both
sides of the E-Capsule.
Fig. 1
Fig. 2
3.5 Setting Angles
Rigging
E-Series | Rigging
ATTENTION
IMPORTANT OPERATING
INSTRUCTIONS
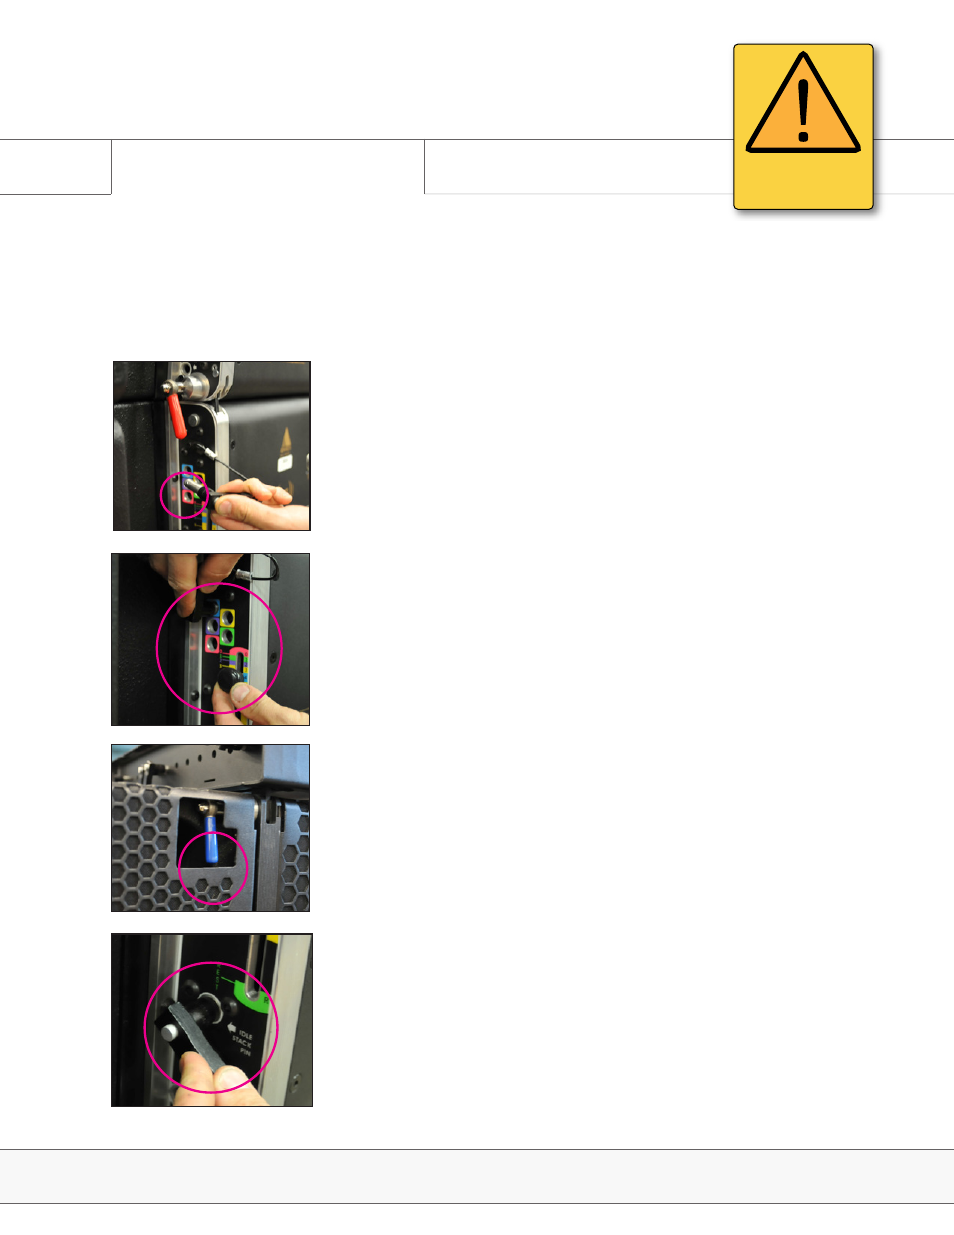
1. The front blue levers on the top cabinets of each 4-up dolly are on
‘Spring’ mode.
2. Red levers in the rear on the BOTTOM cabinet of each 4-stack are in
‘Spring’ mode, abling the hook-up of the next cabinet stack.
3. Remove the angle pin. (Fig. 1)
4. Raise the sliding knob to the angle specified by corresponding
Blueprint AV design and place the angle pin in the corresponding color-
coded slot. (Fig. 2)
5. Remember to check that all cabinets are fully bolted through and
locked by confirming that all levers can be placed in ‘Closed’ mode.
(Fig. 3) Make sure to perform this every time even with enclosures
which are already pinned, to guarantee than no one has changed the
mode of the levers during set-up, tear-down or transport.
Fig. 3
6. Stack pin should always be in “Idle Stack Pin” mode unless you’re
ground stacking the system or need a rigid array.(Fig. 4)
Fig. 4