Neupanel series - mini - quick start guide – Xilica NeuPanel Series User Manual
Page 13
NeuPanel Series - Mini -
Quick Start Guide
XILICA AUDIO DESIGN CANADA / ASIA / EUROPE
Pag
e
13
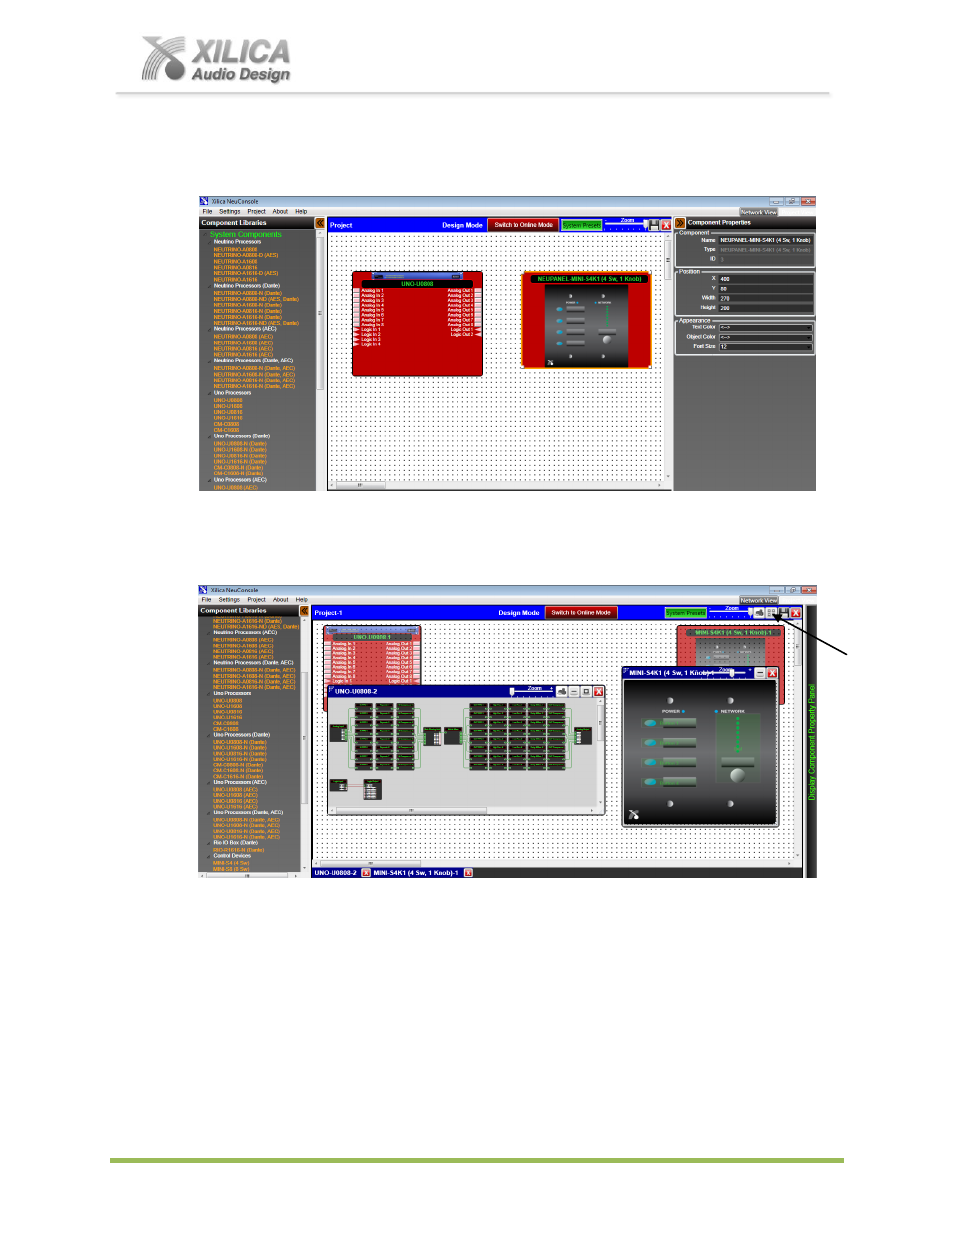
Once done you will notice, as shown below, that each module in the work area has turned
from light see through red and grey to a
solid red
and grey - to indicate successful mapping.
17. NeuConsole Software - Programming the Mini Wall Control:
Double click the processor module in the Project View/Design Mode work area to open and
display the DSP design schematic and DSP modules within it
– see below left.
Then double click the red Mini S4K1 control module to open and display the Mini control
device inside
– see above right. The Mini S4K1 on/off buttons and level control are
independent of each other and functions available to be programmed are light green in color.
Child Tile Window Button: When a processor module and a control module (like the Mini
S4K1 in our example) are positioned in the Project View/Design Mode work area and when
both are opened as they are above - the Child Tile Window button appears in the menu bar
position shown above right with the arrow & below on page 14. Selecting it automatically
creates a separate window for the Mini control and processor modules
– maximizing the work
space so it is easier to program the Mini control. It can create 2-9 child windows to
accommodate and simplify programming multiple Mini (and Touch) controls.