Setting up the navigator – SMK-Link Electronics RemotePoint Navigator User Manual
Page 3
Setting up the Navigator
Your presentation remote comes set up from the factory. In most situations no adjust-
ments are needed; however, if you have many remotes or another device which is
causing interference, complete these steps to avoid interference.
1. To train the receiver to accept the digital code from the remote, remove the USB
receiver from the USB port and reconnect it after a few seconds.
2. Press and hold the Next button (the right arrow) for 10 seconds until the red light
on the remote turns back on. The LED on the receiver should turn from flashing
green to solid green then back to flashing green.
1. Remove the battery from the remote.
2. Replace the battery and hold down the Previous button (the left arrow) for 10
seconds.
3. The LED on the remote will blink the number of the current channel. Each time you
press the Previous button it increases the channel by one.
4. Once you are on channel 4, increasing the channel will move it back to channel 1.
5. The LED will blink rapidly the number of the current channel.
6. Press the Next button (the right arrow) to confirm the channel.
7. Train the receiver again using the steps listed in “Training the Receiver.”
Training the Receiver
Changing Channels
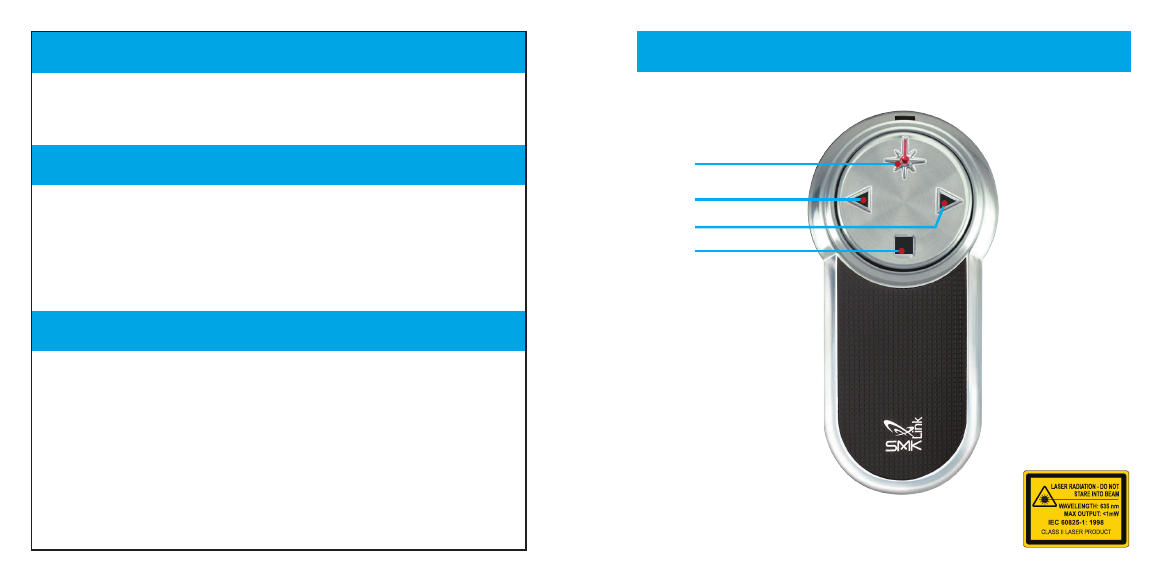
Navigator Controls
Navigator
Model VP4150
Laser Specification:
Max output power: <1mW.
Emitted wavelength: 620-640nm
The Class 2 laser beam is emitted from the front of the device,
indicated by the aperture warning label.
Activate Laser
Previous Slide
Next Slide
Hide / Reveal