Assembly, Unpacking and cleaning, Assembly tools required – Delta (Model 31-300) User Manual
Page 9: Assembly time estimate - 1-2 hrs, Assembling stand
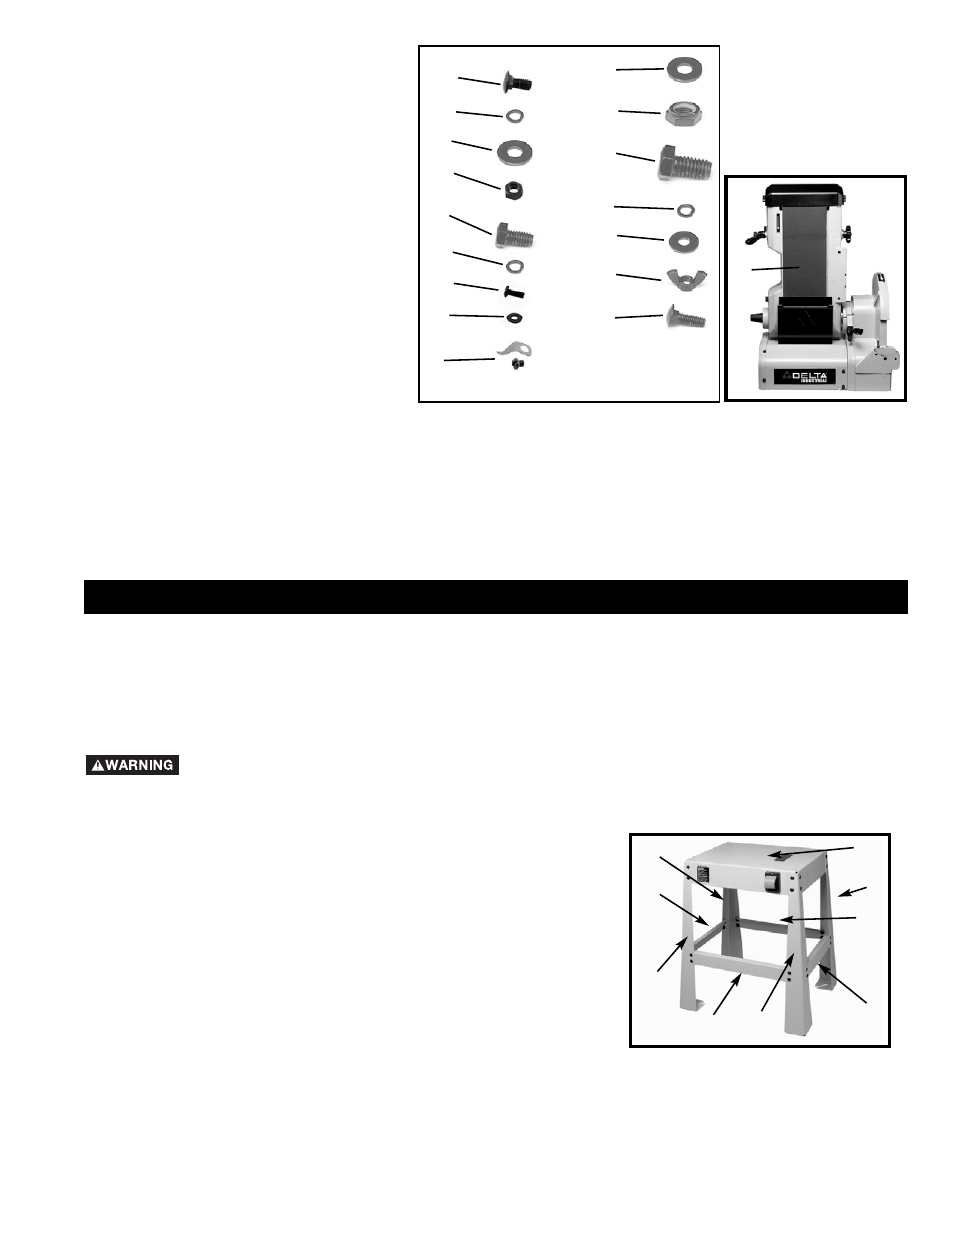
9
Fig. 5
UNPACKING AND CLEANING
Carefully unpack the machine and all loose items from the shipping container(s). Remove the protective coating from
all unpainted surfaces. This coating may be removed with a soft cloth moistened with kerosene (do not use acetone,
gasoline or lacquer thinner for this purpose). After cleaning, cover the unpainted surfaces with a good quality household
floor paste wax.
For assembling stand:
21.
5
/
16
-18 x
5
/
8
" Carriage Bolt (32)
22.
5
/
16
" Lock Washer (32)
23.
5
/
16
" Flat Washer (32)
24.
5
/
16
"-18 Hex nut (32)
To attach center to stand
25.
5
/
16
x
1
/
2
" Hex Head Bolt (4)
26.
5
/
16
" Lock Washer (4)
27. #10-32 x
1
/
2
" Machine screws (4)
28. #10 Flat Washers (4)
To attach motor to stand:
29.
1
/
2
" Flat Washer (2)
30.
1
/
2
" Locknut (2)
31.
1
/
2
-13 x
3
/
4
" Hex Head Bolt (2)
32.
5
/
16
" Lock Washer (2)
33.
5
/
16
" Flat Washer (2)
34.
5
/
16
" Wing Nut (2)
35.
5
/
16
-18 x 1" Carriage Head Bolt (2)
36. Pointer and #10-32 Round Head Screw
37. Sanding Center
21
22
23
24
25
26
29
30
31
32
33
34
35
28
27
37
ASSEMBLY
ASSEMBLY TOOLS REQUIRED
* Phillips Head Screwdriver (not supplied)
*
11
/
16
”,
3
/
4
”, and
1
/
2
” Socket or Open End Wrenches (not supplied)
ASSEMBLY TIME ESTIMATE - 1-2 hrs.
FOR YOUR OWN SAFETY, DO NOT CONNECT THE MACHINE TO THE POWER SOURCE UNTIL
THE MACHINE IS COMPLETELY ASSEMBLED AND YOU READ AND UNDERSTAND THE ENTIRE
OWNER’S MANUAL.
ASSEMBLING STAND
1.
Attach the two short lower braces (A) Fig. 6, and the other two
long lower braces (B) to the four legs (C), using the sixteen 5/8"
carriage bolts, flat washers, lockwashers, and hex nuts.
NOTE:Hand tighten the hex nuts for future adjustments.
2.
Attach the top shelf (D) to the legs, using the remaining carriage
bolts, flat washers, lockwashers, and hex nuts. NOTE: Hand
tighten the hex nuts for future adjustments.
3.
Make sure that the stand is on level ground. Use a helper to lift
and position the machine on the top shelf, and tighten all stand
hardware securely.
Fig. 6
A
A
B
B
C
C
C
D
C
36