Panel description – Atlona AT HD800 V3 User Manual
Page 4
DC 5V
3D
PC
HD
BATT
LOW
BYPASS
PATTERN
TIMING
SELECT
INFO
PATTERN
HDMI IN
POWER
OFF
ON
LIFT UP
PUSH IN
HDMI OUT
AT-HD800
50Hz
60Hz
DC 5V
3D
PC
HD
BATT
LOW
BYPASS
PATTERN
TIMING
SELECT
INFO
PATTERN
HDMI IN
POWER
OFF
ON
LIFT UP
PUSH IN
HDMI OUT
AT-HD800
50Hz
60Hz
1
2
3
4
5
6
7
8
9
10
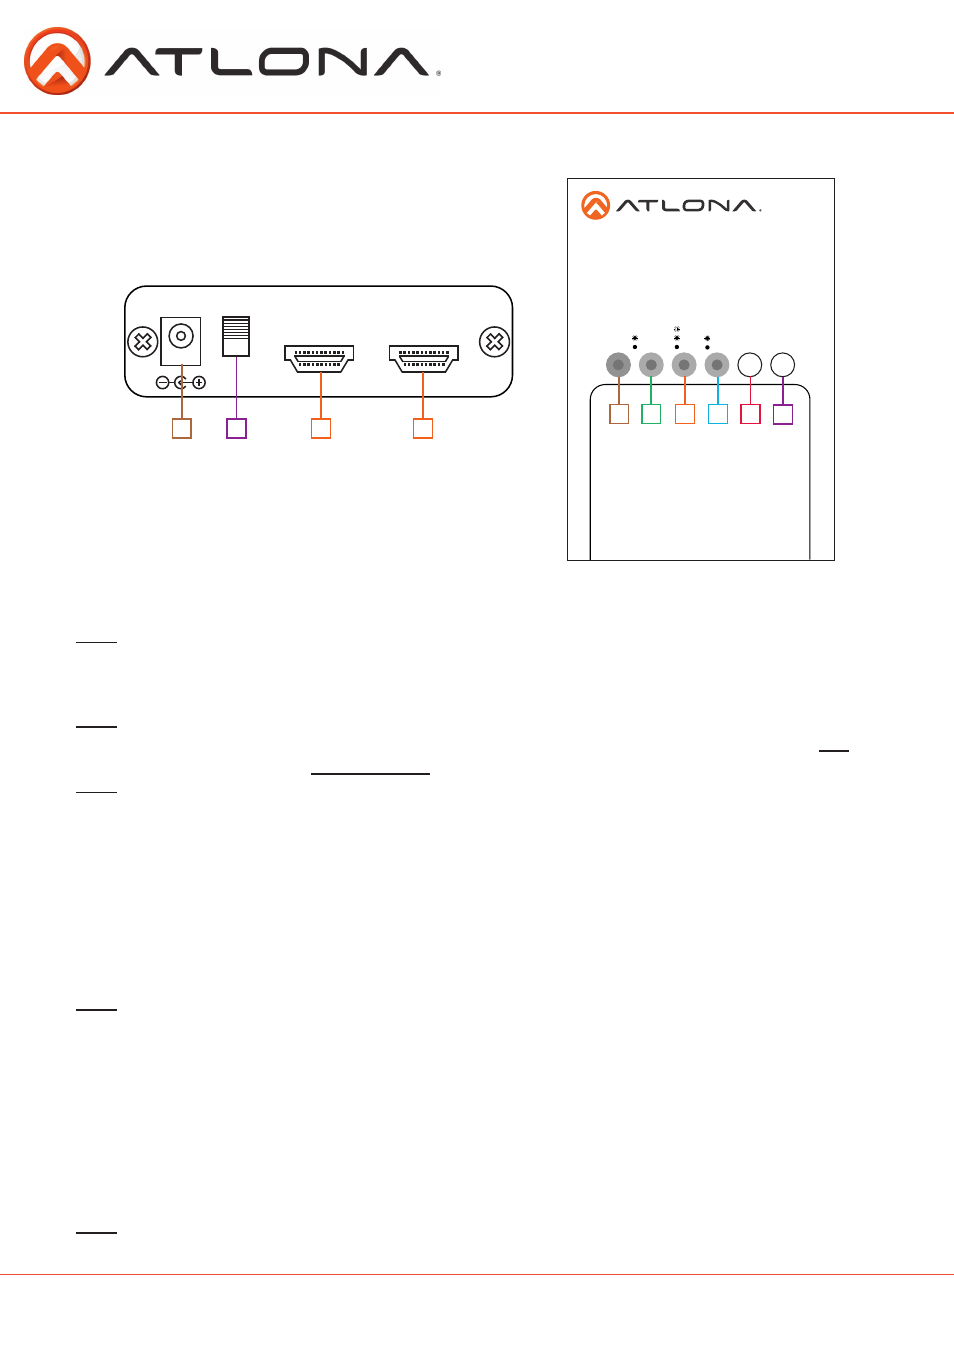
1. DC 5V: Input port for the included 5V DC adapter.
2. Power Switch: Turns the AT-HD800 on (switch up) and off (switch down)
Note: To switch to power over 5V DC adapter, when the batteries are low, power cycle the AT-HD800 with the power
switch.
3. HDMI IN: Connect an HDMI cable from a source, or HDMI loop for cable testing.
4. HDMI OUT: Connect an HDMI cable to a display, or HDMI loop for cable testing.
Note: Loop the HDMI cable from the HDMI OUT to the HDMI IN for cable testing.
5. BATT. LOW LED: Red LED will light up when the power is on. The LED will start flashing fast
when the batteries get to 10% or below or slow when it is put in standby mode.
Note: Standby will occur after 3 minutes of inactivity with nothing plugged into the ports of the AT-HD800.
(The AT-HD800 will not go into standby when using the 5V adapter.)
6. Bypass/Pattern LED: Green LED will illuminate when receiving signal from an HDMI source. The
LED will be off if no HDMI source is connected.
7. 3D/PC/HD LED:
a. LED will flash when receiving or sending a 3D signal.
b. LED will be a solid green when sending or receiving a VESA resolution
c. LED will be off when receiving or sending a video resolution.
8. 50/60 Hz LED: Will illuminate green when sending/receiving a 50Hz signal.
(Most commonly used in Europe and Asia)
Note: To quickly switch between 50 & 60Hz press and hold the Timing Select & Info Pattern buttons together for 3
seconds then release.
9. Timing Select Button: Press once to bring up the resolution menu on the display (not available
when an HDMI source is connected). Press the Timing Select button again to go through the 25
available timings/resolutions (press the Info Pattern button to go backwards)
10. Info Pattern Button
a. HD800 to Display: Press once to bring up the pattern menu. Press continuously to go
through the patterns. (Press the Timing Select button to go back to a pattern.)
b. Source to HD800 to Display: Pressing the Info Pattern button will show the source and
display capabilities side by side on the display’s screen.
Note: If there is no image present, press the Info Pattern button 3 seconds then release. The resolution will be reset to
the Display’s native resolution.
4
atlona.com
Toll free: 1-877-536-3976
Local: 1-408-962-0515
Panel Description