Ac d b – Optoma OWM855W User Manual
Page 4
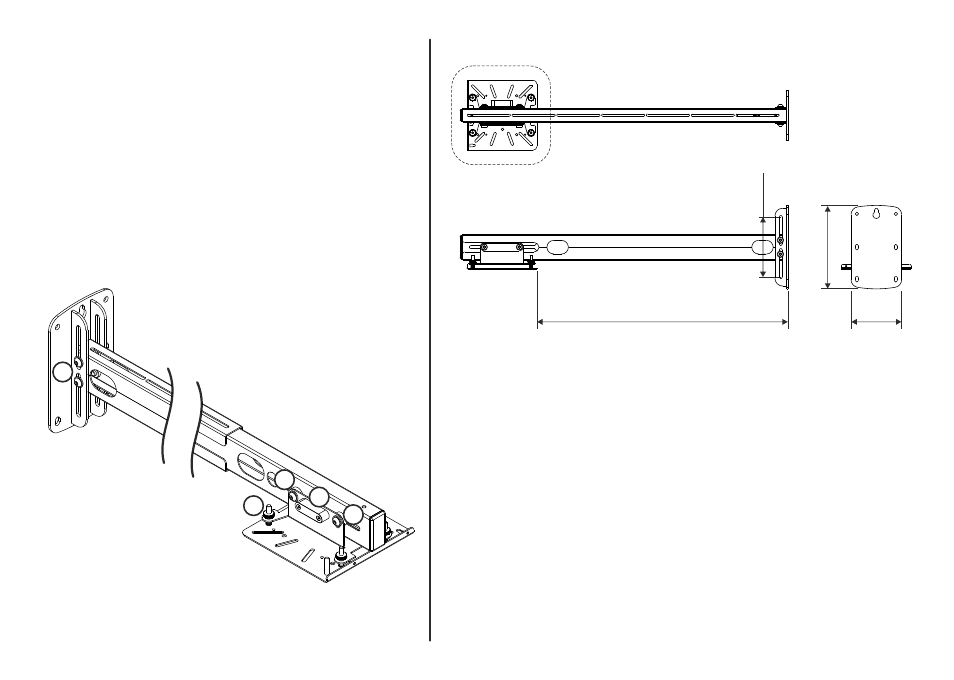
Fine Adjust Position
6
The following adjustments (labelled below) can be
made to fine tune position to correct any discrepancy
in the installation or mounted surface;
a
To fine tune the length and tilt of the mount, loosen
bolts, slide mount to required position and re-tighten
bolts.
b
To fine tune the level of the projector use the four
adjustment thumb wheels on the spring loaded cradle.
Do not fully unwind the thumb wheels.
c
To fine tune height position of the projector, loosen
the boom assembly screws and slide the projector to
required position. Then re-tighten all four screws.
d
The integrated level indicates that the mount arm
is at 0°.
This does not necessarily mean the projector is level
with the screen so other adjustments may need to be
made.
a
a
c
d
b
Specifications;
Throw distance
-
535mm to 1350mm
(Approx dependent on fixing positions)
Adjustment
-
100mm Fine length adjustment
+/- 5° Tilt Adjustment with integral level
4-point vernier adjustment tilt and yaw
100mm Height Adjustment at wall
Compatibility
-
Optoma
EW610ST, EX610ST, EX605ST, EW610ST, EW605ST, EX525ST
ZW210ST, ZX210ST, X305ST, W305ST, X306ST & W306ST
Hitachi
ED-D10N, ED-D11N, CP-D10
ED-A100*, ED-A101*, ED-A111*, CP-A100*
NEC
NP1XXX, NP2XXX, NP3XXX, NP4XXX,
UNIVERSAL
Up to 270mm x 270mm
*Screen size limited to 80" to 110"
Min 690mm / Max 1375mm
Compatibility Universal
Up to 270mm x 270mm
+/- 100mm
215mm
130mm