Maintenance service procedure – Desa AT Series User Manual
Page 6
103018-01G
6
For more information, visit www.desatech.com
For more information, visit www.desatech.com
MAINTENANCE
SERVICE PROCEDURE
Cleaning Fan
1.
Keep heater clean. Clean heater annually or as needed to re-
move dust and debris. If heater is dirty or dusty, clean heater
with a damp cloth.
2.
Inspect heater before each use. Check connections for leaks.
Apply mixture of liquid soap and water to connections. Bubbles
forming show a leak. Correct all leaks at once.
3.
Inspect hose/regulator assembly before each use. If hose is
highly worn or cut, replace.
4.
Have heater inspected yearly by a qualified service agency.
5.
Keep inside of heater free from combustible and foreign objects.
WARNING: Never service heater while it is plugged
in, connected to propane supply, operating, or hot.
Severe burns and electrical shock can occur.
MAINTENANCE
SERVICE PROCEDURE
CLEANING FAN
Clean fan every 500 hours of operation or as needed.
1.
Remove screws on side cover using 5/16" nut-driver.
2.
Remove side cover.
3.
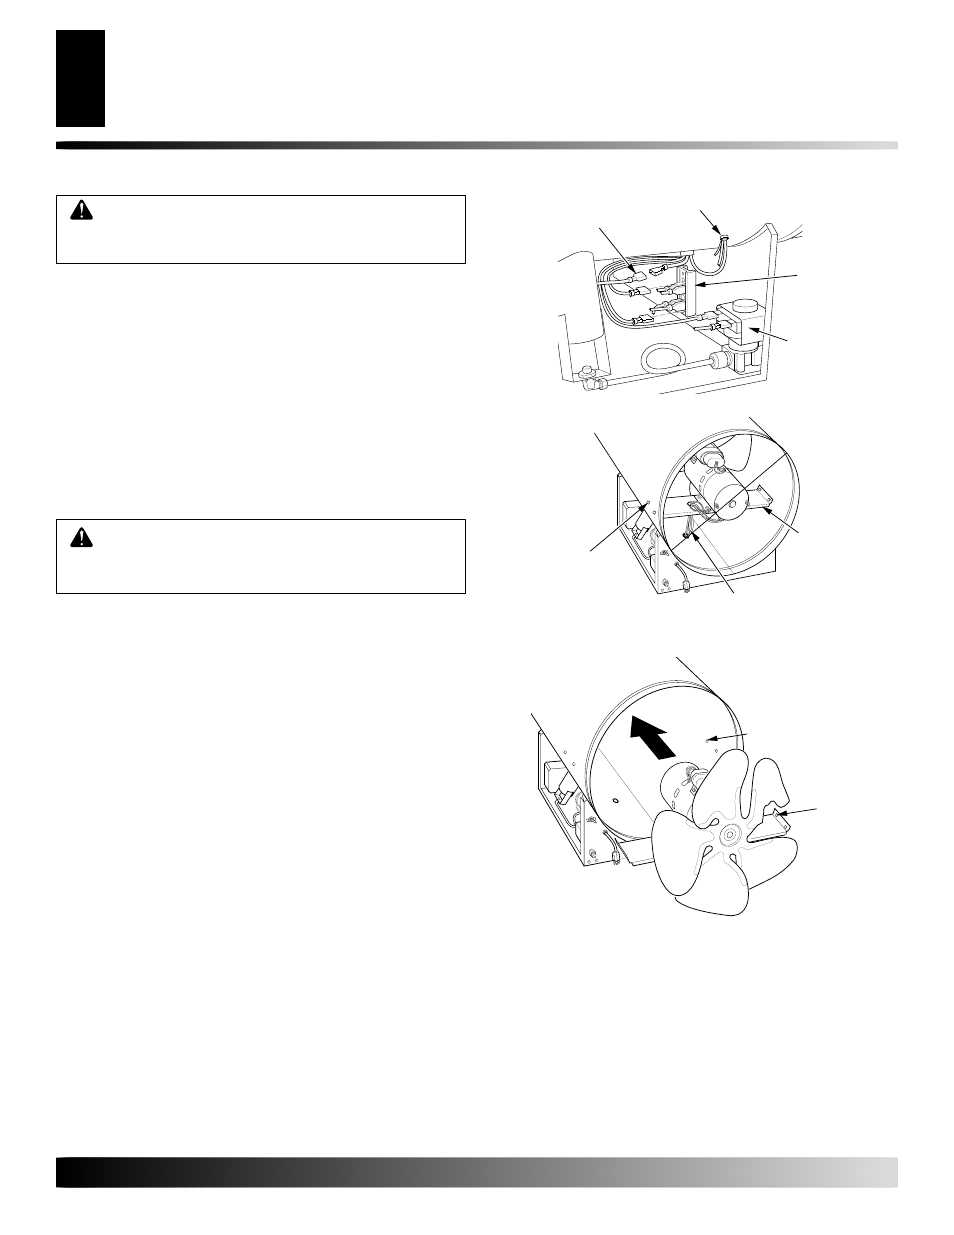
Detach the five motor wires from parts under heater shell. Be
sure to detach only wires coming from motor.
The five motor wires are:
• white wire—to terminal board
• black wire—to terminal board
• blue wire—to thermal switch wire
• orange wire—to solenoid valve
• green wire—to grounding screw on shell
4.
Remove fan guard from rear of heater.
5.
Reach into rear of heater shell. Carefully pull motor wires
through hole in bottom of shell.
Note:
Pull wires through hole
one at a time.
6.
Remove nuts and mounting bolts holding motor mount to shell.
Use 3/8" nut-driver and 7/16" wrench.
7.
Carefully pull motor and fan out of shell.
IMPORTANT:
Be
careful not to damage fan. Do not set motor and fan down with
the weight resting on fan. This could damage fan pitch.
8.
Turn motor and fan around. Place motor and fan into shell
backwards.
Note:
Motor will go into shell first (see Figure 8).
9.
Line up rear mounting holes in shell with first hole on each
side of motor mount (see Figure 8).
Note:
When holes are
lined up, fan should be outside of shell.
WARNING: Never service heater while it is plugged
in, connected to propane supply, operating, or hot.
Severe burns and electrical shock can occur.
Figure 7 - Location of Fan and Motor
Motor Wires
Mounting
Bolts
Motor Mount
Terminal
Board
Figure 6 - Location of Motor Wires
Grounding Screw
Thermal
Switch Wire
Solenoid
Valve
Figure 8 - Fan and Motor Turned Around
Rear
Mounting
Hole
First
Hole