Propane/lp supply, Ventilation, Installation – Desa AT Series User Manual
Page 4
103018-01G
4
For more information, visit www.desatech.com
For more information, visit www.desatech.com
PROPANE/LP SUPPLY
VENTILATION
INSTALLATION
PROPANE/LP SUPPLY
Propane/LP gas and propane/LP tank(s) are to be furnished by the user.
Use this heater only with a propane/LP vapor withdrawal supply
system. See Chapter 5 of the Standard for Storage and Handling of
Liquefied Petroleum Gas, ANSI/NFPA 58 and the Propane Instal-
lation Code CAN/CGA B149.2. Your local library or fire depart-
ment will have these booklets.
The amount of propane/LP gas ready for use from propane/LP tanks
varies. Two factors decide this amount:
1.
The amount of propane/LP gas in the tank(s)
2.
The temperature of tank(s)
The chart below shows the number of 100-pound tanks needed to
run this heater.
Do not operate this product with any tank smaller than 100 pounds.
Temperature (°F)
Number
At Tank
of tanks
40°
3
32°
(Use
20°
larger
0°
tank
-10°
below
-20°
40°F)
Less gas is vaporized at lower temperatures. You may need a larger
tank in colder weather. Your local propane/LP gas dealer will help
you select the proper supply system. The minimum surrounding air
temperature rating for each heater is -20°F.
VENTILATION
Provide at least three square feet of fresh, outside air for each
100,000 Btu/Hr of rating. This heater requires a fresh air opening of
at least 11.25 square feet. Provide extra fresh air if more heaters are
being used.
WARNING: Follow the minimum fresh, outside air
ventilation requirements. If proper fresh, outside air
ventilation is not provided, carbon monoxide poison-
ing can occur. Provide proper fresh, outside air ven-
tilation before running heater.
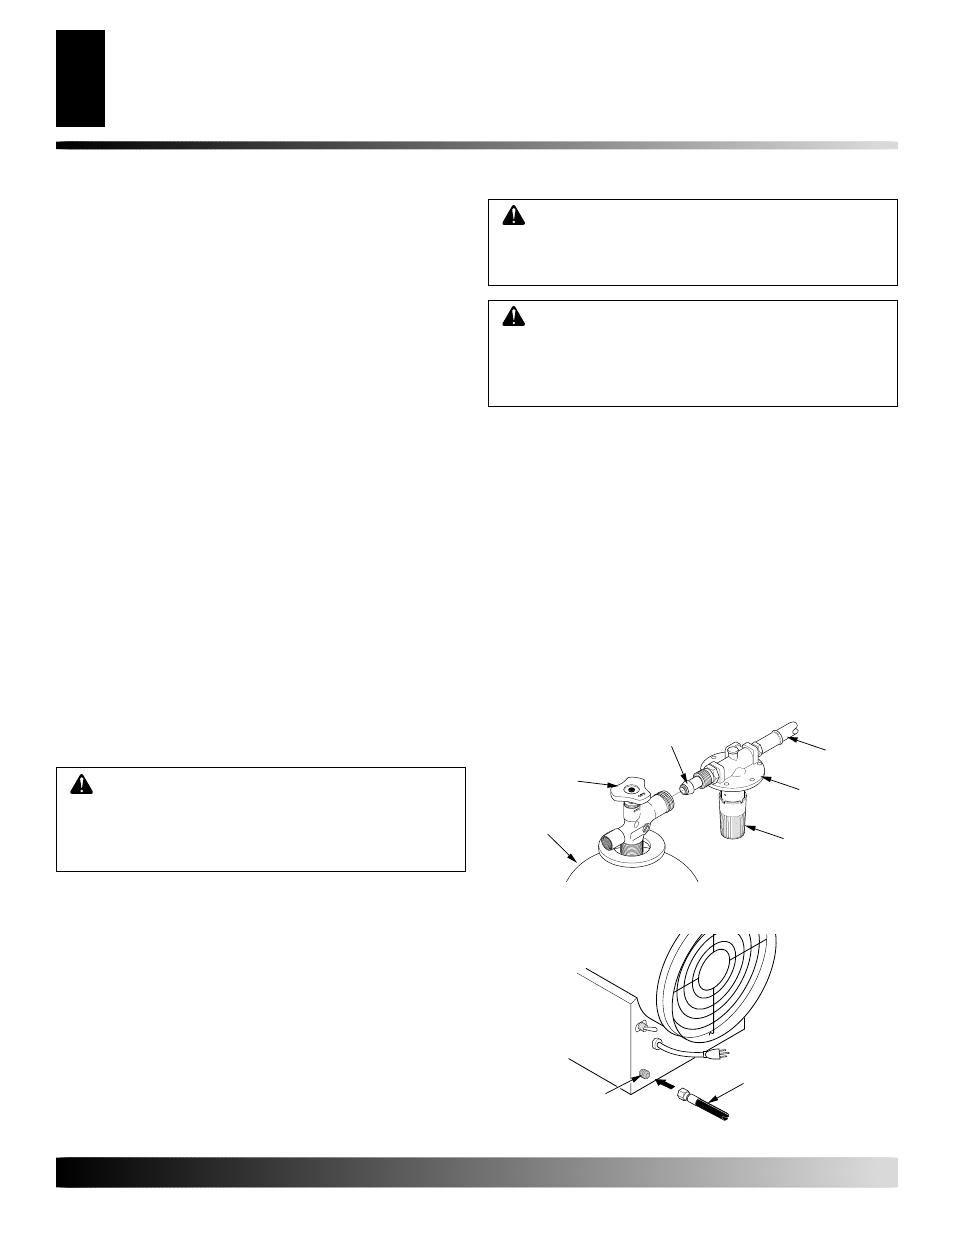
INSTALLATION
1.
Provide propane/LP supply system (see Propane/LP Supply).
2.
Connect POL fitting on hose/regulator assembly to propane/LP
tank(s). Turn POL fitting counterclockwise into threads on tank.
Tighten firmly using a wrench.
IMPORTANT:
Tighten regula-
tor with black adjustment knob pointing down. Pointing adjust-
ment knob down protects regulator from weather damage.
3.
Connect hose to inlet connector. Tighten firmly using a wrench.
IMPORTANT:
Extra hose or piping may be used if needed.
Install extra hose or piping between hose/regulator assembly
and propane/LP tank. You must use the regulator supplied with
the heater.
4.
Open propane/LP supply valve on propane/LP tank(s) slowly.
Note:
If not opened slowly, excess-flow check valve on pro-
pane/LP tank will stop gas flow. If this happens, you may hear a
click inside the regulator assembly. To reset the excess flow check
valve, close propane/LP supply valve and open again slowly.
WARNING: Review and understand the warnings
in the
Safety Information section, page 2. They are
needed to safely operate this heater. Follow all local
codes when using this heater.
WARNING: Test all gas piping and connections
for leaks after installing or servicing. Never use an
open flame to check for a leak. Apply a mixture of
liquid soap and water to all joints. Bubbles forming
show a leak. Correct all leaks at once.
Propane/LP
Tank
Supply Valve
Hose
POL Fitting
Regulator
Adjustment Knob
(pointing down)
Figure 3 - Regulator With Adjustment Knob Pointing Down
Figure 4 - Hose and Inlet Connector
Hose
Inlet Connector