Maintenance, Accessories – Ryobi HP37 User Manual
Page 12
1 — English
BATTERy PACk REMOVAL AND PREPARATION
FOR RECyCLING
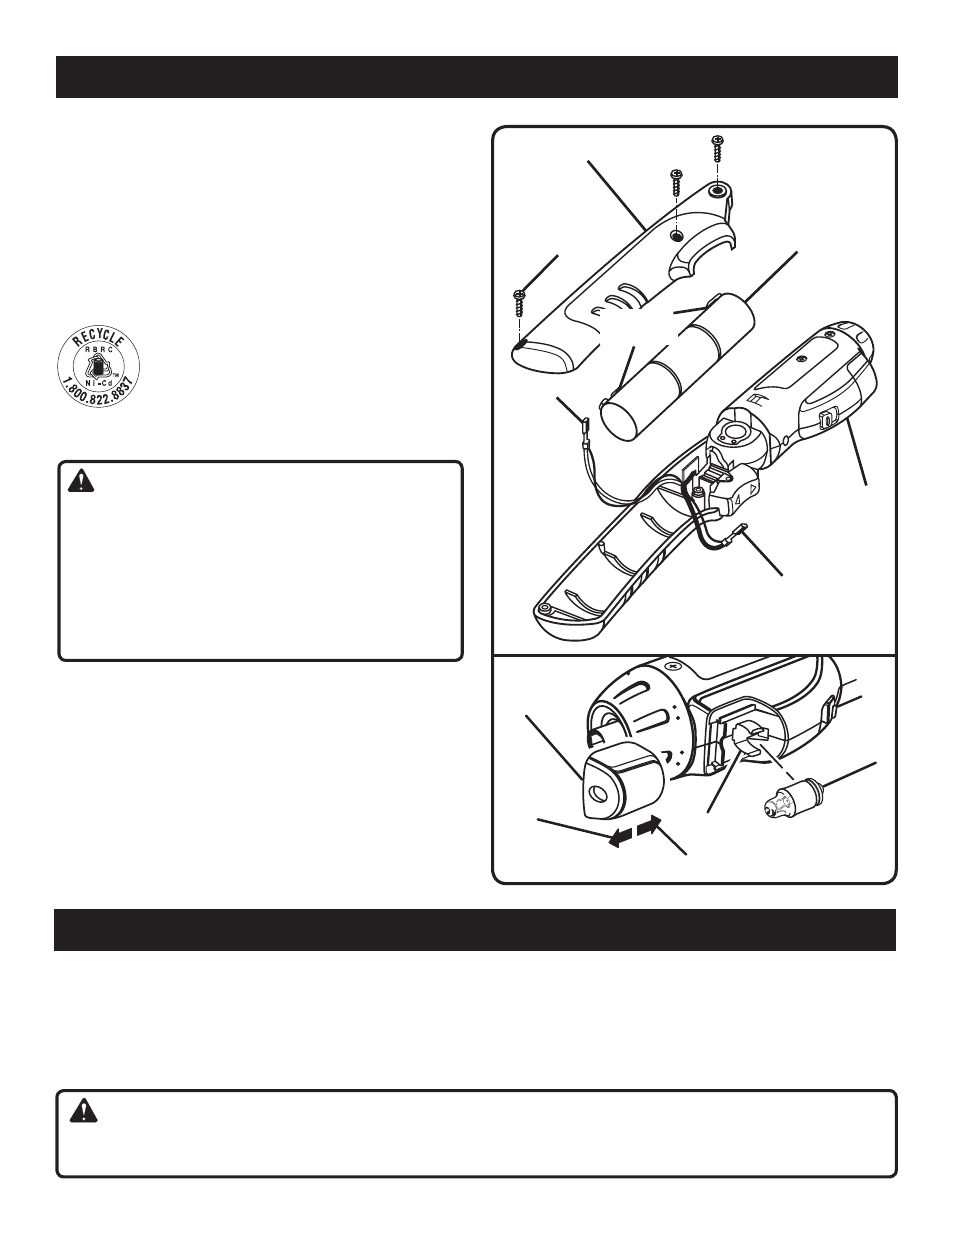
See Figure 11.
TO REMOVE:
Remove the three screws securing motor housing cover
then remove cover.
Lift batteries from motor housing enough to expose leads
and battery terminals. Disconnect leads from battery
terminals.
NOTE: Be careful not to break battery leads
when disconnecting them.
To preserve natural resources, please recycle or
dispose of batteries properly.
This product uses nickel-cadmium batteries.
Local, state or federal laws may prohibit disposal
of nickel-cadmium batteries in ordinary trash.
Consult your local waste authority for information regarding
available recycling and/or disposal options.
WARNING:
Upon removal, cover the battery pack’s terminals with
heavy-duty adhesive tape. Do not attempt to destroy
or disassemble battery pack or remove any of its com-
ponents. Nickel-cadmium batteries must be recycled or
disposed of properly. Also, never touch both terminals
with metal objects and/or body parts as short circuit may
result. Keep away from children. Failure to comply with
these warnings could result in fire and/or serious injury.
MAINTENANCE
Fig. 11
BATTERY
LEAD
BATTERIES
BATTERY
LEAD
MOTOR
HOUSING
COVER
SCREW(S)
BATTERY
TERMINALS
WARNING:
Do not use any attachments or accessories not recommended by the manufacturer of this tool. The use of attachments
or accessories not recommended can result in serious personal injury.
ACCESSORIES
No. Phillips / 8-10 Slotted, Ea.
No. 3 Phillips / 6-8 Slotted, Ea.
5-Pc. Hex Shank Drill Bit Set
6-Pc. Extra Length Magnite Power Bit Set
Look for these accessories where you purchased this product:
7-Pc. Screwdriver Bit Set and Case
13-Pc. Power Screwdriver/Nutdriver Set and Case
17-Pc. Power Screwdriver/Nutdriver Set and Case
30-Pc. Power Screwdriver/Nutdriver Set and Case
1
22
19
16
BULB REPLACEMENT
See Figure 12.
When purchasing replacement bulb, request recommended
part number 780701.
Turn the light
OFF.
To remove the bulb cover, press and slide it forward.
Carefully lift out the bulb.
Insert the new bulb between the two tabs and push it
securely into place.
Slide the bulb cover back into position.
Fig. 1
BULB
COVER
TABS
BULB
TO INSTALL
TO
REMOVE