Pasta machine assembly, Additional accessories available – Weston Roma Traditional Style Pasta Machine User Manual
Page 4
-4-
-17-
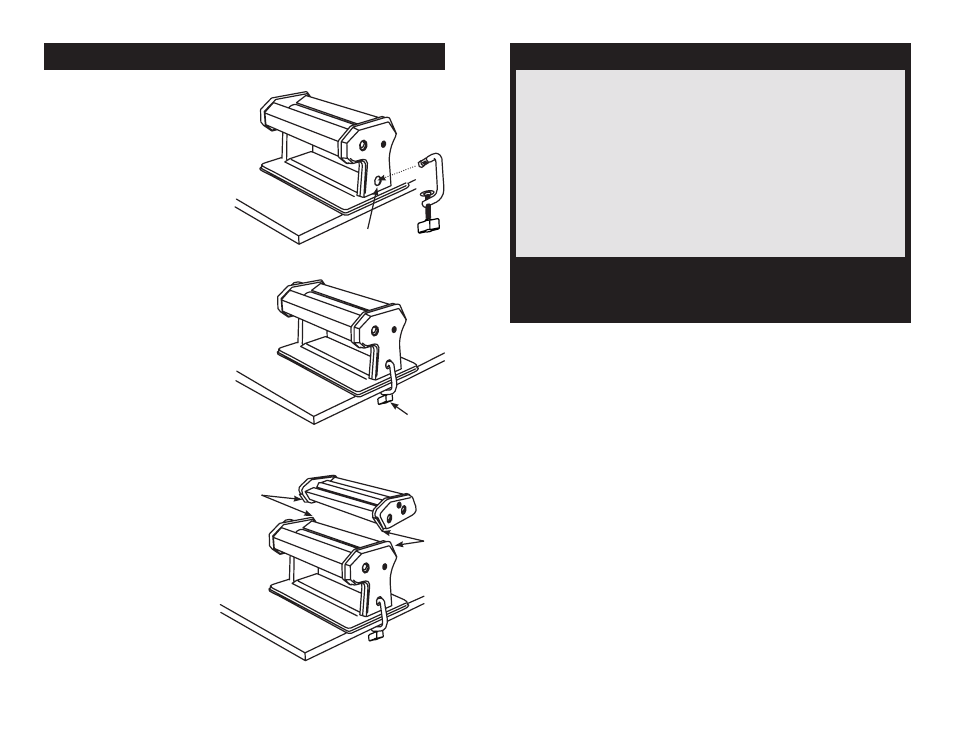
PASTA MACHINE ASSEMBLY
1. Position the
Pasta Machine Base
on a table or countertop, near the
edge of the work surface.
2. Silde the
C-Clamp into the
C-Clamp Hole in the side of the
Pasta Machine Base. The threaded
screw portion of the C-Clamp will be
underneath the table or countertop
(Figure A).
3. Tighten the
Thumbscrew on
the
C-Clamp to secure the Pasta
Machine to the table or countertop
(Figure B).
4. Align the
Clips of the Cutter
Attachment with the Clips on the
Pasta Machine. Slide the Cutter
Attachment onto the Pasta Machine
until fully seated (Figure C).
Figure A
Figure B
Base
C-Clamp
C-Clamp Port
C-Clamp
Thumbscrew
Figure C
Cutter Attachment
Clips
Clips
PART
PART
DESCRIPTION
NUMBER
Square Ravioli Attachment (50mm)
01-0209
Angel Hair Attachment (1mm)
01-0202
Spaghetti Noodle Attachment (2mm)
01-0203
Linguini Attachment (3mm)
01-0204
Lasagna Attachment (50mm wide)
01-0206
Lasagnette Attachment (12mm wide)
01-0205
Half Moon Ravioli Attachment (50mm)
01-0208
Bamboo Pasta Drying Rack
53-0201
ADDITIONAL ACCESSORIES AVAILABLE
These products and many more products can be ordered by visiting
W e s t o n P r o d u c t s . c o m or by calling
Weston Products LLC Toll Free at 1-800-814-4895
Monday thru Friday 8:00am-5:00pm EST. Outside the U.S. call 440-638-3131
E-Mail: [email protected]