Cooking instructions – Weston Jerky Guns User Manual
Page 6
COOKING INSTRUCTIONS
OVEN METHOD JERKY
1. Place the jerky filled
Drying Racks and Baking Sheet in a 175°F (79°C) pre-
heated oven for approximately 1 hour. Meat must reach an internal temperature of
160°F (71°C).
2. Remove the
Drying Racks from the oven and turn the strips over.
3. Return the
Drying Racks to the oven and bake for an additional 30 minutes. Check
for desired dryness. If the jerky is not dry enough, replace the
Drying Racks of jerky into
the oven and bake at 30 minute intervals, turning the jerky each time, until the desired
dryness is achieved.
4. Allow the jerky to cool, then follow “Storage Instructions,” as outlined in this manual.
OVEN METHOD SNACK STICKS
1. Place the snack stick filled
Drying Racks and Baking Sheet in a 150°F (66°C)pre-
heated oven for approximately 2 hours.
2. Then increase the oven temperature to 180-200°F (82-93°C) and bake until the
internal temperature of the snack sticks reaches 156°F (69°C).
3. Remove the snack sticks from the oven and shower with cold water until the internal
temperature drops to 100°F (38°C). NOTE: If you desire a dryer, more wrinkled look
to your snack sticks, do not shower.
4. Allow the snack sticks to cool, then follow “Storage of Jerky or Snack Sticks”
instructions, as outlined in this manual.
SMOKER OR DEHYDRATOR METHOD
If using a smoker or a dehydrator, follow the instructions included with that appliance.
IMPORTANT: Before you place the meat in a dehydrator, it is highly recommended to
heat the meat to 160°F (71°C) BEFORE the dehydrating process. This step assures
that any bacteria present will be destroyed by wet heat. After heating to 160°F (71°C),
maintaining a constant dehydrator temperature of 130-140°F (55-60°C) during the drying
process is important because:
1.) the process must be fast enough to dry food before it spoils; and
2.) it must remove enough water that microorganisms are unable to grow.
8. Place a
Drying Rack onto a Baking
Sheet
(Drying Racks and Baking Tray are only included in the
Original Jerky Kit, they are NOT included with the Original Jerky
Gun or the Original Jerky Gun Jr.).
NOTE: Using a Drying Rack will decrease
the drying time of the jerky/snack sticks, by
allowing the hot air from your oven to circulate
freely through the racks.
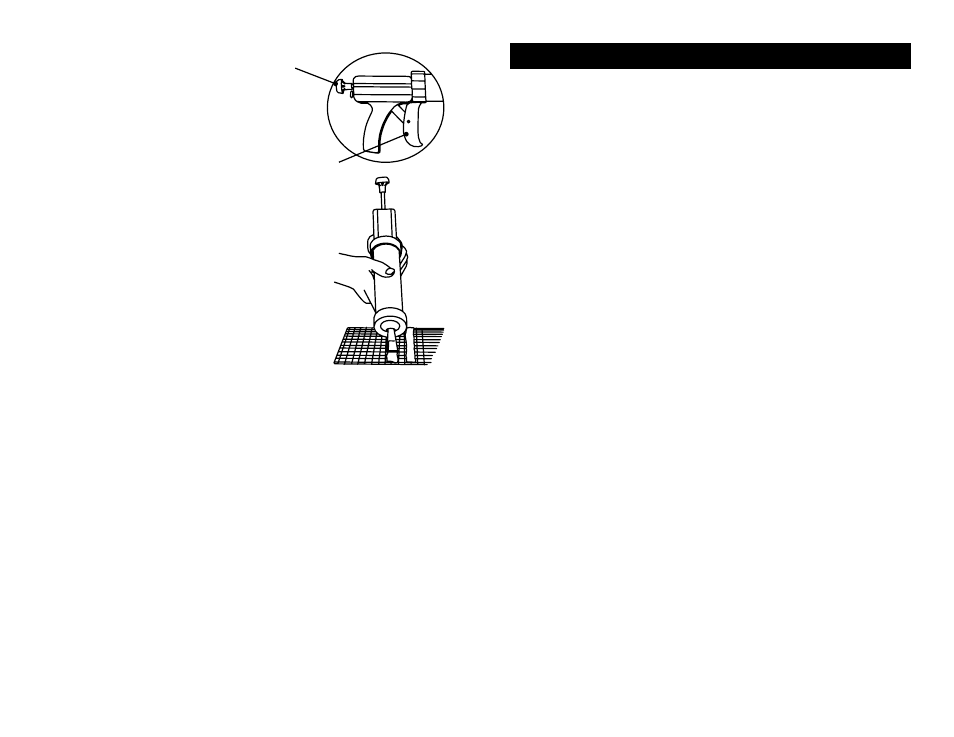
9. With the
Jerky/Snack Stick* Attachment
close to the far end of the
Drying Rack,
squeeze the
Trigger to start the Plunger
Assembly to push the meat forward and out of
the
Jerky Tube. Pull the Trigger repeatedly,
until the jerky begins to extrude
(figure 6)
.
*Snack Sticks can be extruded into casings.
Stuff the casing to a length of about 24” (61 cm),
then tie knots in the open ends of the casings.
Pinch the casing in the middle and twist to form
two links about 12” (30.5 cm) each.
10. While squeezing the
Trigger, slowly pull
the
Jerky Gun across the full length of the
Drying Rack to form long strips of meat
(figure
7)
.
11. Continue extruding strips of jerky/snack
sticks, until the
Drying Rack is filled or the
Jerky Tube is empty. Be sure to leave about
1/2” (1.3 cm) between the strips for even and
consistent drying.
figure 7
figure 6
Plunger
Knob
Trigger
-6-
-7-