Assembly instructions as a grinder attachment – Weston 44 lb Meat Mixer User Manual
Page 6
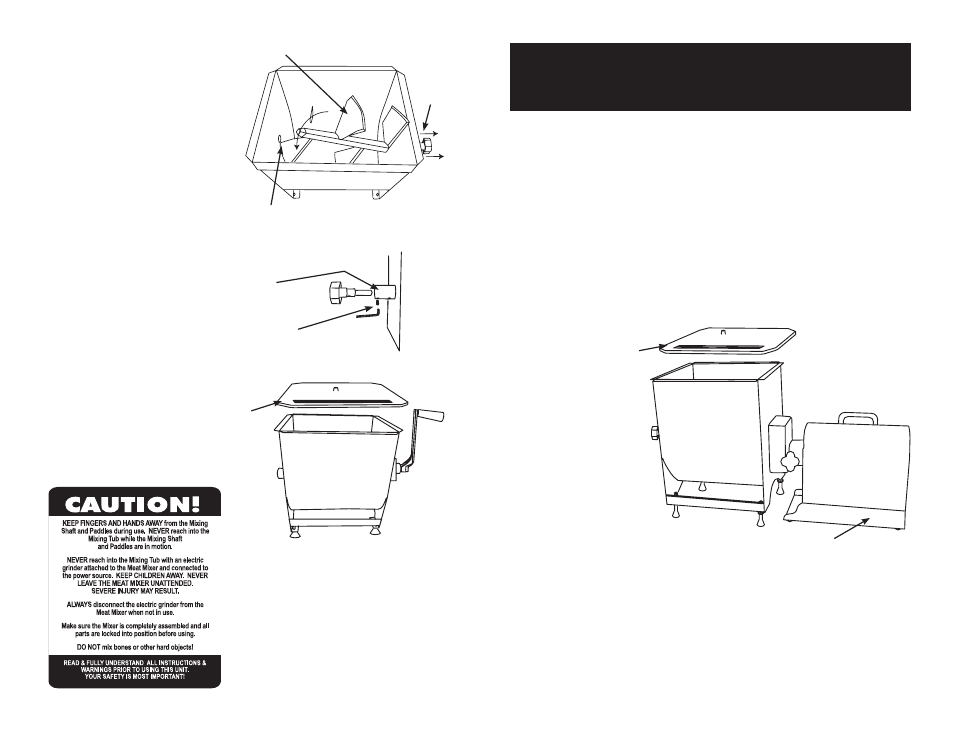
ASSEMBLY INSTRUCTIONS
AS A GRINDER ATTACHMENT*
*Grinder (sold separately) with 1/2-hp motor or higher recommended
Perform steps 1 through 10 in the “Assembly Instructions for Manual Operation”.
11. Make sure the grinder is turned “off” and disconnected from the power source.
12. Align the output shaft on the grinder with the
Drive Shaft on the Meat Mixer. Adjust
the
Feet as necessary. Be sure to retighten the Locking Nuts.
13. Connect the grinder to the
Meat Mixer. You may have to rotate the Drive Shaft to
better align the splines with the grooves in the grinder output shaft. The
Drive Shaft can
be turned with the
Pivot Knob.
14. Make sure the grinder is fully seated to the
Meat Mixer.
15. Tighten the
Locking Knob on the grinder head to secure the two machines together.
16. Install the
Clear Lid (figure 7). DO NOT use the Meat Mixer without the Clear Lid
in place. Severe injury could result!
figure 7
Clear
Lid
Electric
Grinder
figure 4
Pivot
Knob
Mixing Shaft
Pivot Pin
(Inside)
Pivot
Knob
Post
figure 5
Set
Screws
figure 6
Clear
Lid
Brass Pivot Pin to seat in the Bushing
(figure 4).
10. Tighten the second
Set Screw under
the
Pivot Knob Post until it stops (make
sure the
Set Screw fits in the notch on the
Pivot Knob shaft). Loosen the Set Screw
½ turn to allow the
Pivot Knob to rotate
freely (figure 5).
11. Install the
Handle onto the Drive
Shaft.
12. Install the
Clear Lid (figure 6). DO
NOT use the
Meat Mixer without the Clear
Lid in place. Severe injury could result!
-6-
-7-