TracRac IM T-Rac Pro Tacoma User Manual
Page 3
Toyota Tacoma T-Rac Pro
INSTRUCTION MANUAL
6 Toyota Tacoma T-Rac Pro
INSTRUCTION MANUAL
TracRac Inc. 994 Jefferson Street, Fall River, MA 02721-4893 • 800-501-1587
TracRac Inc. 994 Jefferson Street, Fall River, MA 02721-4893 • 800-501-1587
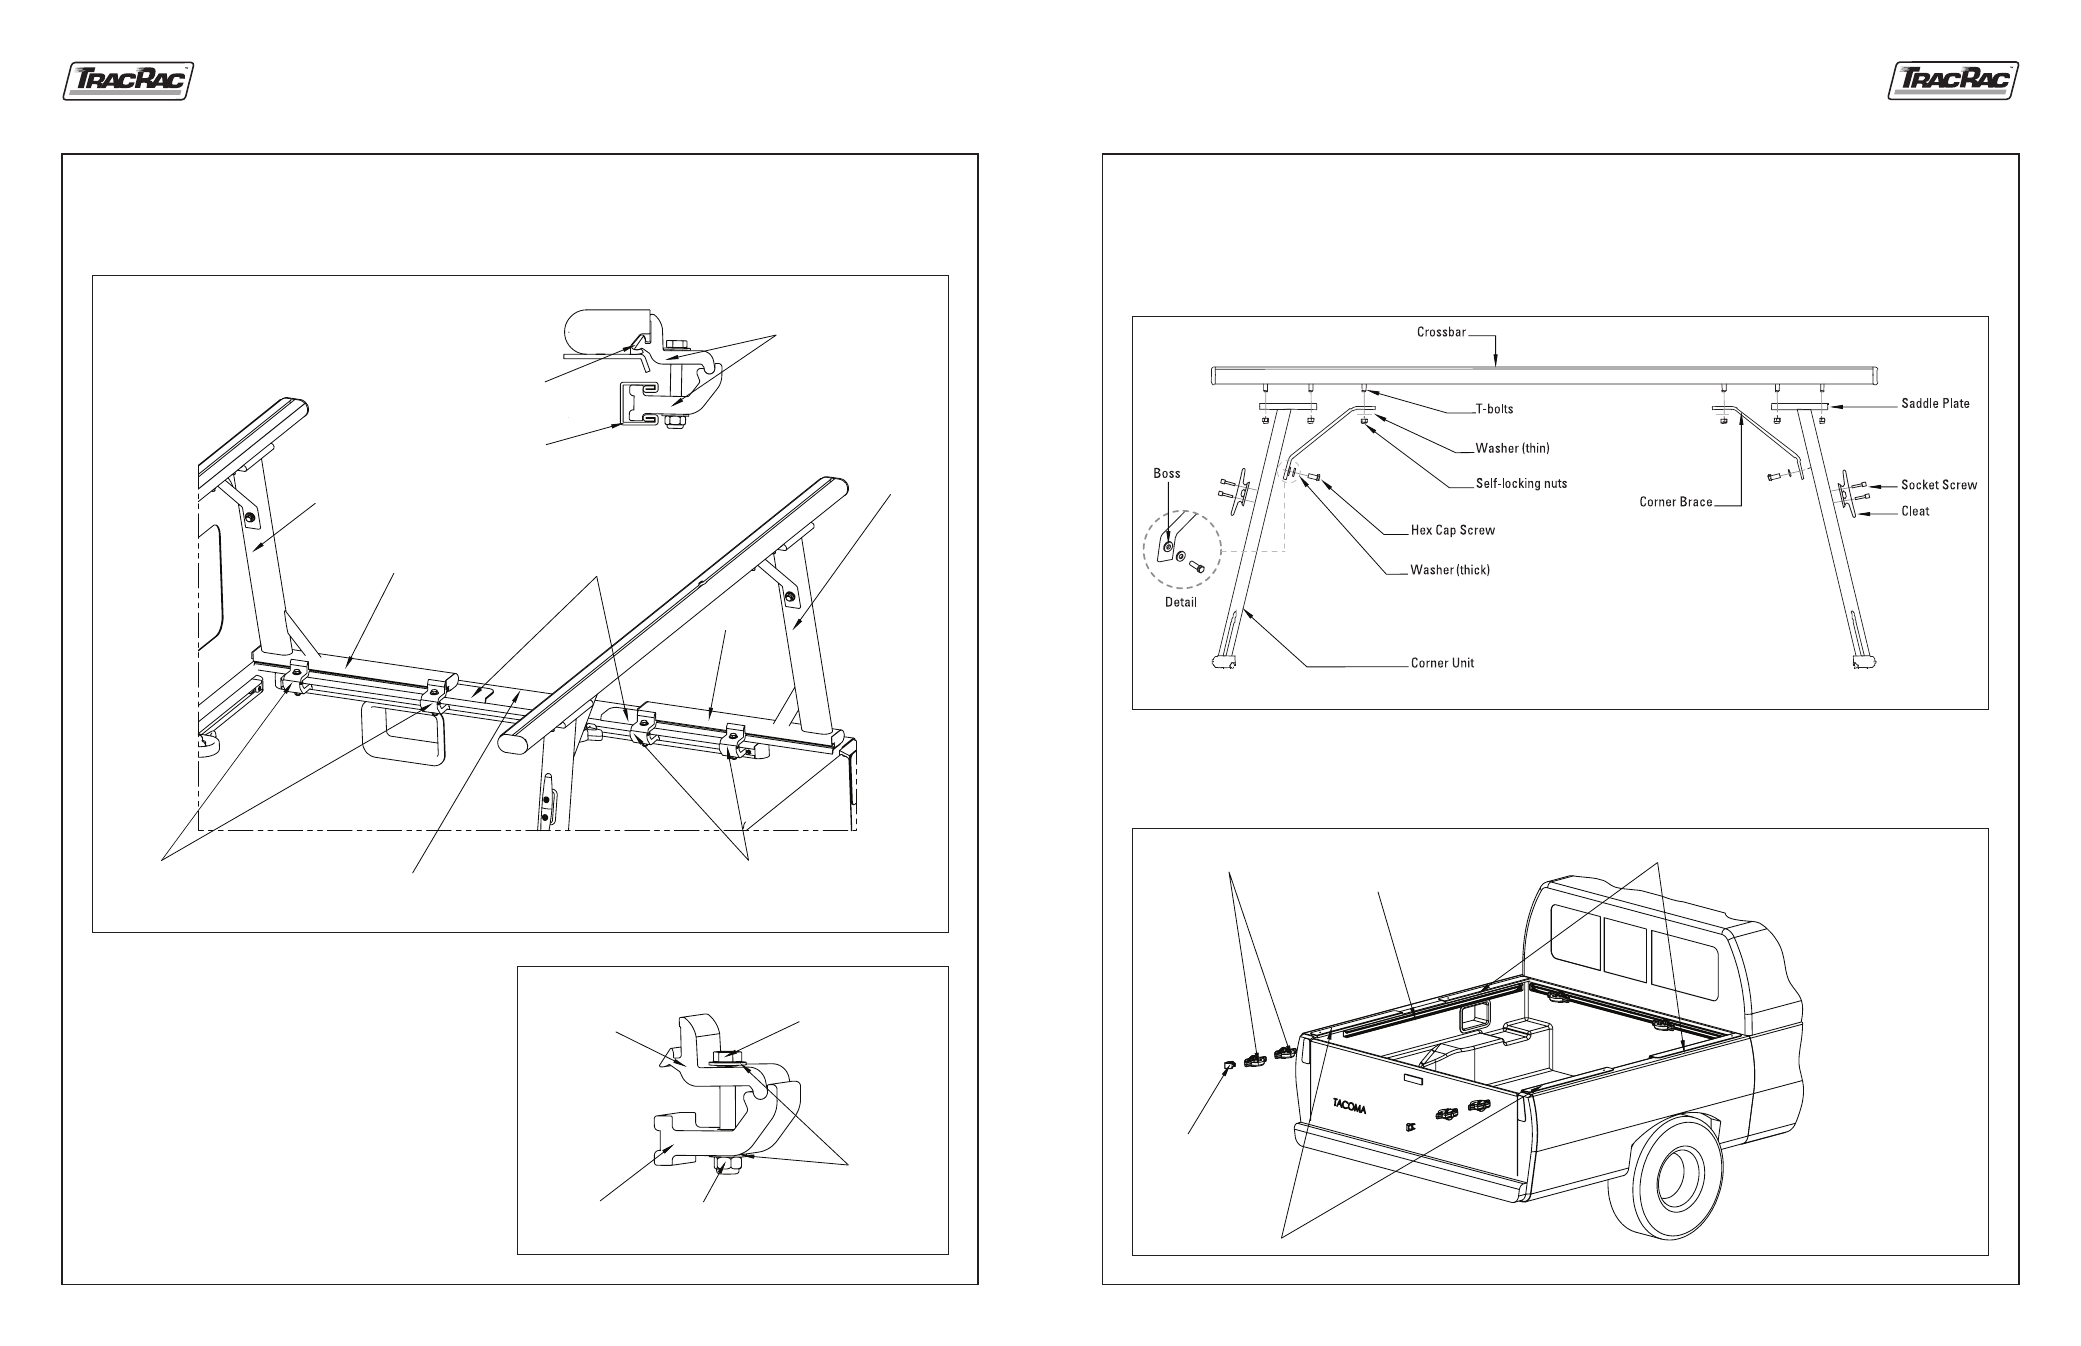
3. Attach each crossbar onto a left and right corner unit by inserting the 2 T-bolts through the saddle plate holes,
and attaching locknuts. Next fasten the corner brace to the crossbar with the remaining T-bolts and washers, leaving
the 3/8” self-locking nuts loose for adjustments later. Attach the bottom of the corner brace (with boss) using a
3/8-16 x 1-1/4” hex head cap screw with washer (Figure 2) to the corner unit. Fasten cleats to uprights using two
1/4 x 1-3/4“ socket screws, as shown below.
4. Remove end caps and Tacoma Tiedowns from Tacoma Side Rails. Place the mount plates on the truck side rails.
Position the front mount plates as far forward as possible and the rear plates as far back as you can, without going
beyond the tailgate. (See Figure 3).
Figure 2.
Crossbar Assembly, Rearview
Figure 3. Rack Configuration
Tacoma
Tiedowns
Tacoma
Side Rail
Front Mount Plates
/FX-14500/
Rail Endcap
Rear Mount Plates
/FX-14500/
5. Now, place the rack assemblies on top of the mounting plates. Slide the bottom portion of the clamp assembly into the Tacoma
Side Rail. (Note: Replace Tacoma Tiedowns where desired.) Spread them as far apart as possible. Next slide the top portion of the
clamp assembly into the T-Rac Base Rail and into each bottom clamp. (See Figure 5 and Figure 6). Replace end caps, if desired.
Figure 6.
01-11046
Clamp
Assembly
Tacoma
Side Rail
Base Rail
Channel
Front Upright
Front T-Rac
Base Rail
Mount Plates
Rear
Upright
Rear
T-Rac
Base
Rail
Base Rail
Clamps
Tacoma Truck
Side Wall
Base Rail
Clamps
Figure 5.
Figure 7. Clamp Mounting Detail
HD-80112-2
Hex Bolt 5/16-18 x 2.5
HD-80139
Lock Nut 5/16-18
FX-11047
Bottom
Clamp
FX-11046
Top Clamp
HD-80115
Flat Washer
5/16
6. Loosely fasten top and bottom clamp using hex
bolt, flat washers and lock nut. (See Figure 7).