Roof installation a: normal installation, Van roof – rear view – TracRac IM TracVan Single User Manual
Page 5
TracRac
INSTRUCTION MANUAL
5
TracRac Inc. 994 Jefferson Street, Fall River, MA 02721-4893 • 508-677-4130
Roof Installation A:
Normal Installation
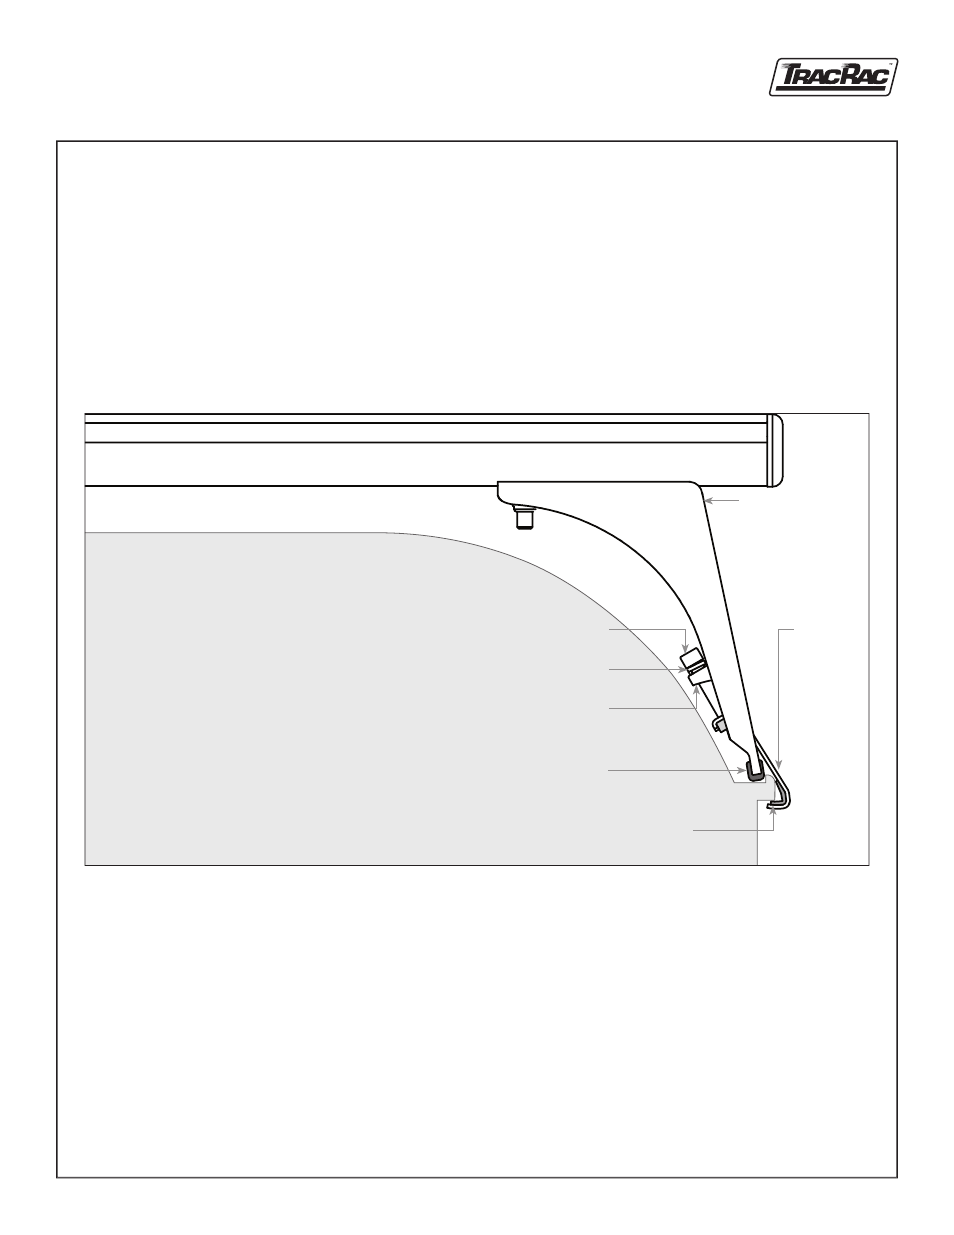
9. The lower edge of each Corner Bracket fits snugly into
the top corner of the van’s rain gutter. Place the J-Hooks
with Neoprene Strips around the outside edge of rain
gutter (see Fig 3A).
CAUTION: Re-torque all fasteners after first 100 miles to
adjust for settling. Recheck all torques every 3000 miles. Pro-
longed driving, vibrations may cause the fasteners to loosen.
• Roof Installation A: Normal Installation
• Roof Installation B: Gutter Span Installation
10. Center the Crossbars by measuring from the end of each
Corner Bracket, to the Crossbar ends, left and right.
11. Tighten the T-Bolts on the underside of the Crossbar to
240 in/lbs. (20 ft/lbs.) to secure the Corner Brackets to
the Crossbar.
12. Now tighten all Socket Head Cap Screws to 120 in/lbs.
(10 ft/lbs.) with the supplied Allen Wrench.
13. Reposition the Crossbar Tiedowns where desired. Now
you’re ready to go!
Capacity – The TracVan System is rated for a capacity of
500 lbs., evenly distributed over all racks, assuming normal
driving conditions and loading.
Do not exceed the racks’ rated capacity, as you could dam-
age the van’s rain gutter.
Secure loads carefully and exercise caution at all times.
• We recommend using transverse ratchet straps to securely
tie down cargo.
• Run additional ratchet straps around the front & rear of
loads, attaching them to the Crossbars to prevent any load
shifting during acceleration and stopping.
Figure 3A
VAN ROOF – REAR VIEW
Corner bracket tab
Corner bracket
Rubber strip
Socket head cap screw
Lock washer
Neoprene strip
Crossbar
J-Hook clip