StorCase Technology DX150-KIT User Manual
Page 2
2
DX150-KIT Installation
StorCase Technology Inc.
DX150-KIT User's Guide - Rev. B00
0382
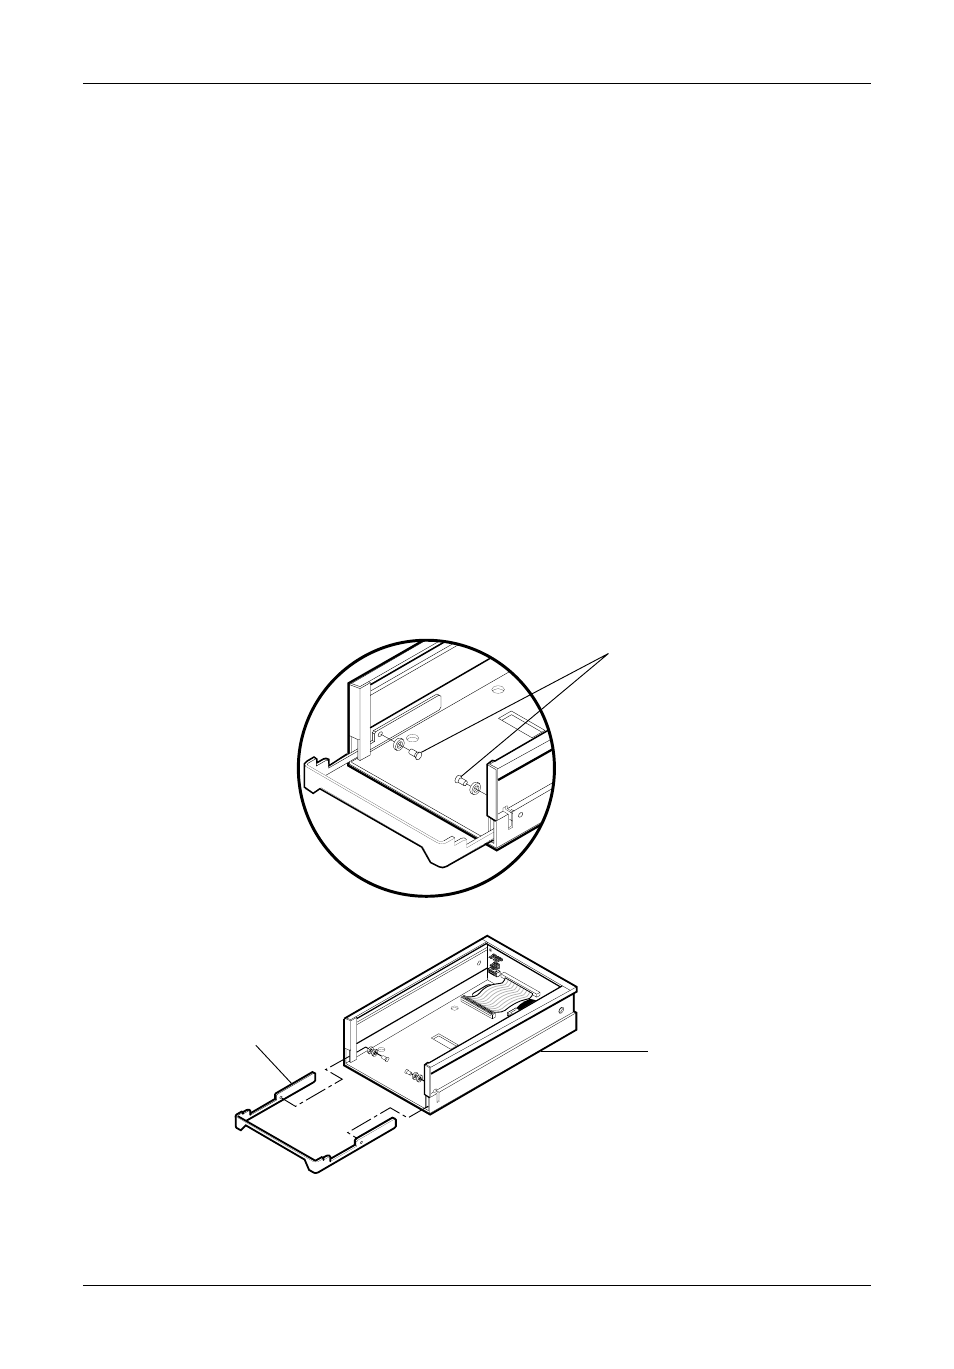
Carrier
(Not Included)
Low Profile
Handle
Remove Existing
Open Front Carrier Handle
With the handle fully
extended, remove the two
retaining screws.
Figure 2: Replacing the Handle
1.
Unpack the DX150-KIT and compare it with the Illustrated Parts Breakdown shown in
Figure 1 for an overview of the entire assembly to verify that the kit is complete. A
#2 Phillips screwdriver is required to complete the installation.
2.
If installing the DX150-KIT into a carrier unit that already has an installed drive,
remove the power, I/O and ID select cables from the drive. Remove the drive from
the carrier.
3.
Place the Data Express carrier unit on a soft, clean surface to protect the finish.
Choose a suitable area that allows ample working space around the unit.
4.
Remove the handle and replace it with the new low-profile handle included in the kit,
as shown in Figure 2.
Fully extend the existing handle and carefully remove the two (2) #6-32 x .230"
retaining screws with a Phillips screwdriver. Remove and replace the handle with
the new low profile handle (new handle uses two filament washers per screw).