Installing the receiving frame – StorCase Technology DE300i-SWC160 User Manual
Page 16
DE300i-SWC160 User's Guide - Rev. B00
StorCase Technology, Inc.
Installation
9
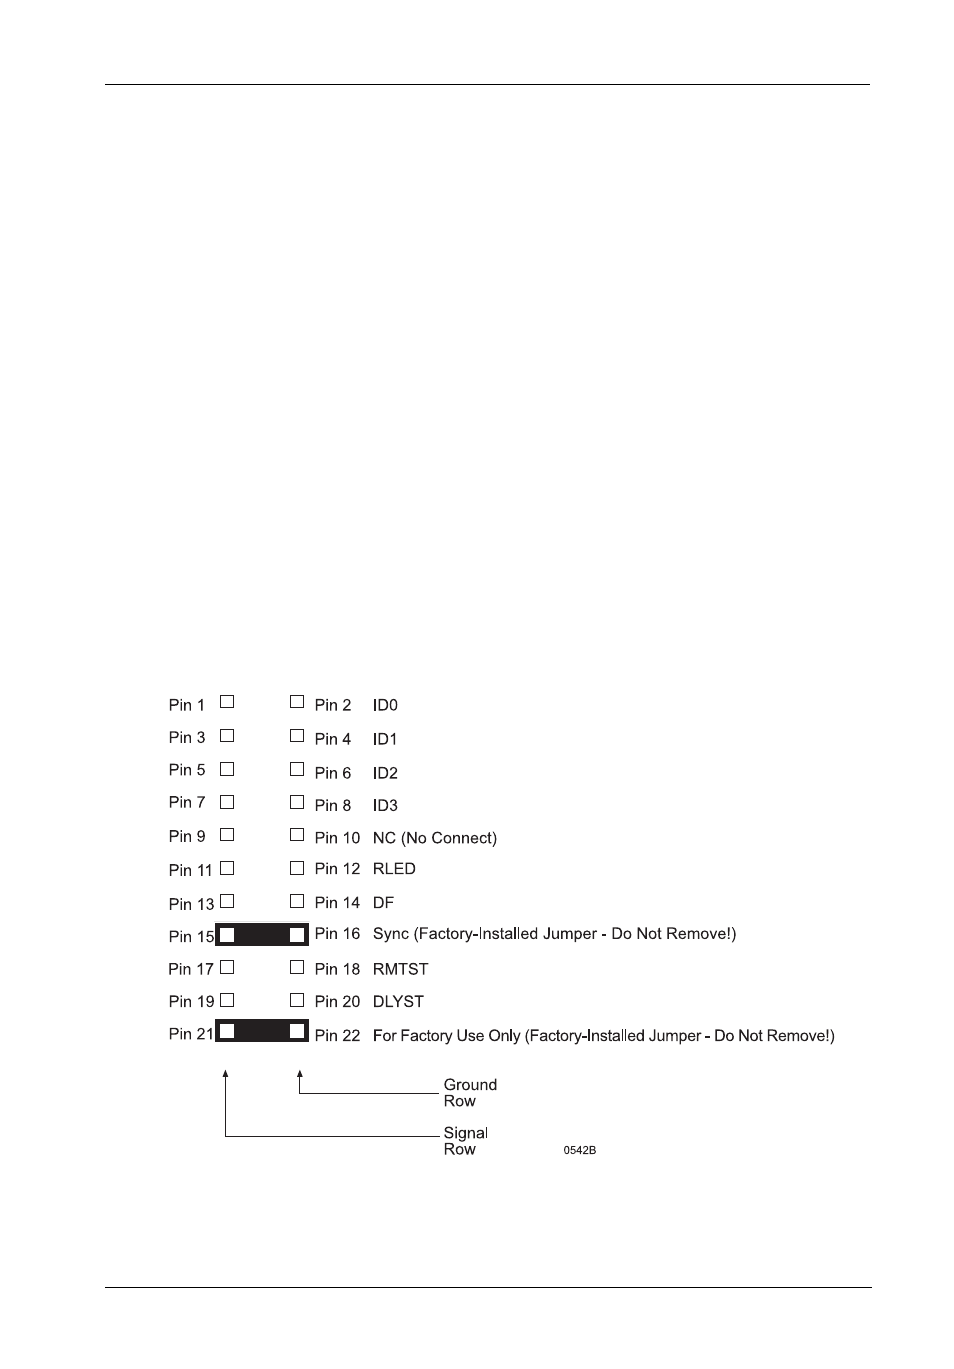
Figure 7: Receiving Frame Motherboard J3 Option Pin Connector
Installing the Receiving Frame
NOTES: DE300i-SWC160 requires Ultra160 chassis and cabling.
DE300i-SWC160 supports implementations with a maximum of 13 devices
(with available 13-device internal cable ). Contact StorCase for further
information.
The drive should be installed into the carrier before installing the receiving frame into the
mounting bay of a computer or expansion chassis.
NOTE:
Use a #2 Phillips screwdriver during this procedure.
1.
Turn OFF power to the computer.
2.
Open the computer system according to the manufacturers instructions. If
necessary, temporarily remove any expansion boards that may make installation
difficult.
3.
To select the DE300i-SWC160 unit ID remotely through the computer system or
external expansion chassis, the appropriate cable from the system must be
connected to the option pins (Pins 1-8 on connectors J3A, J3B, J3C) on the rear
of the receiving frame as shown in Figure 7.