Starrett 5004 Depth Gage User Manual
Page 2
2
3
Operating Instructions
On/Off
A quick press of either the MODE or SET button will active the display. To turn the
display off, press and hold the SET button for 2 seconds.
Mode Button
This button toggles the display through the selection of a variety of functions.
SET Mode
While in this mode a quick press of the SET button will zero the display or set it to the
datum value established in the preset mode.
REF Mode
While in this mode a quick press
of the SET button will toggle the
display between absolute (ABS)
and relative (REL).
A quick press of the MODE
button will exit this mode and
display either ABS or REL on
the bottom right corner of the
LCD depending on which one
was chosen.
UNIT Mode
The gage can be changed from inch mode to millimeter mode, or the reverse, with one
quick push of the SET button.
PRE Mode
A preset number can be entered into the display by first pressing the SET button.
A negative (-) sign will flash to the left of the digits. To select the negative sign press
the SET Button.
If a positive value is desired press the MODE button and the negative sign will
disappear (no sign signifies a positive value) and the left-most digit will begin to flash.
To increment the number press the SET button until the desired number is achieved.
Then, use the MODE button to move the flashing character to the next digit to the
right. Continue this procedure until the last digit has been selected.
Hold Feature
While in the ABS mode a value can be held (frozen) in the display by pressing the
SET button. A quick press of the SET button will reactive the display with no loss of
position.
Output
This tool comes with an Opto-RS232 output port that allows data transmission to a
variety of peripherals by connecting to a Starrett DataSure
®
Wireless Data Collection
System using a Cat.1500-3A-1N end node. Connection thru a traditional wire is also
possible.
Print Command
The print command is controlled by the mm/inch button.
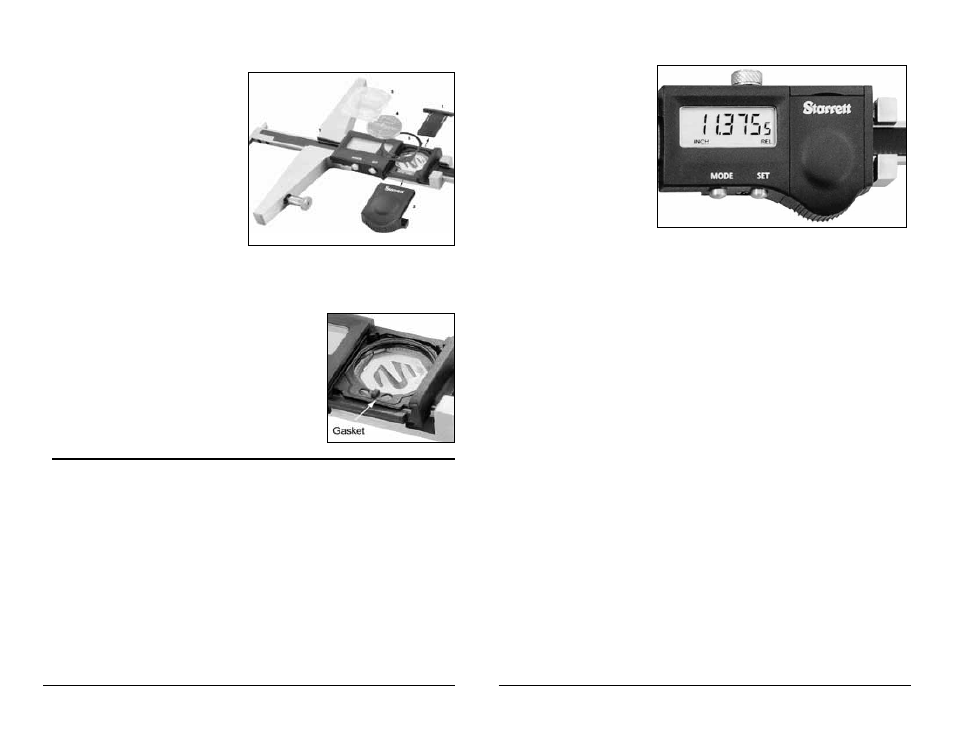
Battery Installation
The caliper comes with one CR2032 3V
battery installed. To change or install a
new battery refer to Figs. 1 & 2.
First, remove the output cover (1) [See
Fig. 1]. Then, remove the battery cover
(2) by sliding it in the direction of the
arrow.
Next, lift the clear battery protector (3),
old battery (4) and battery gasket (5) out
of the compartment.
To install a new battery, first make sure
the battery gasket is positioned correctly in the battery compartment [See Fig. 2].
(Note: It is important that the gasket is oriented correctly with the rubber protrusion
between the two holes facing downward.) Next, place a new CR2032 battery plus
(+) side up into the battery compartment. Put the
battery protector back into position on top of the battery
gasket, again making sure the rubber gasket is correctly
positioned in the cavity. While lightly pressing down on
the battery protector, slide the battery cover back into
position over the protector. Finally, insert the output cover
into the output slot located on the top of the cover.
The LCD now displays the two units - mm and in. Select
the desired unit by pressing either the MODE button for
metric mode or the SET button for inch mode.
Figure 1
Figure 2