Rear panel connections, Connecting the 820s – Simaudio 820S Power Supply User Manual
Page 8
820S Power Supply
____________________________________________________________________________________
8
Rear Panel Connections
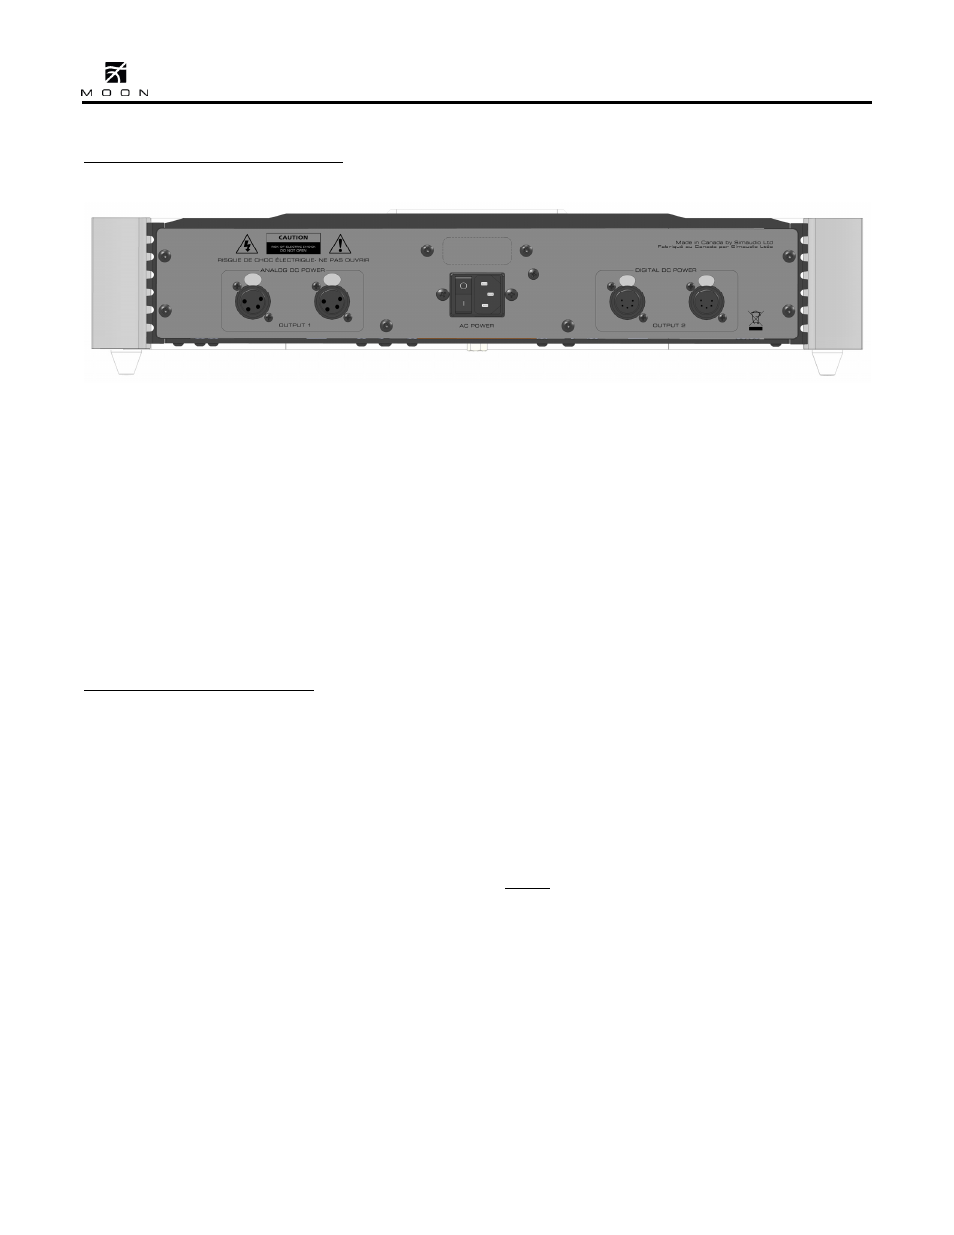
Figure 1: Rear panel of Moon 820S power supply
The rear panel will look similar to Figure 1 (above).
There are 2 pairs of outputs labeled “Analog DC
Power – Output 1” and “Digital DC Power – Output
2” . The Analog outputs use 4-Pin XLR connectors
and the Digital outputs use 5-Pin XLR connectors.
The “Analog DC Power” outputs are intended to
power the analog circuitry (audio) in the 740P
Preamplifier, 650D and 750D DAC / CD Transports,
as well as, both the 610LP and 810LP phono
preamplifiers. The “Digital DC Power” outputs are
intended to power the digital circuitry
(microprocessors for controller software, front panel
displays, CD drive) in the 740P Preamplifier, as well
as both the 650D and 750D DAC/ CD Transports.
The AC Power “main switch” and the “AC Input” IEC
receptacle for the power cord are located in the
center of the rear panel, between the Analog and
Digital AC Power outputs.
Connecting the 820S
1. Disconnect the AC power cable(s) from your
MOON Evolution component(s) that you will be
using with the 820S power supply.
2. Connect the 4-Pin XLR cable between one of the
4-pin XLR outputs labeled “Output 1” on the rear
panel of the 820S and the corresponding 4-Pin
XLR input on your MOON Evolution component,
as shown in figure 2 on the next page.
3. If applicable, connect the 5-Pin XLR cable
between one of the 5-pin XLR outputs labeled
“Output 2” on the rear panel of the 820S and
the corresponding 5-Pin XLR input on your
MOON Evolution component, as shown in figure
2 on the next page.
4. Connect the supplied AC power cable to the IEC
receptacle, located on the power supply’s rear
panel. Ensure that the AC wall outlet you use
has a functioning ground. For the best sonic
performance, it is preferable that you plug your
820S directly into a dedicated AC outlet and
avoid using an extension cord.
Notes: The example in figure 2 shows a 750D DAC/
CD Transport (top) connected to an 820S (middle)
by both a 4-Pin XLR cable and a 5-Pin XLR cable, as
well as a 610LP Phono Preamplifier (bottom)
connected to the 820S with only a 4-Pin XLR cable.
When using the 820S, the rear panel rocker switch
on any connected component(s) is bypassed.
When no components are connected to the 820S, it
will automatically go into standby mode after 20
minutes.