P.8 rta-s06 – RTA Products RTA-S06 User Manual
Page 8
P.8
RTA-S06
7
8
9
9
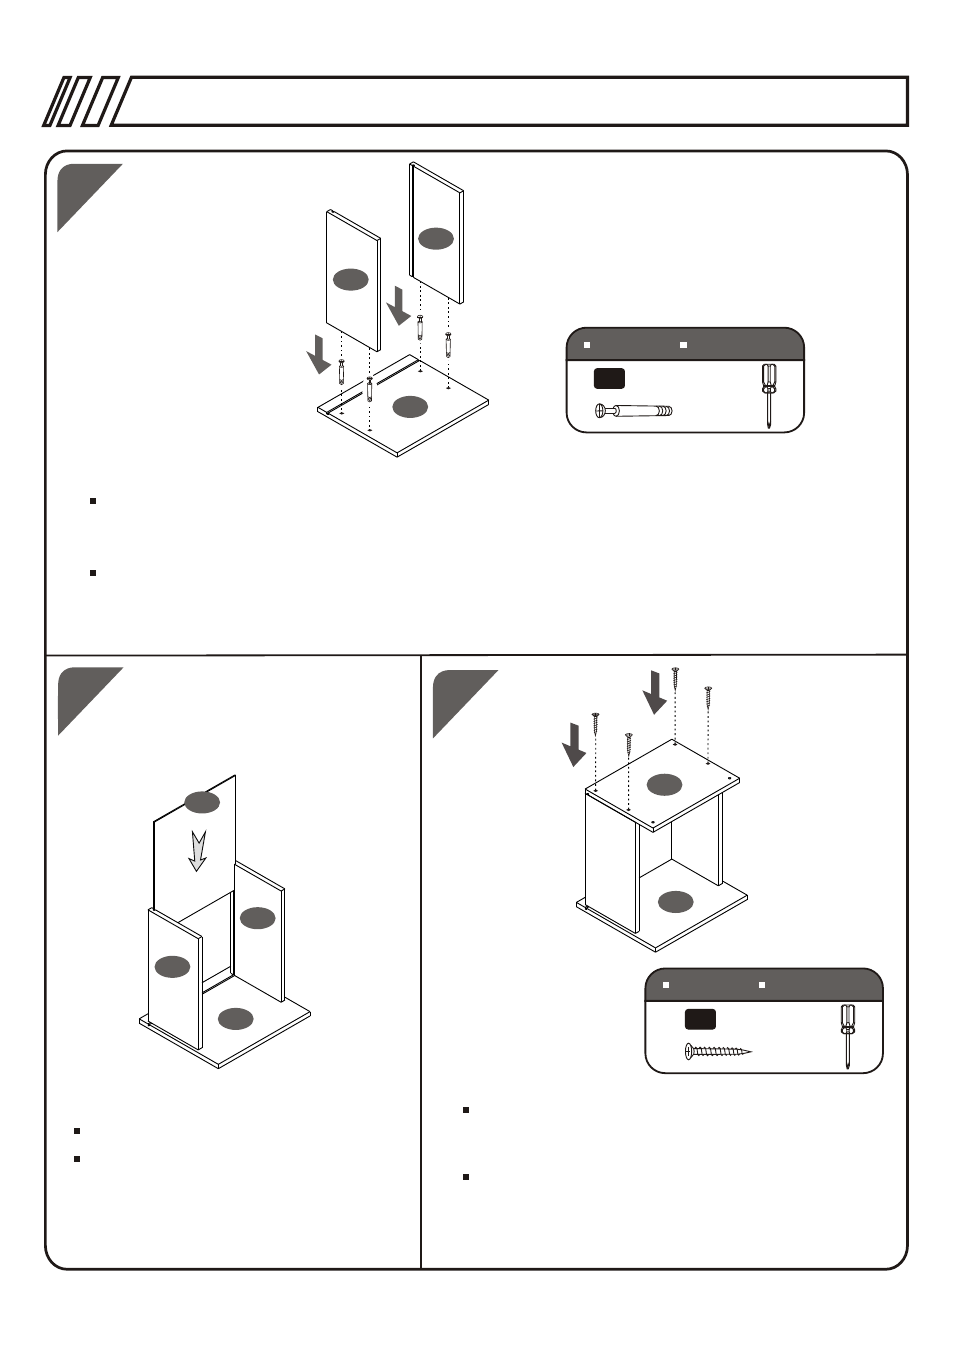
Insert the Bolts A in the holes of the back face of the Bottom Drawer Front Panel (9) and
tighten them with the screwdriver, then place the Bottom Drawer Left Panel (7) and the Bottom
Drawer Right Panel (8) over the Bolts and tighten the nuts on the inside faces.
10
9
11
Use Screws B to fix the Bottom Drawer Back
Panel (10) to the Bottom Drawer's Left and Right
Panels (7 & 8).
7
8
5
9
10
Slide in the Drawer Bottom Panel (5).
4PCS
6X40 MM
A
TORNILLOS
TORNILLOS
SCREWS
SCREWS
4PCS
4X30 MM
B
TORNILLOS
TORNILLOS
SCREWS
SCREWS
Inserte los Pernos A en los agujeros de la cara interna del Panel Frontal de Gaveta Inferior y
ajústelos con el destornillador,luego coloque el Panel Izquierdo de Gaveta Inferior (7) y el Panel
Derecho de Gaveta Inferior (8) sobre los pernos y ajuste las tuercas en la cara interna de los
Paneles.
Deslice el Panel Inferior de Gaveta (5).
Use tornillos B para fijar el Panel Posterior de
Gaveta Inferior (10) a los Paneles Izquierdo y
Derecho de Gaveta Inferior (7 y 8).