Motor service, Disassembly, Assembly – ParkZone PKZU2480 User Manual
Page 12
12
EN
Motor Service
100 x 100
CAUTION: DO NOT handle propeller parts
while the fl ight battery is connected. Personal
injury could result.
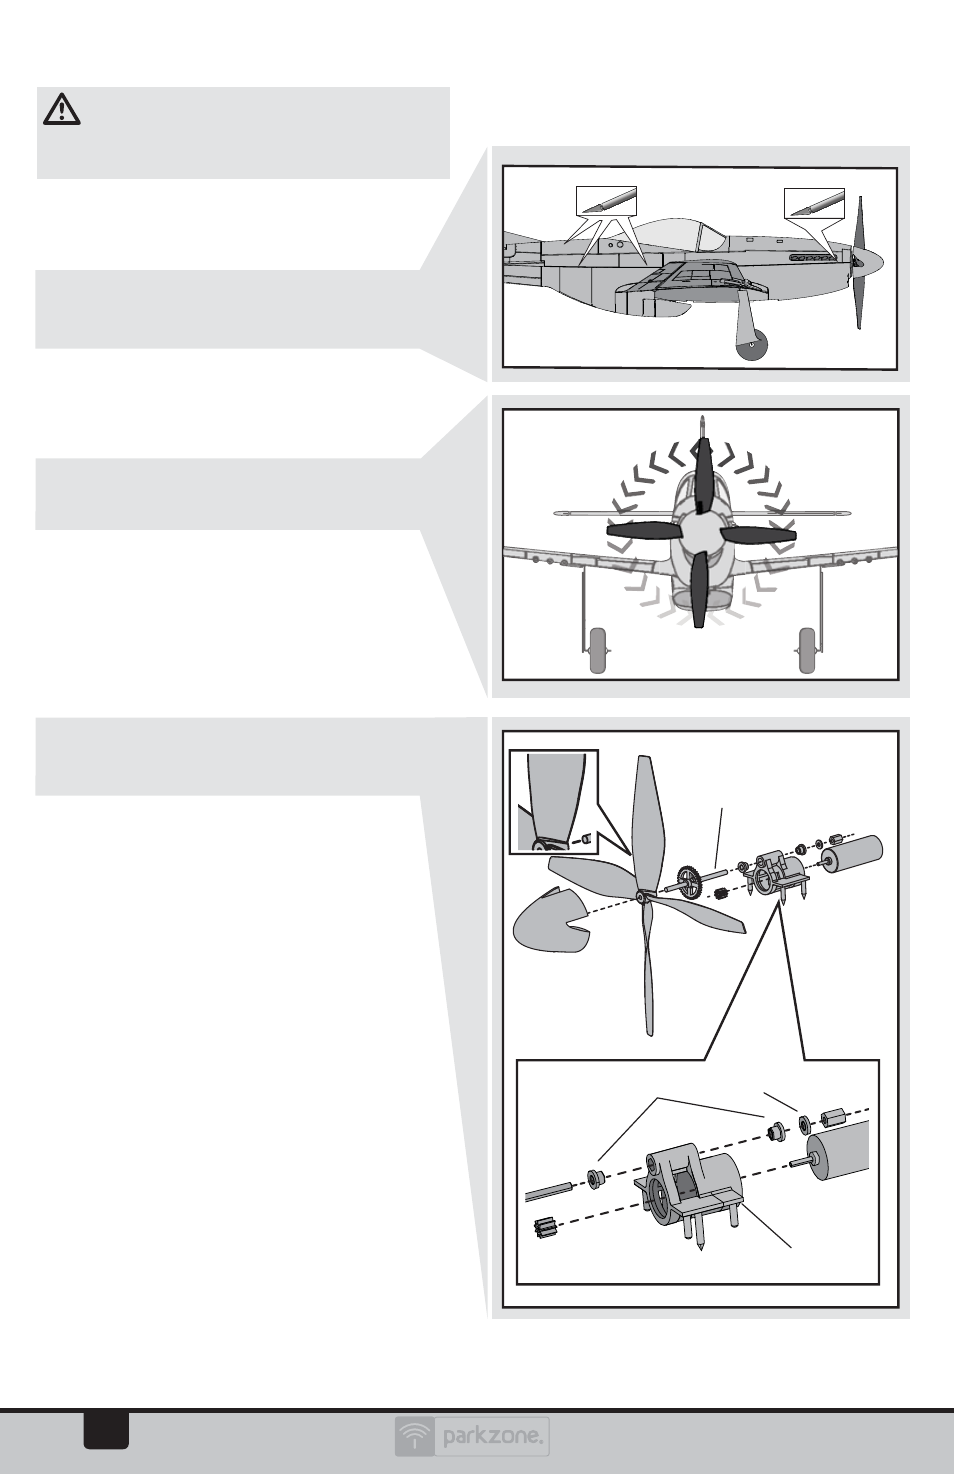
Disassembly
1. Disconnect the battery from the
ESC/receiver.
2. Carefully cut the tape and decals on the
side of the fuselage and behind the
canopy to remove the top of the fuselage.
IMPORTANT: Removing tape or decals can
remove paint from the fuselage.
3. Hold the prop shaft using needle-nose
pliers or hemostats.
4. Turn the propeller counterclockwise (facing
the front of the model) to remove. Turn the
propeller clockwise to install.
5. Carefully remove a damaged spinner
and glue from the propeller.
6. Hold the nut on the end of the prop
shaft using needle-nose pliers or
hemostats.
7. Turn the gear on the shaft clockwise (facing
the front of the model) to remove the nut.
8. Gently pull the shaft (A) from the gearbox (B)
and make sure the washer (C) and two
bushings (D) are not lost.
9. Disconnect the motor from the ESC/
receiver.
10. Gently push the motor out of the
gearbox and remove the motor
through the top of the fuselage
behind the ESC/receiver.
NOTICE: DO NOT remove the gearbox from
the aircraft. Damage to the aircraft will result.
Assembly
Assemble the aircraft using the instructions
above in reverse order.
• Correctly align the prop shaft gear with the
pinion gear on the motor.
• Connect the motor to the ESC/receiver so
that the powered motor turns the propeller
counterclockwise (facing the front of the
model).
• Make sure the propeller size numbers (100 x
100) face away from the motor (see illustration).
• Attach the spinner to the propeller using foam-
compatible CA (Cyanoacrylate adhesive).
• Assemble the fuselage using clear tape.
A
D
B
C
Insta
ll
Re
mo
ve
100 x 100