ParkZone PKZU1180 User Manual
Page 7
12
EN
DE
FR
IT
13
EN
DE
FR
IT
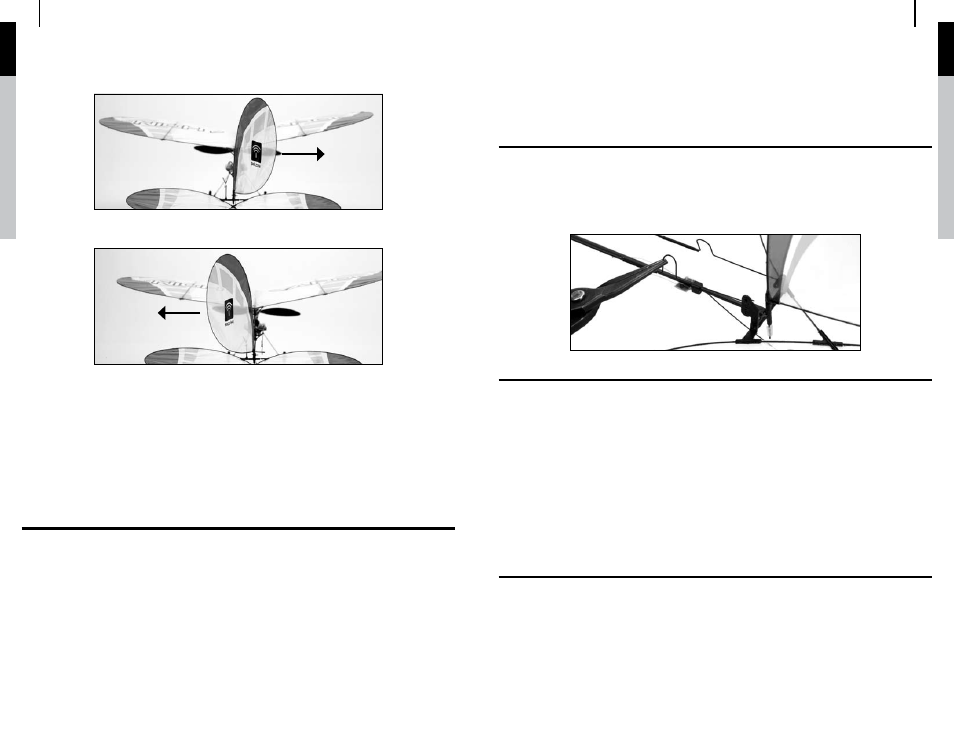
Move the rudder stick left and right to check yaw control. When the stick is pushed to the right, the rudder
should also move right.
Note: On 3-channel aircraft, like the Vapor, the rudder is controlled by the stick usually used by the
ailerons on 4-channel aircraft.
With the rudder stick pushed to the left, the rudder should move left.
If at any time during the test the controls respond in the opposite direction of operation of the flight controls,
follow your transmitter’s instructions to reverse the flight controls.
Once you’ve confirmed the flight control directions, all controls should be functioning properly. However, if
you continue to encounter problems with your Night Vapor responding properly to the transmitter, do not fly.
Digital Trims
The ParkZone 4-channel 2.4GHz DSM2 transmitter features digital trim buttons on all controls to make fine
adjustments. Center the control surfaces using the trims. If there is not enough electronic trim available, it
may be necessary to adjust the loops in the control linkages to center the surfaces.
Reversing the Flight Controls
The transmitter included with the Night Vapor is the same transmitter included in the PKZ Ember 2, Vapor,
and Ultra Micro RTF versions. It also functions identically to the transmitter included with the E-flite mCX
and mSR (MLP4DSM).
Note: For reversing with other transmitters, please refer to that transmitter’s
instruction manual.
Should the Night Vapor’s electronic components be used in another aircraft, you may find it necessary to
reverse the operation of flight control surfaces.
Reversing the rudder and elevator operation can be accomplished by following the steps below.
1. Be certain the battery is unplugged from the aircraft and the transmitter turned off.
2. Push down on the digital trim button for the surface you would like to reverse.
a. Top elevator trim button—elevator normal
b. Bottom elevator trim button—elevator reverse
c. Left rudder trim button—rudder normal
d. Right rudder trim button—rudder reverse
3. Continue holding the desired digital trim button down and turn the transmitter on.
4. Hold the digital trim buttons down for approximately five
seconds until tones are heard, confirming the selection.
5. Connect the flight battery and complete the flight control test, confirming all surfaces are operating in
the correct direction.
Control Centering
In the event of an accident or before your first flights, check to make sure the flight control surfaces are
centered. It is much better to do this mechanically due to the mechanical limits of linear servos.
1. Make sure the transmitter trims are centered, and if your transmitter has them, sub-trims are set to 0.
2. Check to see if any of the flight control surfaces are not centered.
3. If the surface is not centered, use a pair of pliers and carefully lengthen or shorten the pushrod by
bending the U-shape in the pushrod.
Dual Rate Function (RTF Only), and CG
The 4-channel 2.4GHz DSM2 transmitter included with the Night Vapor features dual rate capability. The
default setting is high rate. To access the low-rate function, press IN on the right gimbal. The LED light on
the transmitter will blink, alerting you the transmitter is on low rate. To return to high rate, push IN again on
the right stick.
Note: ParkZone STRONGLY recommends using the LOW-RATE setting for conducting the first
flight of your Night Vapor.
Center of Gravity
The Night Vapor’s front wing mount should be positioned at approximately 28–30mm behind the front of the
fuselage for the initial flights, with the front battery tray positioned at approximately 10–12mm behind the
front wing mount. The Night Vapor will fly at a wide range of CG positions, allowing you to alter the flying
characteristics of the aircraft. You may also experiment and add a little “trim” to the elevator to bring the
nose up slightly in flight. This allows the airplane to fly even slower.
Receiver Control Unit Description, Arming and Motor Control Test
The receiver installed on your Night Vapor is a lightweight combination of main motor electronic speed
control, servos and Spektrum DSM2-compatible receiver. The receiver unit is also equipped with a status
indicator LED.
Before each flight ALWAYS turn the transmitter on before connecting the flight battery to the receiver unit.
Never connect the flight battery to the receiver unit before powering the transmitter on. After each flight,
always disconnect the flight battery from the receiver unit before powering the transmitter off.
Note: The only time you should connect the flight battery to the receiver unit before powering on
the transmitter is when binding the receiver to the transmitter. Please see the Transmitter and
Receiver Binding section of this manual for more information.