ParkZone PKZU1180 User Manual
Page 6
10
EN
DE
FR
IT
11
EN
DE
FR
IT
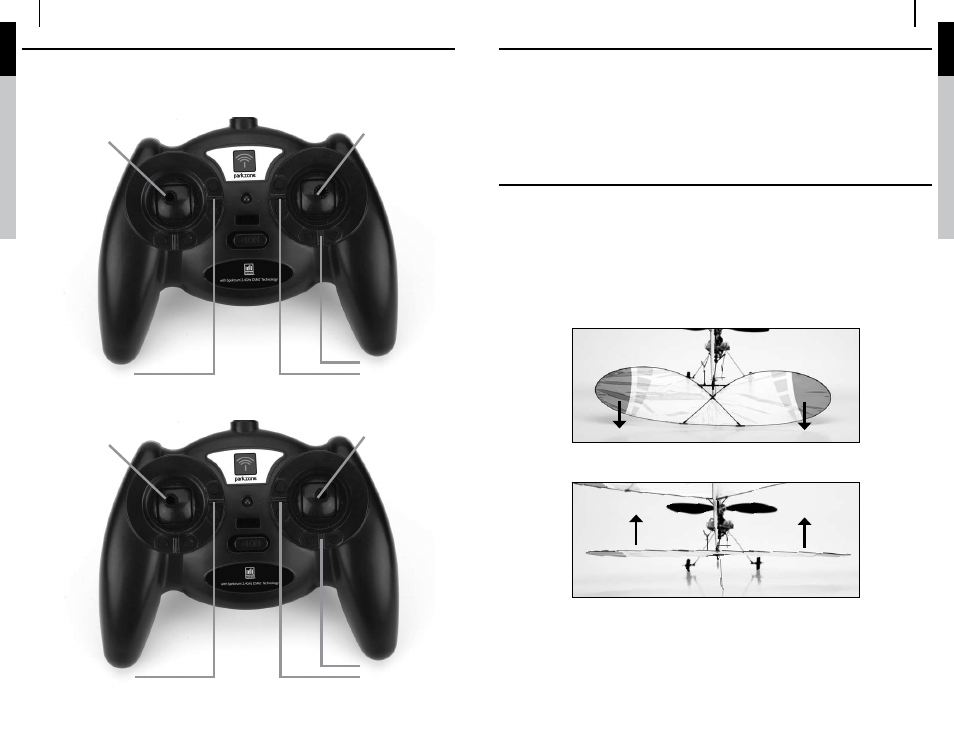
Transmitter Control Identification
Note: Before each flight you should ALWAYS turn the transmitter on before connecting the flight battery
to the receiver unit. After each flight, be sure you always disconnect the flight battery from the
receiver unit before powering the transmitter off.
Mode 1
Elevator Function
Rudder/Throttle Functions
Elevator Trim
Throttle Trim
Rudder Trim
Mode 2
Throttle Function
Rudder/Elevator Functions
Throttle Trim
Elevator Trim
Rudder Trim
LED Identification
The Night Vapor is equipped with six LED lights. Below is a description of what each individual light
looks like.
There are 3 LED lights on the leading edge of the wing. These lights are a bright white color and
•
remain solid.
There are 2 LED lights on the trailing edge of the wing. The light on the right side of the wing (looking
•
from the front) will blink red, and the one on the left (looking from the front) will blink green.
There is 1 LED light located near the tail of the aircraft. This light blinks blue.
•
Control Test
You must test the controls prior to the first flight to ensure none of the servos, linkages, or parts were
damaged during shipping and handling and that the controls function in the correct directions.
Turn the transmitter on first and lower the throttle stick and trim completely. Then, plug the battery into the
battery receiver unit.
Note: The connectors on the battery lead are keyed to prevent reverse polarity connection. However, if
you force them together in the wrong orientation and with the wrong polarity it is still possible to
damage the battery and/or receiver unit.
Move the elevator stick on the transmitter forward and back to check elevator pitch control. When the stick
is pushed forward the elevator should move down.
When the elevator stick is pulled back, the elevator should move up.