Step 9 step 10 – ParkZone PKZ5075 User Manual
Page 5
7
8
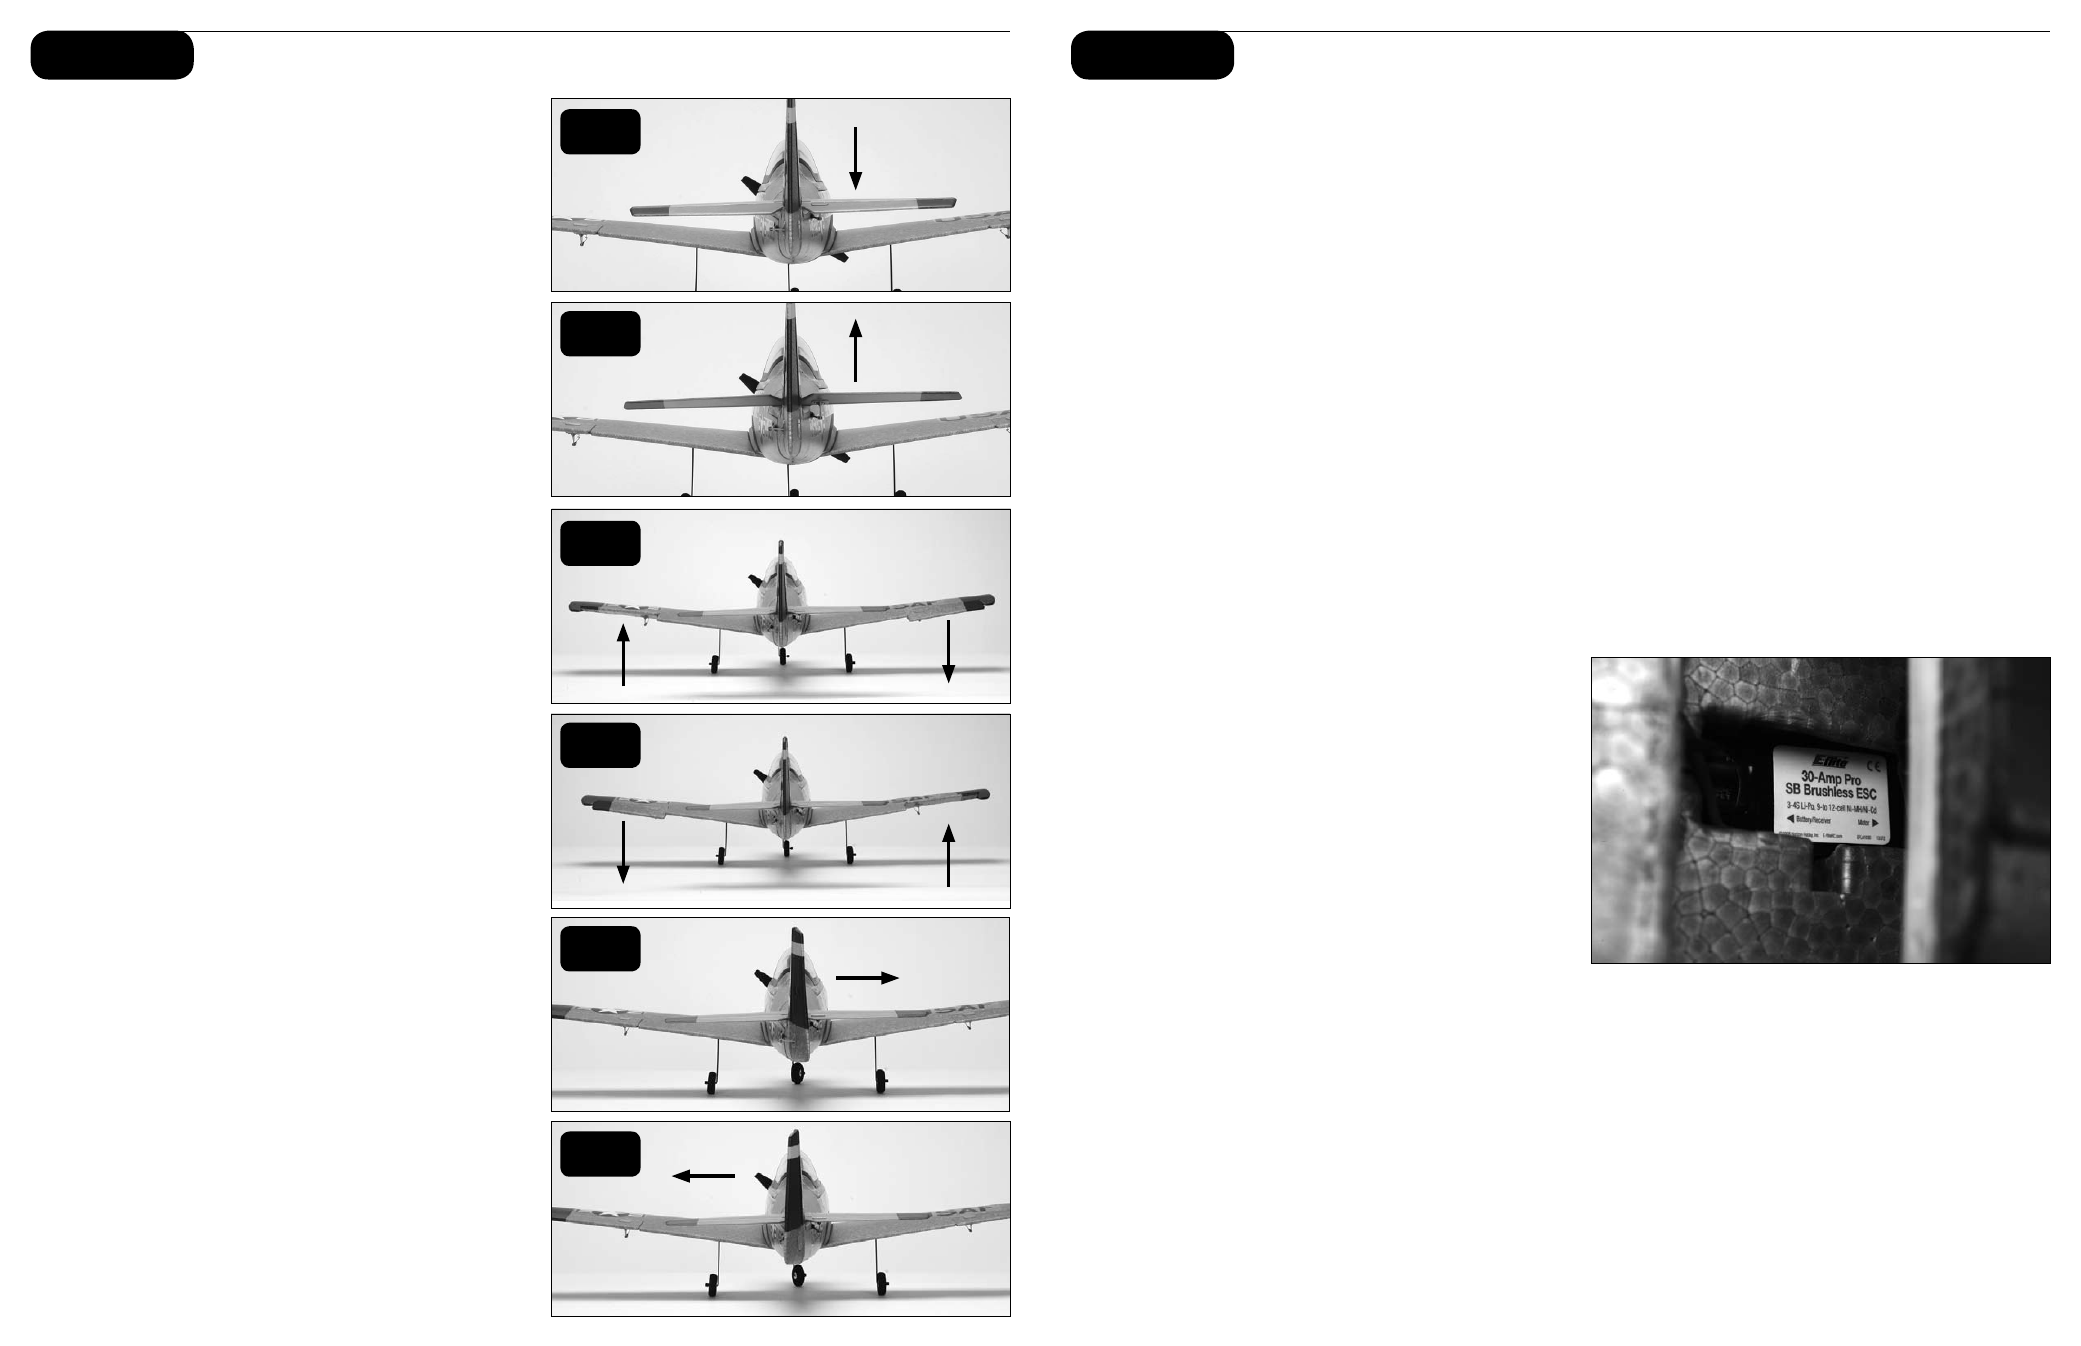
Control Direction Test
1. Move the elevator stick on the transmitter forward
and aft to check elevator pitch control. When
the stick is pushed forward, the elevator should
move down.
2. When the elevator stick is moved aft the elevator
should move up.
3. Move the aileron stick left and right to check aileron
roll control. When the stick is pushed to the left,
the left aileron should move up and the right aileron
should move down.
4. With the aileron stick pushed right, the right
aileron should move up and the left aileron should
move down.
5. Move the rudder stick left and right to check yaw
control. When the stick is pushed to the right the
rudder should also move to the right (if viewed from
behind the airplane).
6. With the rudder stick pushed to the left, the
rudder should move to the left (if viewed from behind
the airplane).
If at any time during the test the controls respond in
the opposite direction, it may be necessary to reverse/
change the direction of operation of the flight controls.
Follow your transmitter instructions to change the
direction of the various flight controls.
1
2
3
4
5
6
Step 9
Step 10
30-Amp Pro Switch-Mode BEC Brushless
Controller
Your T-28D Trojan PNP comes out of the box with the
E-flite 30-Amp Pro Switch-Mode BEC Brushless Controller.
This controller has been designed for use in radio control
aircraft and is designed to support motor currents up
to 30 amps continuous, and a 5-volt Switch-Mode BEC
circuit capable of 700mAh continuous current on any
recommended input voltage with a 3- to 4-cell Li-Po
battery. It is suitable to use with most radio brands.
If you intend to fly your T-28D Trojan PNP stock, then
there is no need to program your ESC. It comes installed
with the default settings. If you intend to re-program the
ESC, we strongly recommend removing the propeller
first in order to keep it from spinning if the motor is
accidentally engaged.
Note: ALWAYS assume the motor and the propeller
are live. ALWAYS keep clear of the propeller at all
times. The high rpm of the brushless motor can cause
severe injury.
Features
• Up to 30-amp continuous current with proper airflow,
35-amp peak
• 5-volt Switch-Mode BEC circuit capable of 700mAh
continuous current on any recommended input
voltage
• Drives up to 5 analog or 4 digital sub-micro servos
with the BEC
• 3S-4S Li-Po or 9- to 12-cell Ni-MH/Ni-Cd input voltage
• Programmable motor braking
• Safe power-arm mode prevents accidental starts
• Programmable low voltage cut-off with settings for 3S
Li-Po (9.2V), 4S Li-Po (12V) or 74% of battery starting
voltage
• Programmable soft start for helis and airplanes
• Auto motor shutdown if signal is lost or there is
interference
• Programmable timing has 5 user-selectable ranges
for use with a larger variety of brushless motors
• Heli mode for starting the motor with a low speed
ratio
• Optional RS232 Serial Link available for programming
(EFLARS232)
• Pre-wired connectors - E-flite EC3 connectors on
battery input and 3.5mm female gold bullets on
motor output leads
Using the 30-Amp Pro Switch-Mode BEC
Brushless Controller
This controller is very simple to use, and for safety, will
not arm the motor until the throttle stick has been held
in the Idle/Off position for more than 1 second. The
controller will indicate the soft cutoff voltage setting
every time you plug the battery in by first emitting a
low, long tone, to indicate startup. Depending on the
selected cutoff voltage (default is 74%), you will then
hear the respective number of medium length mid tones
to indicate the cell count or a musical tone for the 74%
cutoff, helping you to confirm the setting before every
flight. Proper air cooling is required during flights so
the ESC should be placed in an area where air flows over
the controller.
Connecting the ESC to the Motor
The three wires from the motor connect to the three
female gold bullet connectors on the ESC. The order of
connection to the motor is not important; any motor wire
can be plugged into any connector. If the motor runs
backwards, you can simply unplug and switch any two of
the motor wire plugs connected to the ESC.
Mounting the ESC
Choose a location that has good airflow and offers good
protection. Do not cover the side with the flat heat shield
with hook and loop or tape as this will greatly reduce its
effectiveness. Mount the ESC with a combination of hook
and loop, 2-sided foam tape, and/or tie wraps.
Starting Your Power System
1. Turn on your transmitter and ensure the position of
the throttle stick is set to Idle/Off.
2. Plug the battery pack into the controller. You will
hear 1 low long tone to indicate startup, then the