Step 8 step 7 – ParkZone PKZ4975 User Manual
Page 5
7
8
Flying
Always choose a wide-open space for flying your
ParkZone Bf-109G PNP. It is ideal for you to fly at an AMA
sanctioned flying field. If you are not flying at an AMA
approved site, always avoid flying near houses, trees,
wires and buildings. You should also be careful to avoid
flying in areas where there are many people, such as
busy parks, schoolyards, or soccer fields. Always follow
local ordinances. We recommend only flying your Bf-109G
in light winds.
Prior to Each Flight
• Always make sure your Bf-109G PNP is properly
trimmed.
• Always make sure the receiver, ESC, and battery are
properly secured.
• Always verify the propeller is on securely.
• Always ensure the servo reversing switches on the
transmitter are set correctly.
• Always verify the dual rates switch is set at where
you plan on flying. We recommend LOW rates
for your initial flying. The Bf-109G PNP is VERY
maneuverable on high rates and requires a lot of
experience to handle properly.
Center of Gravity Location
The CG Location is 2 3/8 inches from leading edge at the
“D” shaped indentation closest to the landing gear wheel
bump. This CG location has been determined with the
ParkZone 1800mAh 11.1V Li-Po battery installed.
Control Surface Travel Information
Note: Measured at widest point of control surface
High Rate
Low Rate
Aileron:
5/8 up/down
3/8 up/down
Elevator:
5/8 up/down
3/8 up/down
Rudder:
3/4 left/right
1/2 left/right
Mid Flap
Full Flap
Flap
1/2 inch
1 inch
Ailerons if flaps are used.
High Rate
Low Rate
Ailerons:
3/4 up/down
3/8 up/down
Note: Mid flap is used if transmitter has three-position
flap switch, otherwise use the full flap setting.
Fly in this area
(upwind of pilot)
Stand here
600 feet
WIND
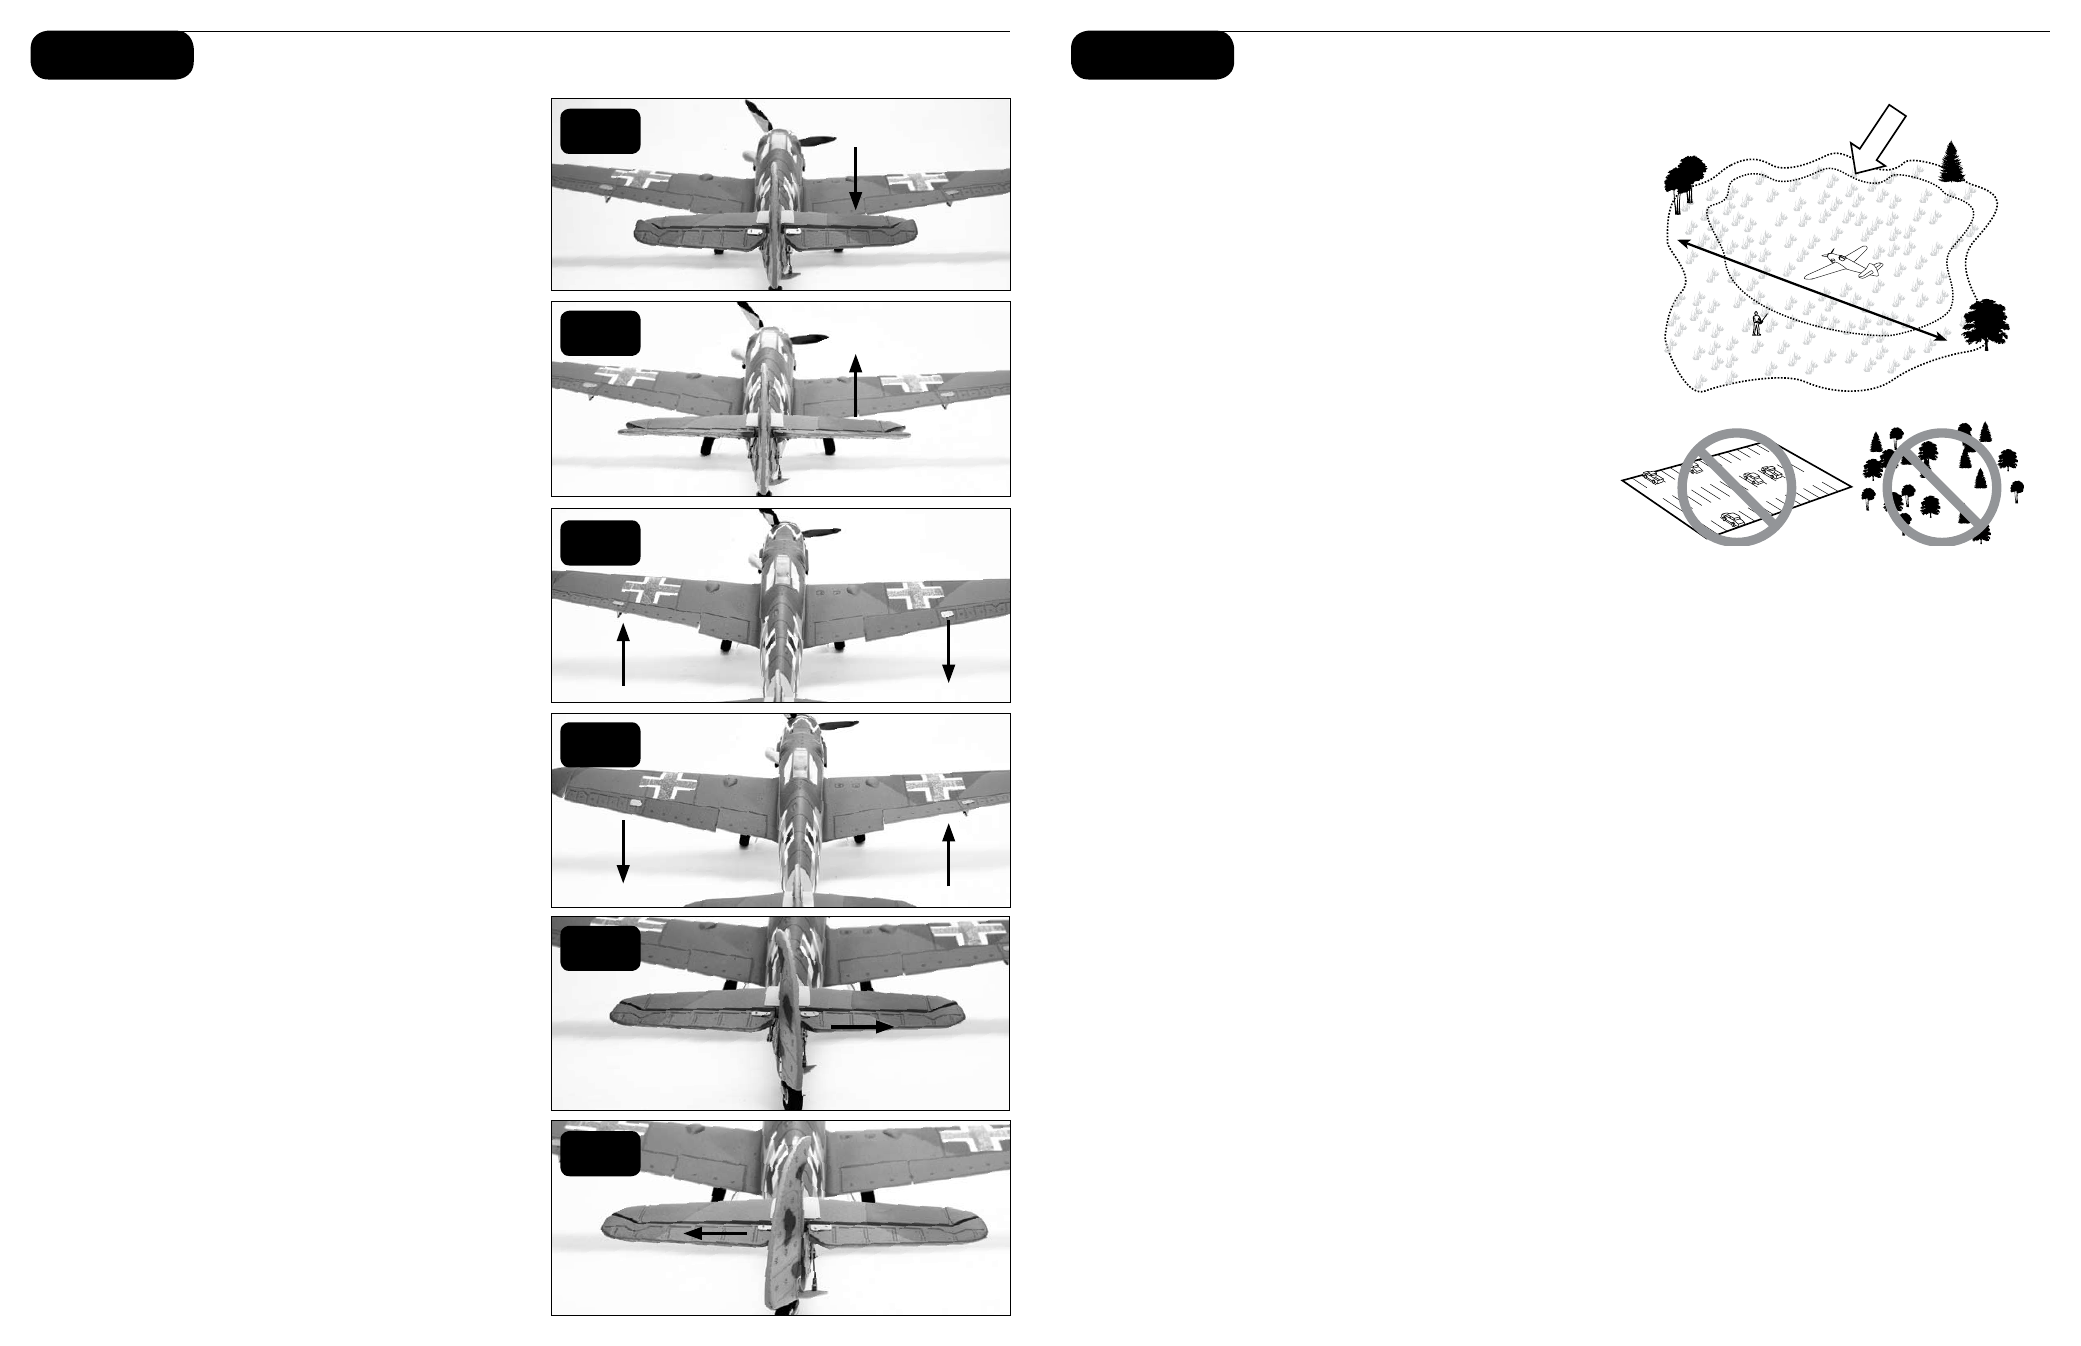
Step 8
Step 7
Control Direction Test
1. Move the elevator stick on the transmitter forward
and aft to check elevator pitch control. When
the stick is pushed forward, the elevator should
move down.
2. When the elevator stick is moved aft the elevator
should move up.
3. Move the aileron stick left and right to check aileron
roll control. When the stick is pushed to the left,
the left aileron should move up and the right aileron
should move down.
4. With the aileron stick pushed right, the right
aileron should move up and the left aileron should
move down.
5. Move the rudder stick left and right to check yaw
control. When the stick is pushed to the right the
rudder should also move to the right (if viewed from
behind the airplane).
6. With the rudder stick pushed to the left, the
rudder should move to the left (if viewed from behind
the airplane).
If at any time during the test the controls respond in
the opposite direction, it may be necessary to reverse/
change the direction of operation of the flight controls.
Follow your transmitter instructions to change the
direction of the various flight controls.
1
2
3
4
5
6