Step 5 step 4, Step 6 – ParkZone PKZ4375 User Manual
Page 3
Apply Tape
4. Check all functions to ensure proper setup.
Keep all body parts away from the propeller.
You can also make any trim adjustments to the
control surfaces at this time. Once you are
satisfied that the channels are functioning
correctly, you can turn off the radio system.
Install the receiver into the allotted space within the
fuselage. Make sure it is secure. Carefully route the
antenna so it exits the fuselage just behind the canopy.
It should then simply fall along the fuselage and can be
secured through the vertical stab. When the antenna is
routed correctly, it should hang several inches (5”–7”)
below the fuselage.
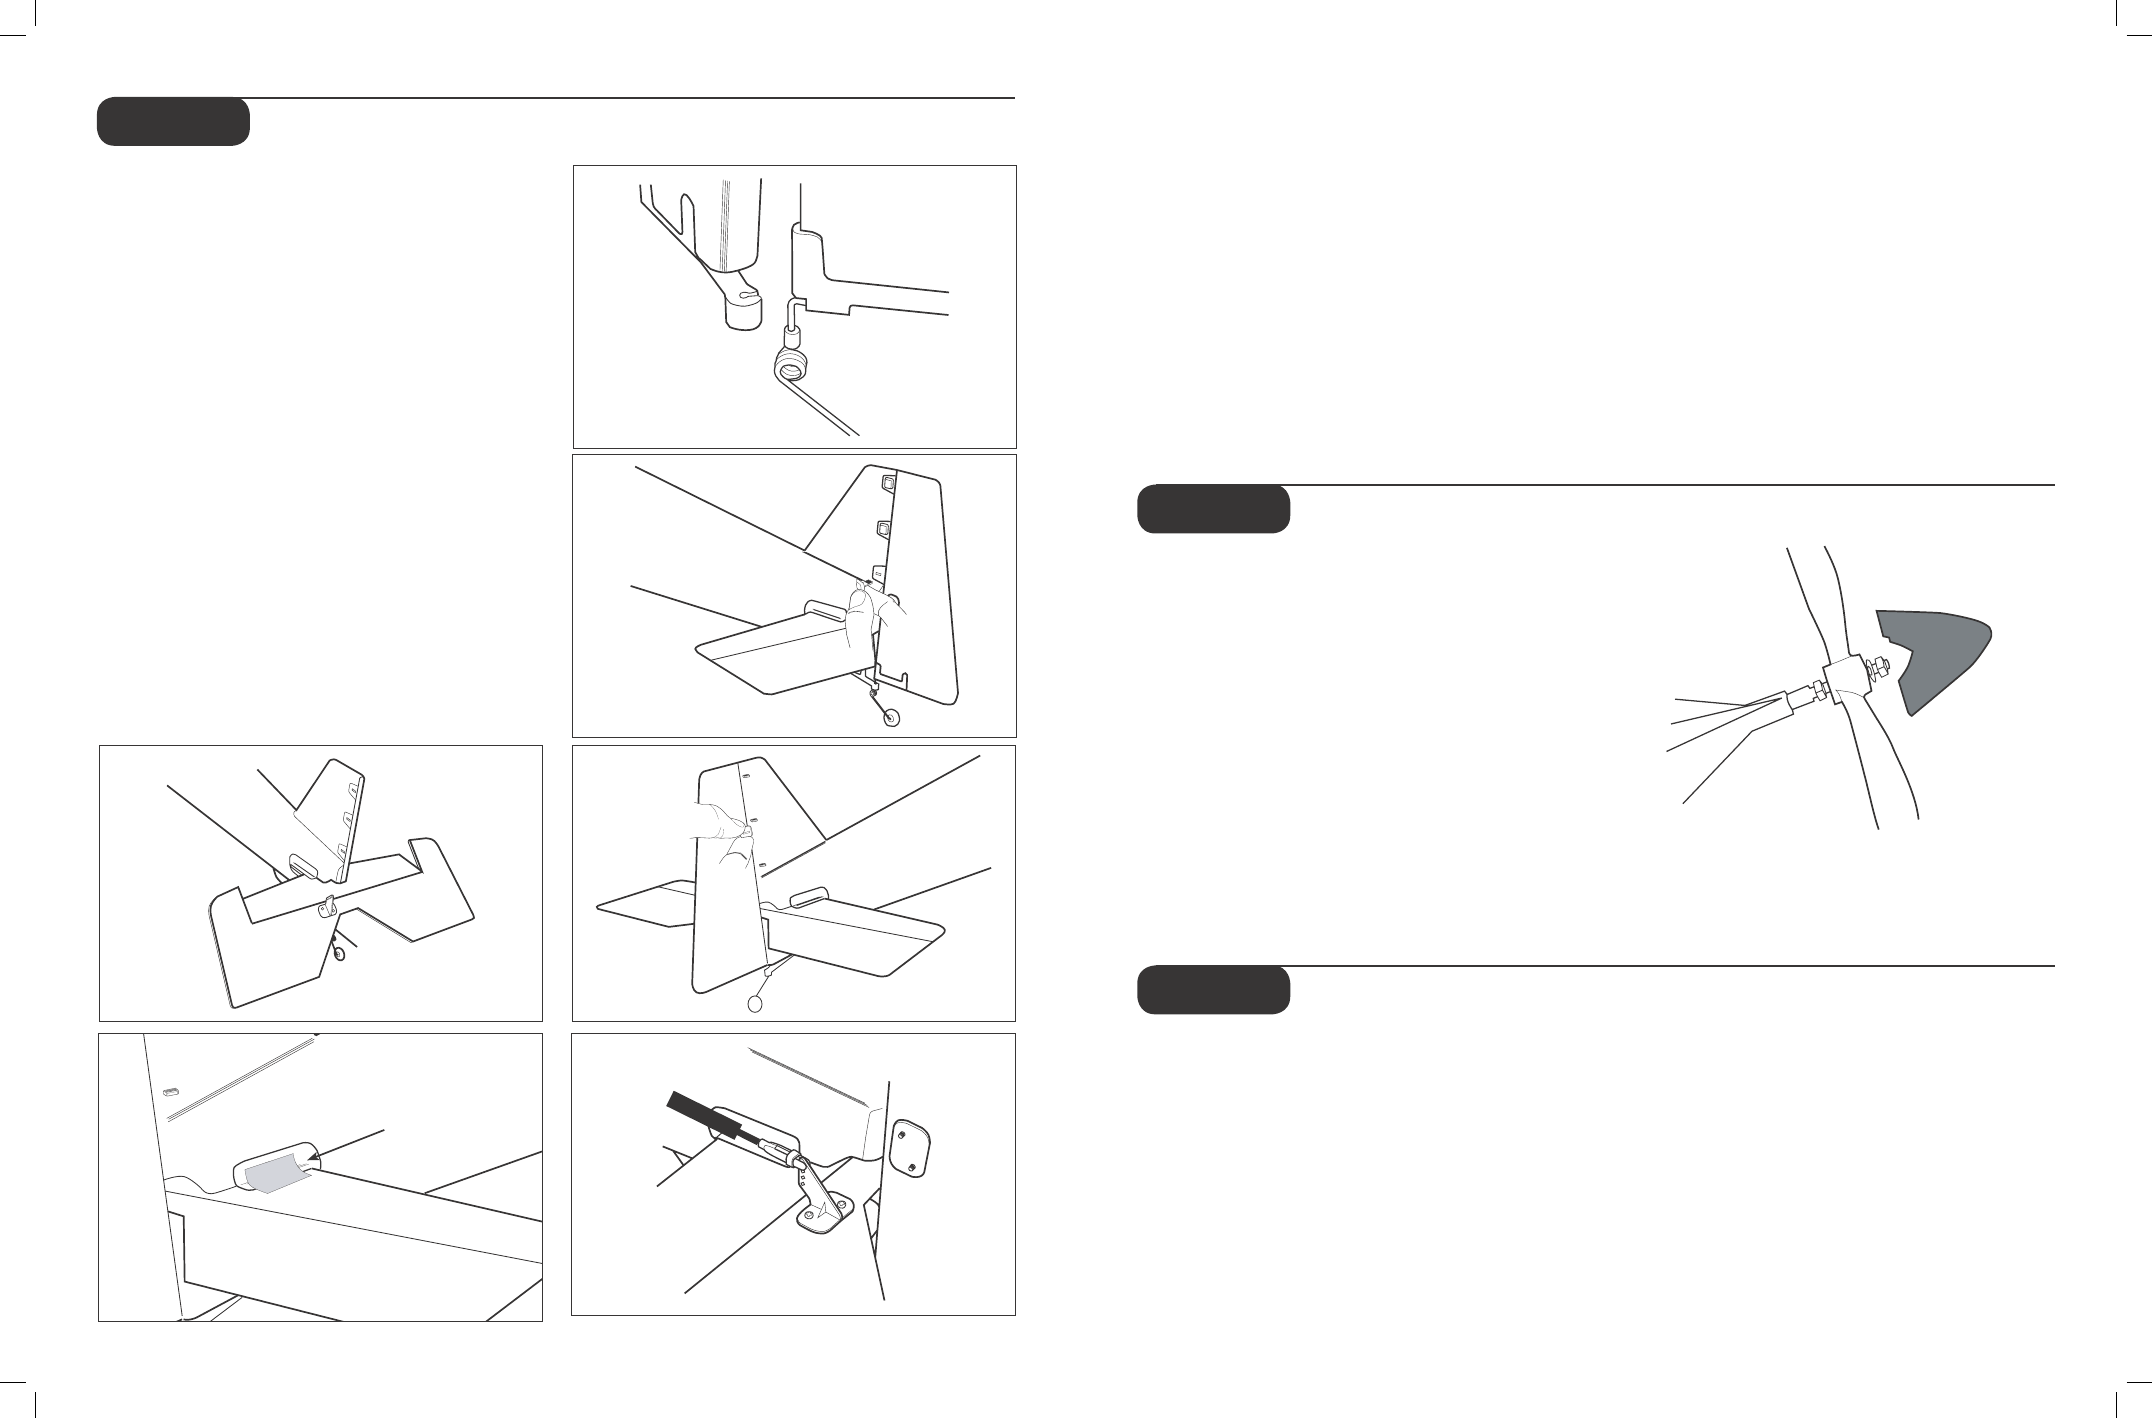
Attaching the Horizontal Stabilizer and
Rudder
1. Locate horizontal stab.
2. Carefully slide horizontal stab into fuselage, making
sure control surface horn is on top.
3. Use included strips (4 pieces) of clear tape to
secure stab to tail fillet. You should use 1 strip for
top and bottom of each side.
4. Locate rudder. Carefully snap tail wheel wire into
the clip on bottom of fuse as shown.
5. Use the three pins that are supplied to connect.
rudder to stab, as shown. Do this by pushing pins
in carefully.
6. Install keepers on backside to secure pins
as shown.
7. Attach rudder and elevator pushrods to
respective control horns (outer holes of control
horns for both).
Note: It may be necessary to re-trim control
surfaces prior to flight.
Step 5
Step 4
Step 3
Center of Gravity Information
Your ParkZone Typhoon 2 3D Plug-N-Play aircraft can
be powered by either a 9-cell Ni-MH 1000mAh battery
pack (PKZ1027), or by the ParkZone 3S 1800mAh
(PKZ1031) or 1800mAh battery pack (PKZ1031).
The center of gravity (CG) for your Typhoon 2 3D PNP,
with the 9-cell Ni-MH pack, is approximately 3.50 inches
(90mm) back from the leading edge of the wing. The
CG with the 3S 1800mAh Li-Po is approximately 3.50
inches (89mm) back from the leading edge of the wing.
Additionally, you may choose to make the first several
flights with the included spanner (prop wrench) taped
to the inside or bottom of the cowl. This will add .3
ounces 8.5 g) and may help you to get used to the
flight characteristics of this 3D airplane.
Aileron, Elevator, and Rudder Throws
The recommended throws in low rate are:
Ailerons: +/- .75 inches (20mm)
Elevator: +/- 1.40 inches (35mm)
Rudder: +/- 1.00 inch (25mm)
The recommended throws in high rate are:
Ailerons: +/- 1.25 inches (30mm)
Elevator: +/- 2.00 inches (50mm)
Rudder: +/- 2.00 inches (50mm)
Your Typhoon 2 3D PNP should fly great between these
ranges.
Installing the Propeller and Spinner
Your Typhoon 3D PNP has two props that are included.
You can select the prop that best works with your flying
style.
A. 13.5 x 7 (PKZ1006): This prop is recommended for
the first several flights on your plane. This prop will
allow your plane to fly a bit slower, but is also the setup
for maximum vertical power (especially with the 9-cell
Ni-MH pack).
B. 12 x 8.75 (PKZ1007): This prop will allow you to
fly at faster speeds and help with certain aerobatic
maneuvers. This propeller is ideal for the ParkZone 3S
1800mAh Li-Po battery pack. When you have selected
the propeller that best works for you, install and secure
it making sure not to forget any of the necessary
hardware.
1. Slide propeller on. Make sure pitch numbers on prop
are visible from front of airplane.
2. Slide washer on first. Next, screw the nut on and
tighten securely.
3. Attach spinner.
Step 6
Installing the Receiver
Carefully plug in the servo leads into the corresponding
channels of the receiver you have chosen. The servo
plugs may have to be trimmed carefully with a hobby
knife if you are using a JR
®
or HiTec radio system in
order to fit correctly into the receiver.
Confirm that the servo leads/plugs are in the correct
channel of the receiver. Do this by:
1. Turning on the transmitter.
2. Installing a charged flight battery.
3. Turning on receiver switch.
Step 2
Step 7
Step 6
Step 5
Step 4