Typhoon 2 3d plug-n-play instruction manual, Step 2 step 1 step 3 – ParkZone PKZ4375 User Manual
Page 2
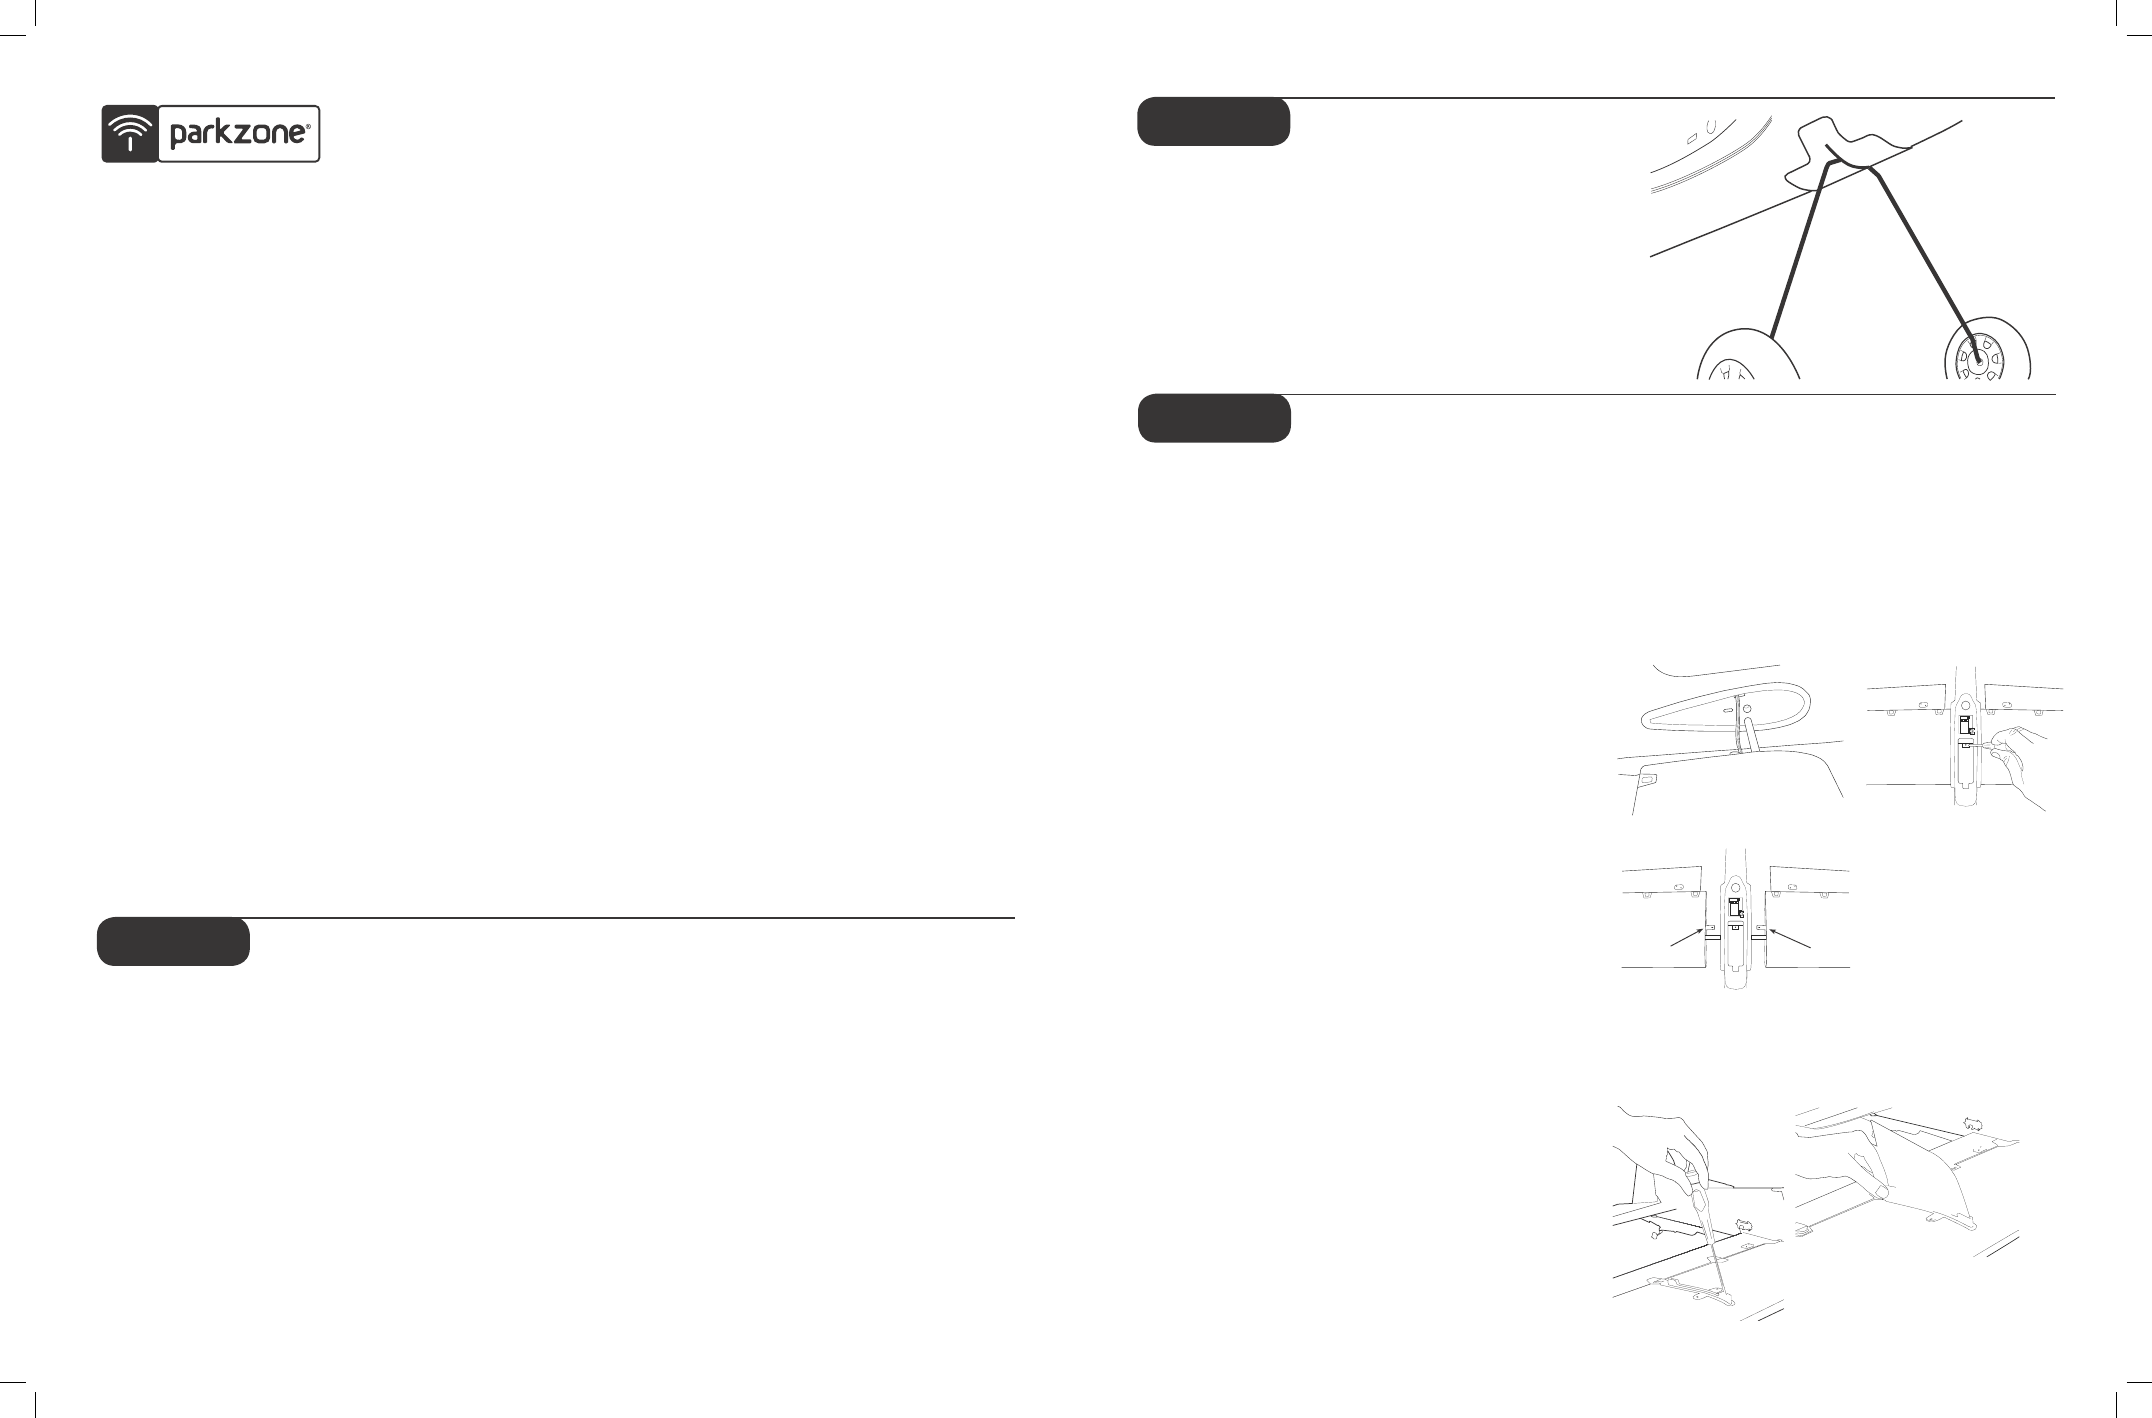
Installing Landing Gear
1. Slightly squeeze together the legs of the landing
gear while sliding it into the allotted space on the
fuselage undercarriage.
2. The fit should be snug, so it will not easily pull out.
3. Gently tug on the landing gear to ensure that it is
inserted all the way into the fuselage and will not
come out when the plane is in use.
Congratulations on your purchase of the ParkZone
®
Typhoon
™
2 3D Plug-N-Play
®
airplane (PKZ4375). We
at ParkZone are committed to giving you the most
enjoyable flight experience possible. In order to have
a safe and successful flight, we ask that you do not fly
until you have read these instructions thoroughly.
This airplane comes almost fully assembled in order
to allow you to get in the air quickly. Your Typhoon 2
3D Plug-N-Play (PNP
®
) already has the 3-wire servos, a
ParkZone (BL400-15T) brushless motor, and an E-flite
Pro 25A brushless ESC installed. The decals have
already been applied, as well. You will only need to
add your own battery (a 3S 2200mAh Li-Po or 9-cell
1000mAh Ni-MH are recommended), as well as a
receiver and transmitter.
Note: Although the airplane can function with a 4-channel radio system, we
suggest that you use a computer radio system with at least 6 channels so
you can use dual rates and make end-point adjustments. These features will
greatly add to the flying capabilities of the aircraft.
In as little as a few hours, you can be ready for your
first flight with the Typhoon 2 3D PNP. This means
you can spend your time refining your 3D flying skills,
not your building skills. Your ParkZone Typhoon 2 3D
PNP will allow you to do such maneuvers as harriers,
blenders, hovering, knife edges, and more.
Warning
Although your ParkZone Typhoon 2 3D PNP comes
almost ready to fly, this aircraft is for experienced RC
pilots only and is not a toy! Misuse of the plane can
cause serious bodily harm and damage to property.
Therefore, only an experienced RC pilot should fly it.
Attaching the Wing
1. Locate the wing set. Note that the servos are
located in the bottom of the wing.
2. Select a wing half and slide in fuse, making sure
that you slide aileron servo lead in first (in allotted
hole in side of fuse). Pull aileron lead carefully
through fuse in order to allow wing tab and spar to
go into their allotted holes. Do the same with the
other wing half.
3. Carefully slide wing halves toward each other until
the wing tabs overlap.
4. Match up the holes on each tab and secure with
included screw.
5. Plug in the aileron connectors into receiver. Left
aileron should plug into allotted space of receiver
(directly below elevator). Right aileron lead should
plug into second space of Rx allotted for aileron.
6. Attach the clevis of the aileron linkage to the
bottom (outermost) hole of the aileron horn. Once
you gain more experience, you can insert the clevis
into holes on the aileron horn that are higher in
order to do more extreme maneuvers with your
Typhoon 2 3D PNP.
7. Plug in the aileron connectors into the receiver.
Left aileron will plug into allotted space of receiver
(directly below elevator). Right aileron lead will plug
into second space of Rx allotted for aileron.
(Optional) SFG Installation
1. Locate the SFG mounts from the accessory bag.
2. The lower SFG mounts feature screw alignment
pins to ease in the installation. Insert the lower SFG
mount into the positioning holes in the wing. Gently
install the upper SFG mount into the wing and
carefully press the mounts together.
3. Using a small Phillips screwdriver (#00 Phillips
screwdriver is recommended), secure the mounts
together using the included screws.
Charging Your Flight Battery
We recommend that you choose either the 9-cell
10.8V Ni-MH battery pack (PKZ1027), or the ParkZone
1800mAh 3S Li-Po (PKZ1031) to power your Typhoon 2
3D PNP. If you choose to use a Li-Po battery, it must
be charged with a charger that is specifically designed
to handle Li-Po batteries, such as the ParkZone 2- to
3-Cell Li-Po Charger (PKZ1040). Regardless of the
battery you choose, always follow the charger and
battery instructions in order to avoid any damage to the
battery, charger, property or yourself.
Warning
Failure to use the proper charger for a Li-Po battery
can result in serious damage, and if left charging long
enough, will cause a fire. Please use caution when
charging Li-Po batteries.
Advancing your Flying Skills
Once you have begun to fly your Typhoon and are looking for more ideas on maneuvers, visit:
http://www.horizonhobby.com/Explore/Article.aspx?ArticleID=1022
http://www.horizonhobby.com/Explore/Article.aspx?ArticleID=1033
http://www.horizonhobby.com/Explore/Article.aspx?ArticleID=1044
Optional Side Force Generators (SFG)
Installation
4. Slide the SFG surfaces into the mounts and secure
with clear tape. The SFGs are symmetrical and
when installed, the graphics will face the wing tip.
Always check ailerons prior to flight to make sure they
are not reversed! Trim adjustments to the ailerons may
be necessary prior to flight.
• BA
TT
• THRO
• ELEV
• AILE (R)
• AILE (L)
• RUDD
• AUX1
• BA
TT
• THRO
• ELEV
• AILE (R)
• AILE (L)
• RUDD
• AUX1
Wing Tab
Wing Tab
Step 2
Step 1
Step 3
Typhoon 2 3D Plug-N-Play Instruction Manual