Typhoon 2 3d instruction manual, Step 2 step 1 – ParkZone PKZ4300 User Manual
Page 2
300—400mAh
300mAh
500—1000mAh
500mAh
1000—1500mAh
1A
1500—2000mAh
1.5A
2000mAh +
2.0A
BATTERY CAPACITY
MAX. CHARGE RATE
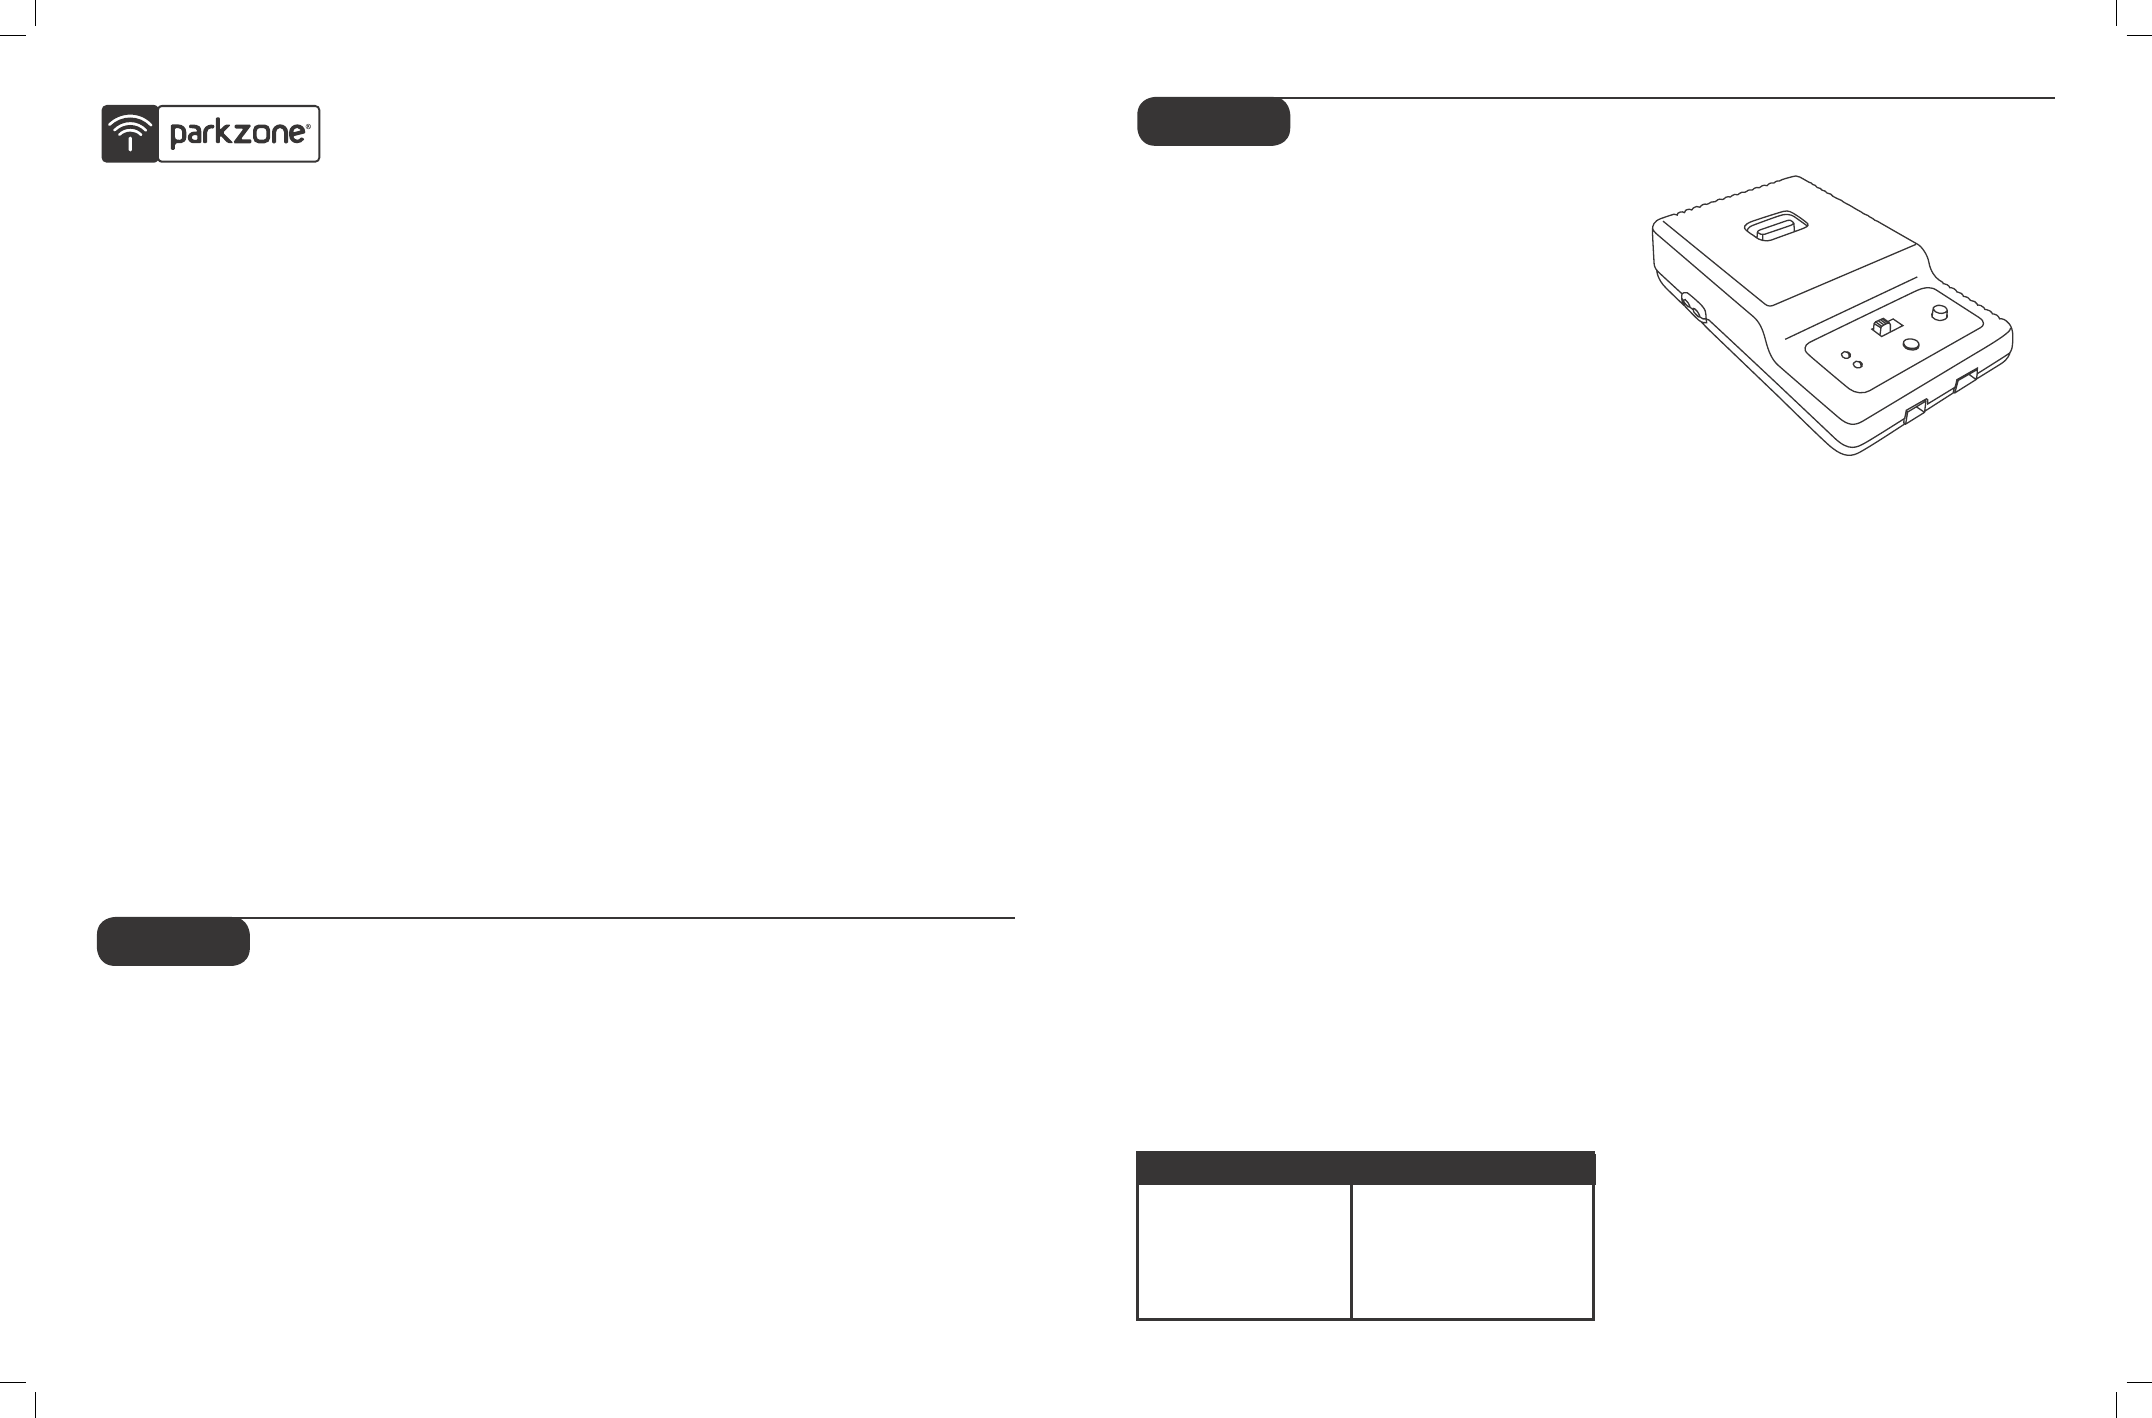
Charging the Aircraft Battery
Your Typhoon 2 3D comes with a DC balancing
charger and 3S Li-Po battery. You must charge the
included Li-Po battery pack with a Li-Po specific
charger only (such as the included charger). Never
leave the battery and charger unattended during the
charge process. Failure to follow the instructions
properly could result in a fire. When charging, make
certain the battery is on a heat-resistant surface.
DC Li-Po Balancing Charger Features:
• Charges 2- to 3-cell lithium polymer battery packs
• Variable charge rates from 300mAh–2A
• Automatically detects incorrect cell count selection
• Simple single push-button operation
• LED charge status indicator
• LED cell balance indicator
• Audible beeper indicates power and charge status
• Cigarette lighter input cord
Specifications
• Input power: 12V DC, 3A
• Charges 2- to 3-cell Li-Po packs with minimum
capacity of 300mAh
• Variable charge rates from 300mAh to 2 amps
3S 11.1V 1800mAh Li-Po Battery Pack
The ParkZone 3S Li-Po battery pack features a
balancing lead that allows you to more safely charge
your battery pack when used with the included
ParkZone Li-Po balancing charger.
To Complete the Charging Process
1. Attach the input cord of the charger to the
appropriate power supply (12V automobile
accessory jack), or use the (HBZ6513) and attach
to 12V AC power supply. Once your charger
has been correctly powered up, there will be an
approximate 3-second delay and then you will hear
an audible “beep” and the green (ready) LED will
flash.
2. Refer to the chart below to select the appropriate
Congratulations on your purchase of the ParkZone
®
Typhoon
™
2 3D RTF airplane. Your ParkZone Typhoon
2 3D comes with everything needed to get you in the
air—all in one box! You will only need to attach the
wing, horizontal stabilizer, rudder, propeller, and landing
gear, as well as charge the flight battery prior to your
first flight. In as little as 40 minutes, you can be ready
to fly. This means you can spend your time refining your
3D flying, and not your building skills. Your ParkZone
Typhoon 2 3D allows you to do such maneuvers as
harriers, blenders, hovering, knife edges, and more!
We at ParkZone are committed to giving you the most
enjoyable flight experience possible. In order to have a
safe and successful flight, we ask that you do not fly
until you have read these instructions thoroughly.
Your Typhoon comes with a fully proportional 5+ channel
radio system with full control of throttle, rudder, aileron
and elevator. Your Typhoon 2 3D also comes with a
powerful 400-size brushless motor and ESC, as well
as a 3-cell 11.1V 1800mAh Li-Po battery pack and DC
charger.
Warning
Though your ParkZone Typhoon 2 3D comes ready-to-
fly, this aircraft is for experienced R/C pilots only and
is not a toy. It can cause serious bodily harm and
damage to property!
charge rates:
3. Select the proper number of cells that you will be
charging, either 2 or 3 cells.
4. Locate the safety charge lead on the battery pack.
The charge lead of a 3-cell Li-Po battery will plug
into the larger 4-pin port on the bottom right of the
charger. A 2-cell pack will need to plug into the
3-pin port on bottom left of the charger. Once the
battery is properly plugged into the correct port,
it will beep 3 times if it is a 3-cell, and twice if it is
a 2-cell pack. Once this is done, you are ready to
proceed to charge the battery pack.
5. Push the start button to begin the charging
process. Once this is done, the charger will make
an audible beep that matches the cell count, and
then the red (charge) LED will begin to flash. Do not
adjust the current once the charger has begun to
charge.
6. When the battery pack is fully charged, you will
hear an audible beep for about 3 seconds, and
the green LED will be solid. The LED will remain
solid until the battery pack is unplugged from
the charger. Always unplug the battery from the
charger immediately upon completion. Failure to do
so could cause a fire.
Note: At times, the green LED may also flash during
the charging process, indicating that the charger is
balancing one or more of the cells at the same time it
is charging the battery pack. When this is occurring,
the red and green LED’s will both be flashing. It will
not always be necessary for the cells to be balanced.
Transmitter
Your ParkZone Typhoon 2 3D airplane comes with a
fully proportional (Mode 2) 5+ channel radio system.
In this configuration, the left stick controls throttle
and rudder, while the right stick controls elevator and
aileron. There is also a dual rates switch on the top
right face of the transmitter that will increase/decrease
the travel of the control surfaces of the airplane.
1. Insert the 8 “AA” batteries into the transmitter.
2. Turn the switch on to ensure the batteries have
been installed correctly. When the batteries are
installed correctly, the LED’s on the transmitter
should glow brightly. When the transmitter makes a
repeated “beep” sound, it is time to replace these
batteries.
Advancing your Flying Skills
Once you have begun to fly your Typhoon and are looking for more ideas on maneuvers, visit:
http://www.horizonhobby.com/Explore/Article.aspx?ArticleID=1022
http://www.horizonhobby.com/Explore/Article.aspx?ArticleID=1033
http://www.horizonhobby.com/Explore/Article.aspx?ArticleID=1044
Step 2
Step 1
Typhoon 2 3D Instruction Manual