Motor test control test – ParkZone PKZ1880 User Manual
Page 6
10
11
Warning: Keep everything clear of the propeller
before starting the motor test; so you do not damage
any property or harm anyone.
1. Make sure the throttle slider is in the “off” position.
2. Turn on the transmitter.
3. Plug the flight battery into the lead inside the
fuselage.
4. Secure the battery inside the fuselage cavity by
looping the hook and loop straps around the
battery.
5. Your P-51D Mustang has a built-in throttle
arming feature that must sense the throttle slider in
the “off” position before it will spin the
propeller. Advance the throttle forward and the
propeller should spin at a high speed. The throttle
slider needs to be in the “off” position each time
the battery is plugged into the airplane.
Motor Test
Control Test
6.
Follow this step each time you need to turn the
airplane off. When finished with the motor test, be
sure to disconnect the battery first, and then turn
off the transmitter. Each time you use your airplane
you should always place the throttle in the “off”
position, and then turn on the transmitter and plug
the battery pack into the lead from the fuselage.
7. Make any trim adjustments, as necessary, prior to
flight (see Making Trim Adjustments to the
Horizontal Stabilizer and Making Adjustments to
the Ailerons).
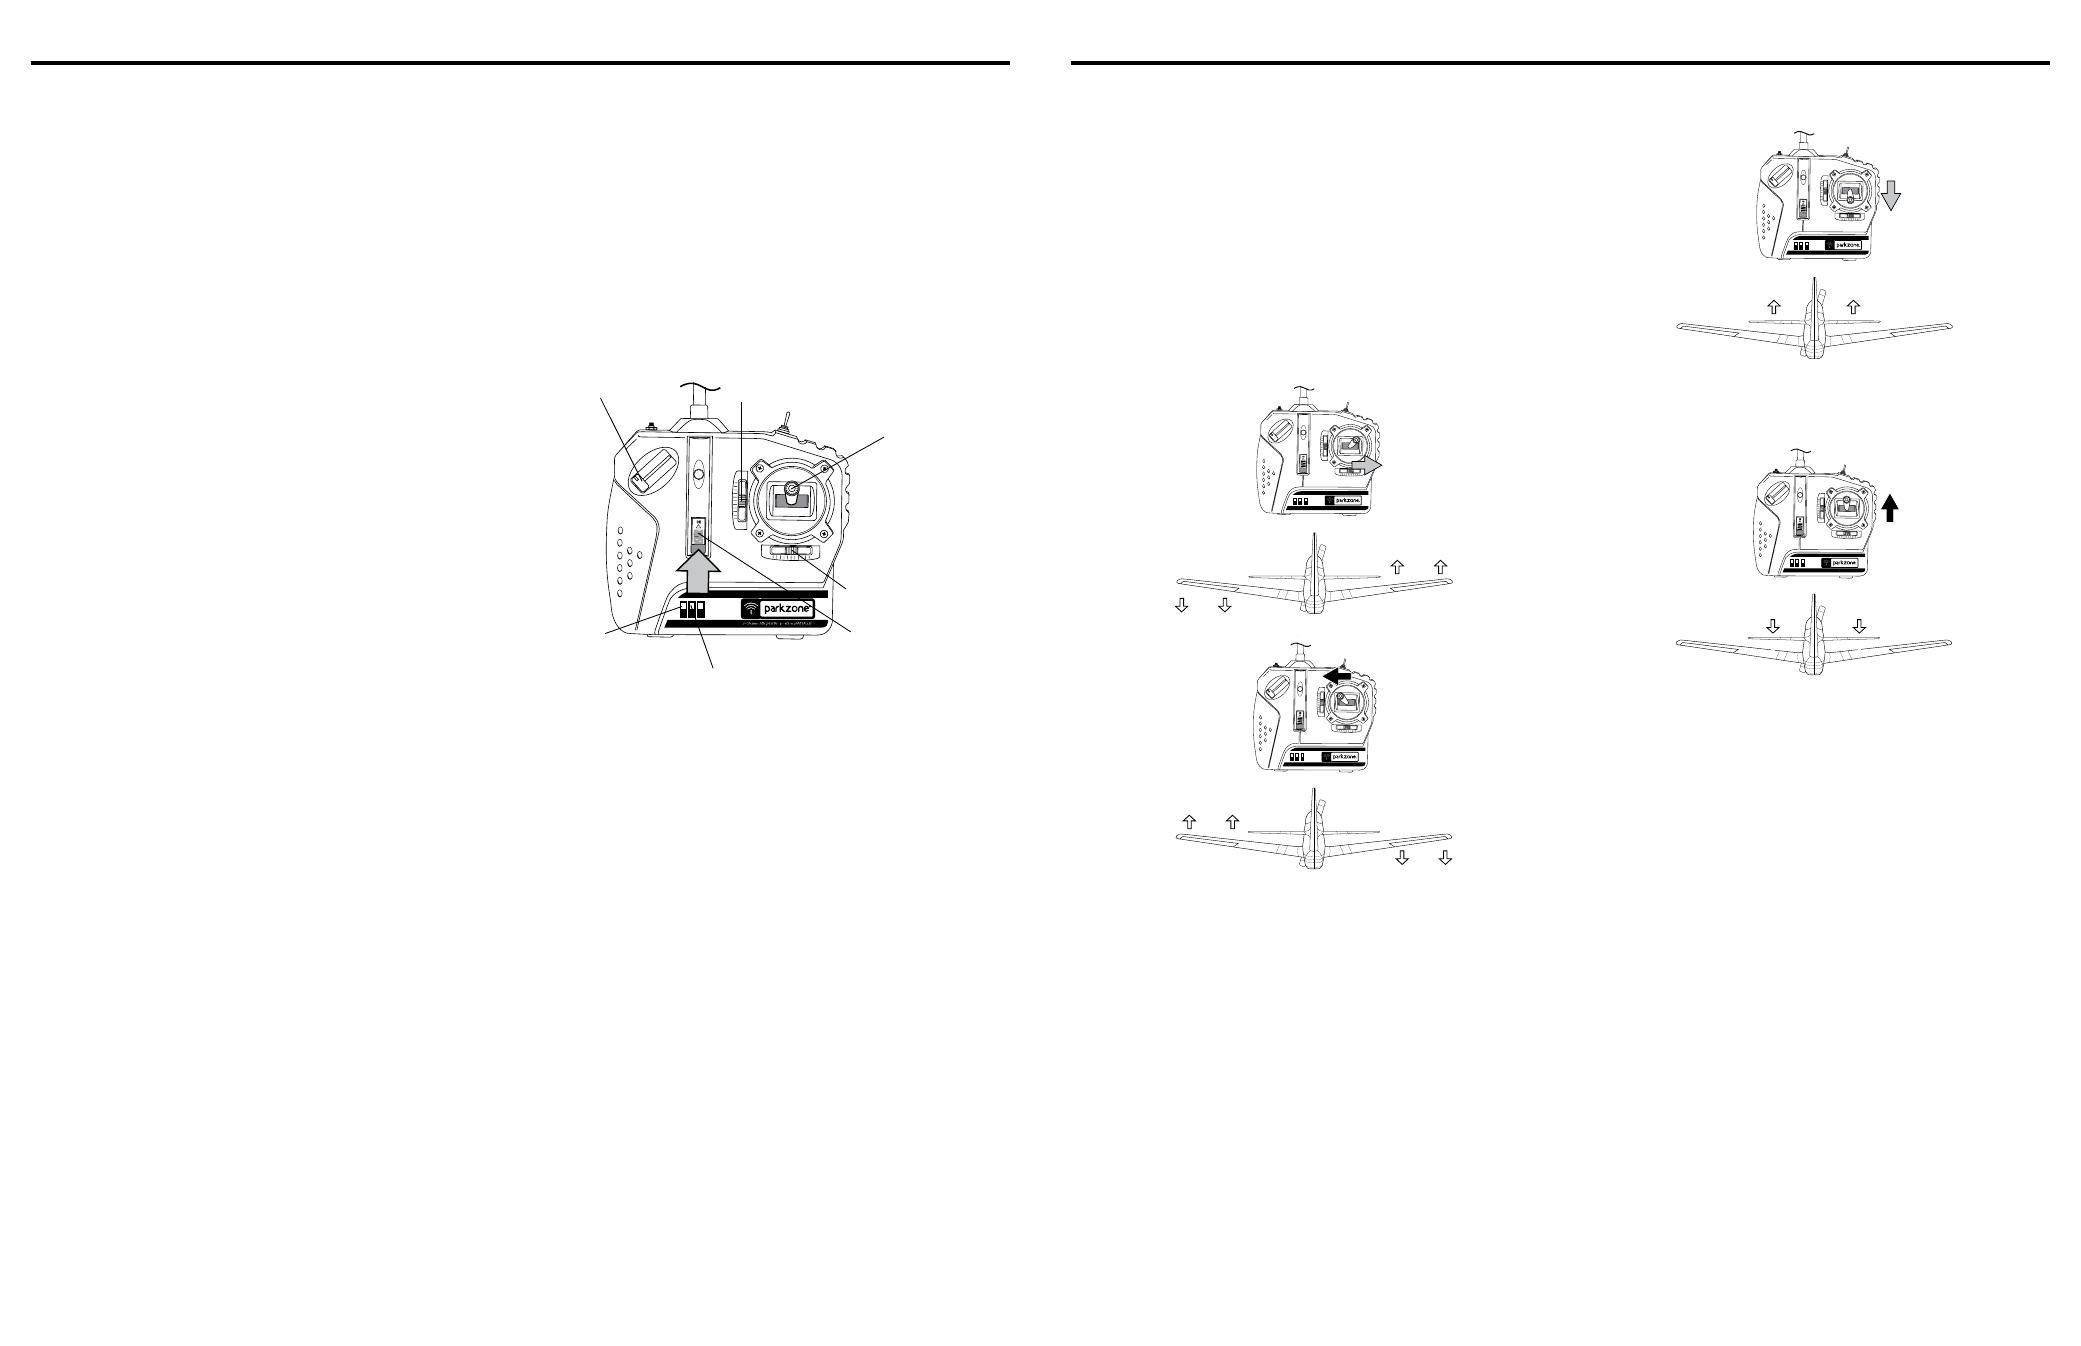
ON/OFF
Throttle Lever
Elevator
Reverse
Switch
Alieron Reverse Switch
Aileron/Elevator Lever
Elevator Trim Lever
Aileron Trim Lever
Note: Transmitter above reflects Mode 2 only
Warning: Keep everything clear of the propeller
before starting the control test in the event that you
accidentally turn on the motor.
1. Be certain that the throttle slider is in the “off”
position and that both trim levers are centered.
2. Switch on the transmitter and check to make sure
the LED is lit, indicating the transmitter has power.
3. Install the flight battery into the fuselage and plug it
into the battery connector.
4. Move the stick from side to side. The ailerons on
the trailing edge of the wings should move per your
transmitter input. When the stick is pushed to the
right, the right aileron should deflect upward and
the left aileron downward, and vice versa.
Note: If ailerons or elevator are reversed simply
move the reversing switch on the front face of the
transmitter.
5. Pull the stick back and the elevator control surface
should move upward.
6. Move the stick full forward. When this is done,
the elevator control surface should move down.
7. When the test is complete, be sure to disconnect
the flight battery first, and then turn off the
transmitter. This should be done each time you
turn off the airplane.
Note: It is very important to make sure that the
control surfaces are at 0 degrees when the
transmitter’s control stick and trim levers are
centered. (See Steps 5 and 8 for making needed
adjustments to control surfaces.)
If your airplane is not responding correctly to the
transmitter input, do not fly! Some correction is needed.