Step 16, Step 18, Step 17 – ParkZone PKZ1100 User Manual
Page 6
11
10
Reduce power at 10 feet.
Step 16
Using Elevator
Your J-3 is equipped with a third channel for
elevator (pitch control). Pulling back on the stick
provides up elevator. This allows for shorter take-
offs, better flares for landing, better climb rates, and
more effective turns. However, pulling too far back
on the elevator to climb too quickly will cause the
airplane to enter a stall (make the nose of the plane
come down).
To avoid crashing from a stall, always maintain
enough altitude to recover.
Just after a stall has occurred, the nose of the
airplane will fall and the plane will look like it is
diving. To pull out of a stall, simply pull back slowly
on the stick (partial up elevator) once your J-3 has
built up airspeed. Remember, pulling back too
quickly or for too long will once again cause the air-
plane to enter a stall. Effectively avoiding and
recovering from stalls requires experience. Always
seek the help of an experienced radio control pilot if
you are not familiar with pitch control. Failure to do
so, could result in a crash and significant damage
to your airplane.
Step 18
Mode Change Flight Control System
Your J-3 has computer software that allows you
to fly in two different modes. The mode in which
you fly is determined by a jumper on the receiver
circuit board.
The first mode is the way that your J-3 comes
from the factory. With the jumper still in place,
you will have the benefit of slight “up” elevator
when rudder input is given. This helps to allow
smooth turns and will greatly help your transition
to learning pitch control. It is highly recommended
that you continue to fly in this mode until you have
mastered pitch control, including landings that are
soft and precise.
After you have successfully flown several flights
in the first mode, you can advance to the second
mode, if you so choose. In this mode, you will have
conventional control of the rudder and elevator at
all times. Keep in mind that although this means
you can fly more aggressively, it also means crashes
can be more likely as well. Always fly at higher alti-
tudes when you are learning this mode in order to
allow for more mistakes. This will help prevent your
J-3 from a crash due to pilot error.
Entering the Second Mode:
1. Remove wing to gain access to fuselage from
the top.
2. Remove the foam that surrounds the receiver
circuit board.
3. Locate the correct jumper and remove from
the receiver circuit board. Remove only the
correct jumper, leaving the other one in place.
4. Store the jumper in a safe place for future use.
5. Re-install the foam and receiver.
Confirming the Second Mode:
1. Move the control stick directly to right or left.
2. If the elevator stays at 0 degrees and does
not deflect upward at all, you are in the
second mode.
Step 17
Landing Your J-3
When you begin to notice that your J-3 no
longer climbs well under full power (normally after
approximately 15 minutes), the battery is getting
low and it is time to land. Bring in your J-3 directly
into the wind and toward the desired landing spot.
Gradually reduce throttle (as well as giving a small
amount of down elevator if you choose) to reach an
altitude of approximately 10 feet). At this point,
reduce even more thottle and your J-3 should glide
in softly for a landing.
Note: Your J-3 should be landed on a smooth
surface (such as asphalt or concrete) so that the
landing gear can work effectively. You can land in
short grass, but it is less ideal.
Expert Tip: As you get better and more experi-
enced at flying, try adding a bit of “up” elevator just
prior to landing to “flare” the plane. With some
practice, your landings should become smooth and
on target.
WARNING: Do not attempt to catch the air-
plane or injury may occur. Remember, there is a
spinning propeller on the front of the plane that
can cause injury! Also, remember to cut power to
the motor right before you land to prevent damage
to the propeller.
L T
455EW
J8
Q3
J1
JP1
C20
L T
455EW
J8
Q3
J1
JP1
C20
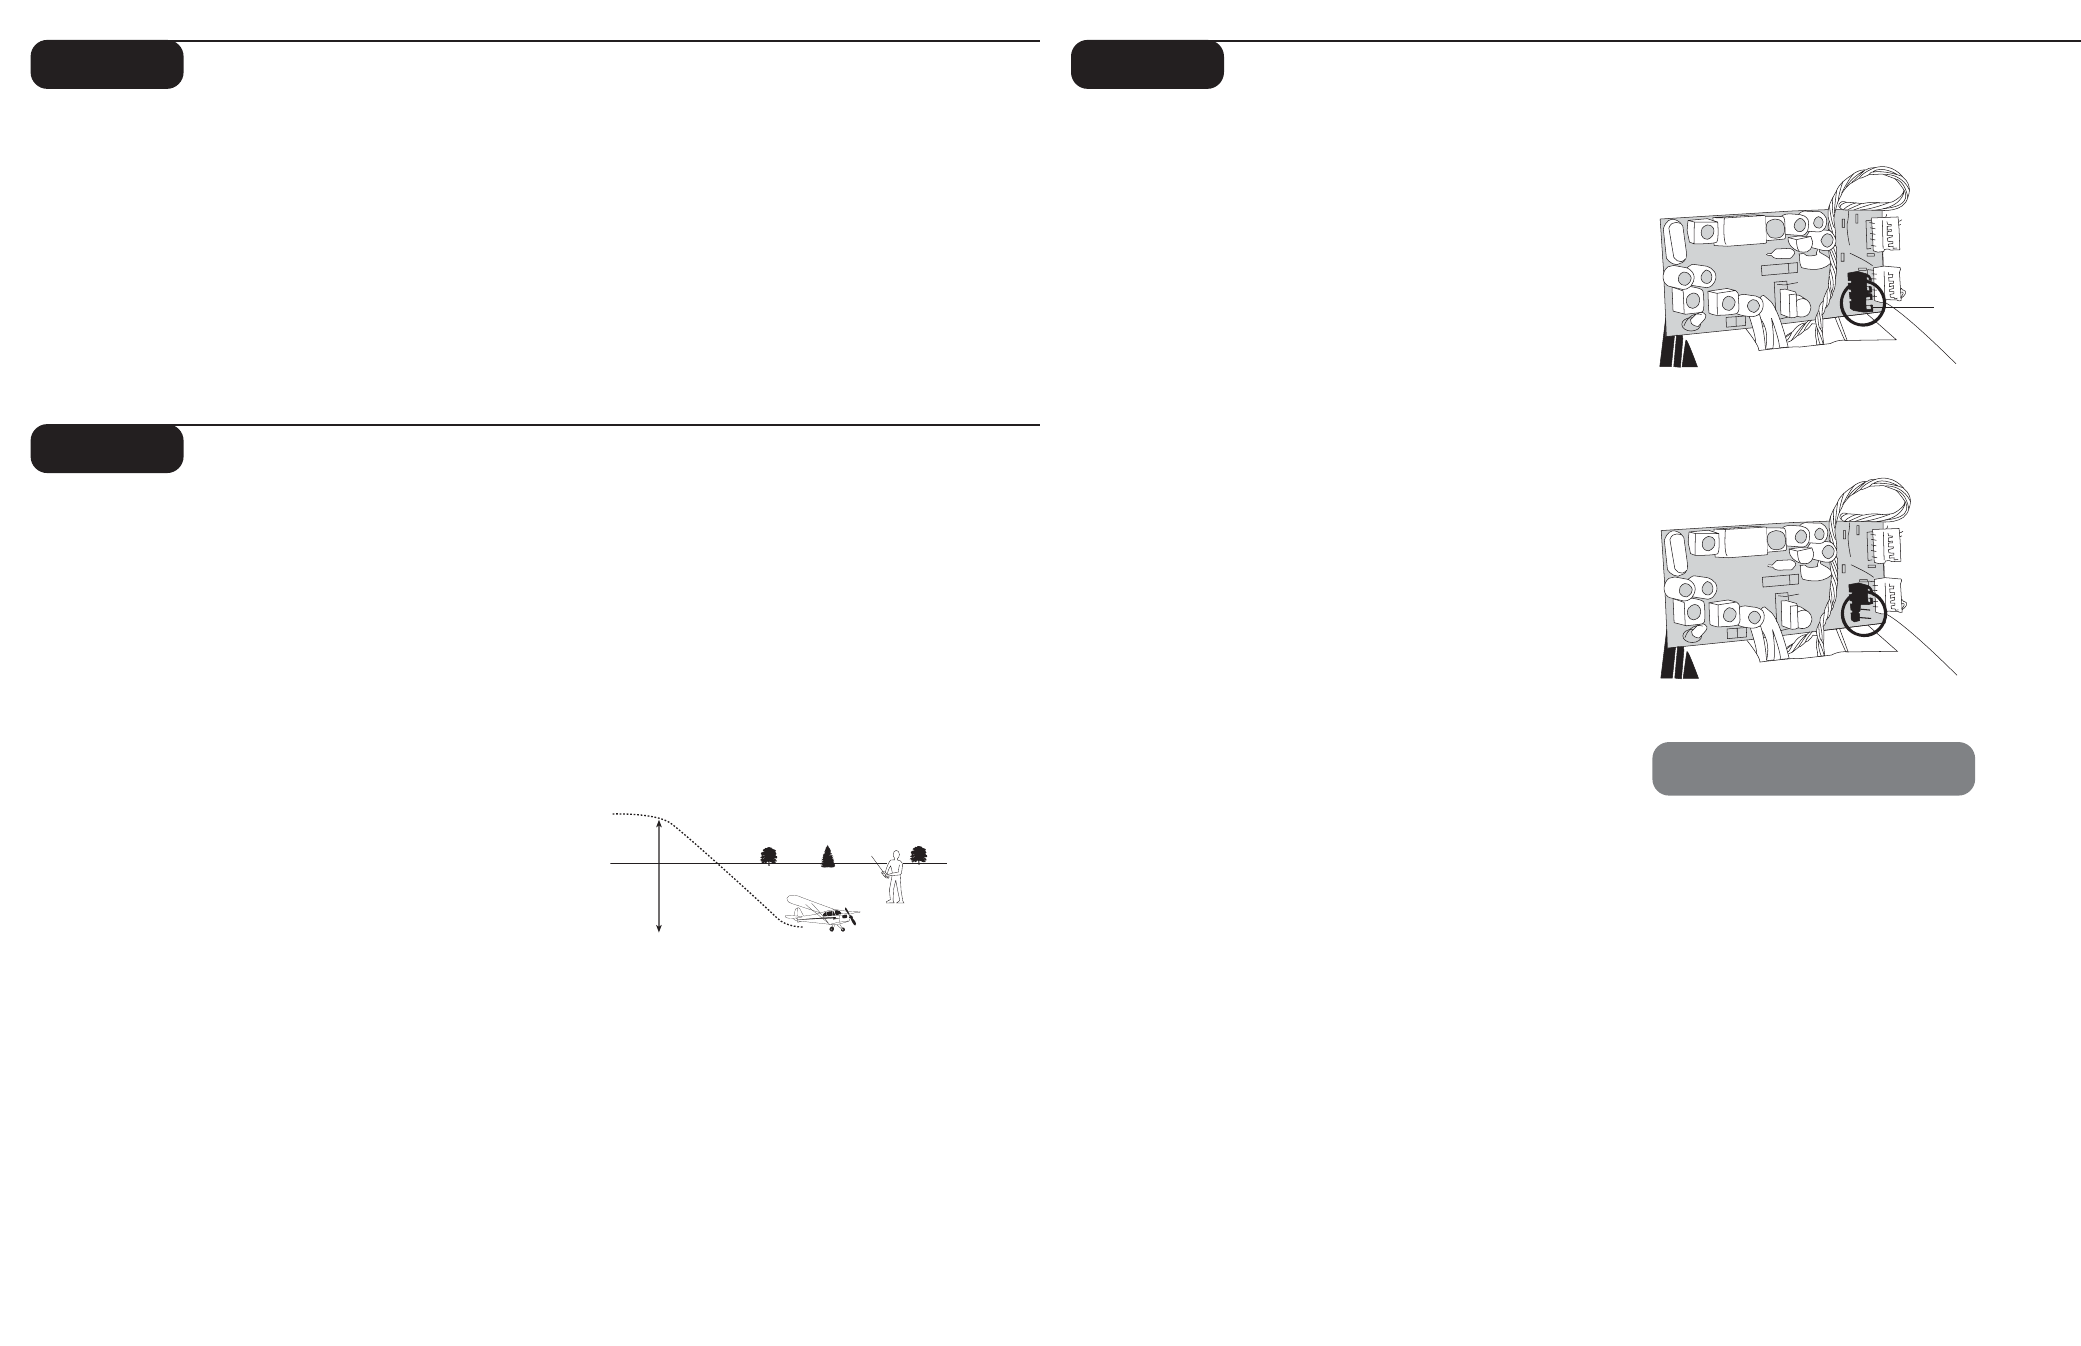
By removing the jumper, you will
now be in the second mode.
Locate the correct jumper on the circuit
board. When the jumper is properly in place
(as it comes), the J-3 is in the first mode.
Jumper
NOTE: Do not remove the other jumper. It needs
to stay in place for the J-3 to function correctly.