Tent setup, Nemo innovation (continued) – NEMO Equipment NAN User Manual
Page 3
Tent Setup
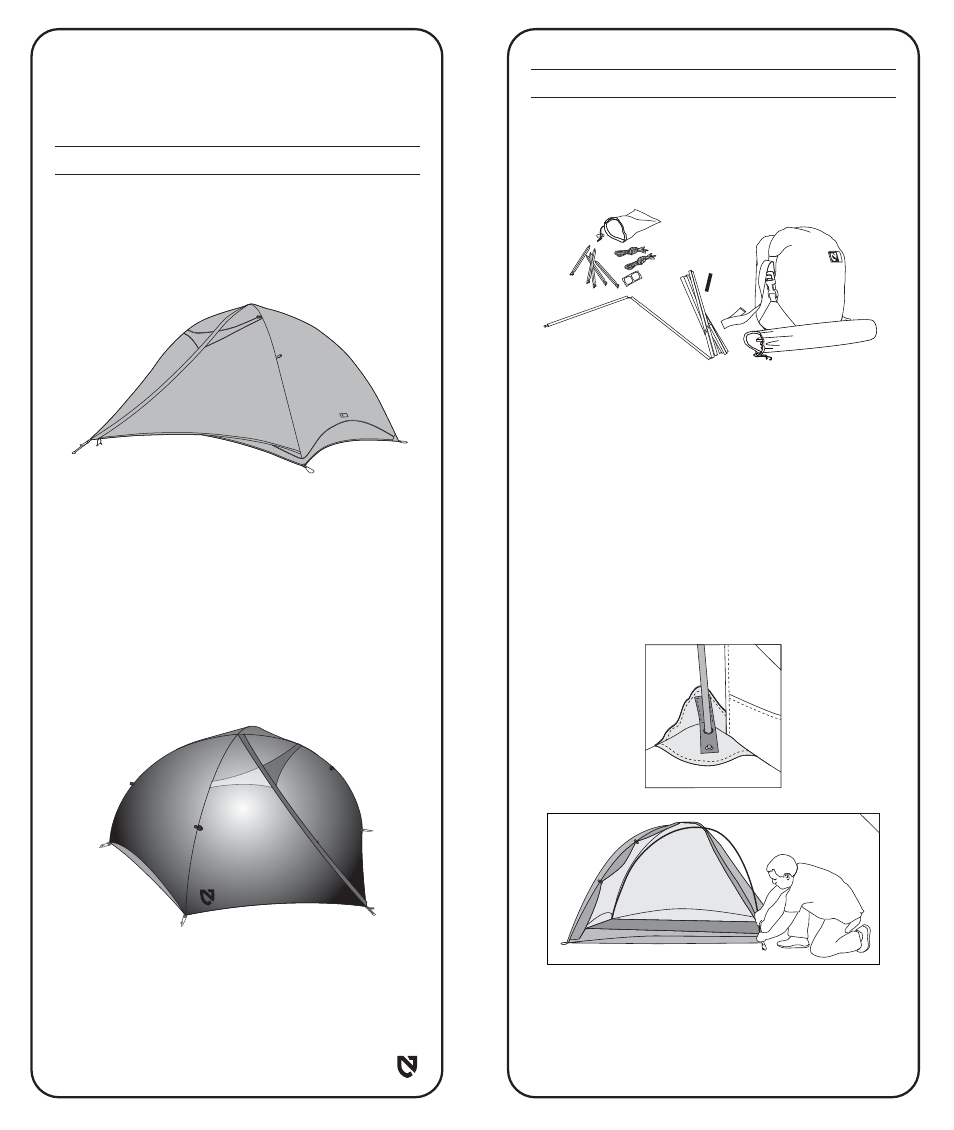
1. Lay out the contents of Nano™ and make sure that you
received all of the following items: tent, stuff sack, two poles,
five stakes, guy lines, pole repair sleeve, Tear-Aid® fabric
patches.
3
2. When choosing a location to pitch your tent, select a flat area
free of fragile undergrowth and sharp objects. Nano™ is a
freestanding tent which means it will still function without being
staked out. For full strength, anchor the corners of your tent to
the ground with the included stakes. If the ground is too hard to
place stakes, tie the corners of your tent to heavy objects like
rocks. If you are forced to set up your tent on an incline, make
sure your head will be positioned uphill.
3. To install Nano™ poles, place the end of one pole into a far
corner. Insert the opposite end into the diagonal corner near the
door. Make sure the pole ends sit in the metal buttons. Repeat
with the second pole. It is easiest to insert the poles before
staking the tent.
3
NEMO Innovation
(Continued)
2. Bold Catenary Patterning: using computer aided modeling,
we build catenary curves into the edges of as many of our tent
panels as possible. This method of patterning saves extra material
and improves the tensioning of the tent.
3. LightPocket™: most headlamps have a focused beam and
hanging your lamp inside your tent can be frustrating. To make
things easier, Nano™ includes a special pocket for your headlamp
with a light diffusing fabric. Place your lamp in the pocket above
the door with the light facing towards the inside of the tent, and
the LightPocket™ will help cast an even light throughout the tent
interior.