Instructions for setup – NEMO Equipment OB 3P User Manual
Page 5
Remember to leave no trace. Before leaving your campsite, take a thorough look
around making sure you have not left anything behind, out of place, or damaged.
To contact NEMO Customer Service
Email: [email protected]
Phone: 800-997-9301
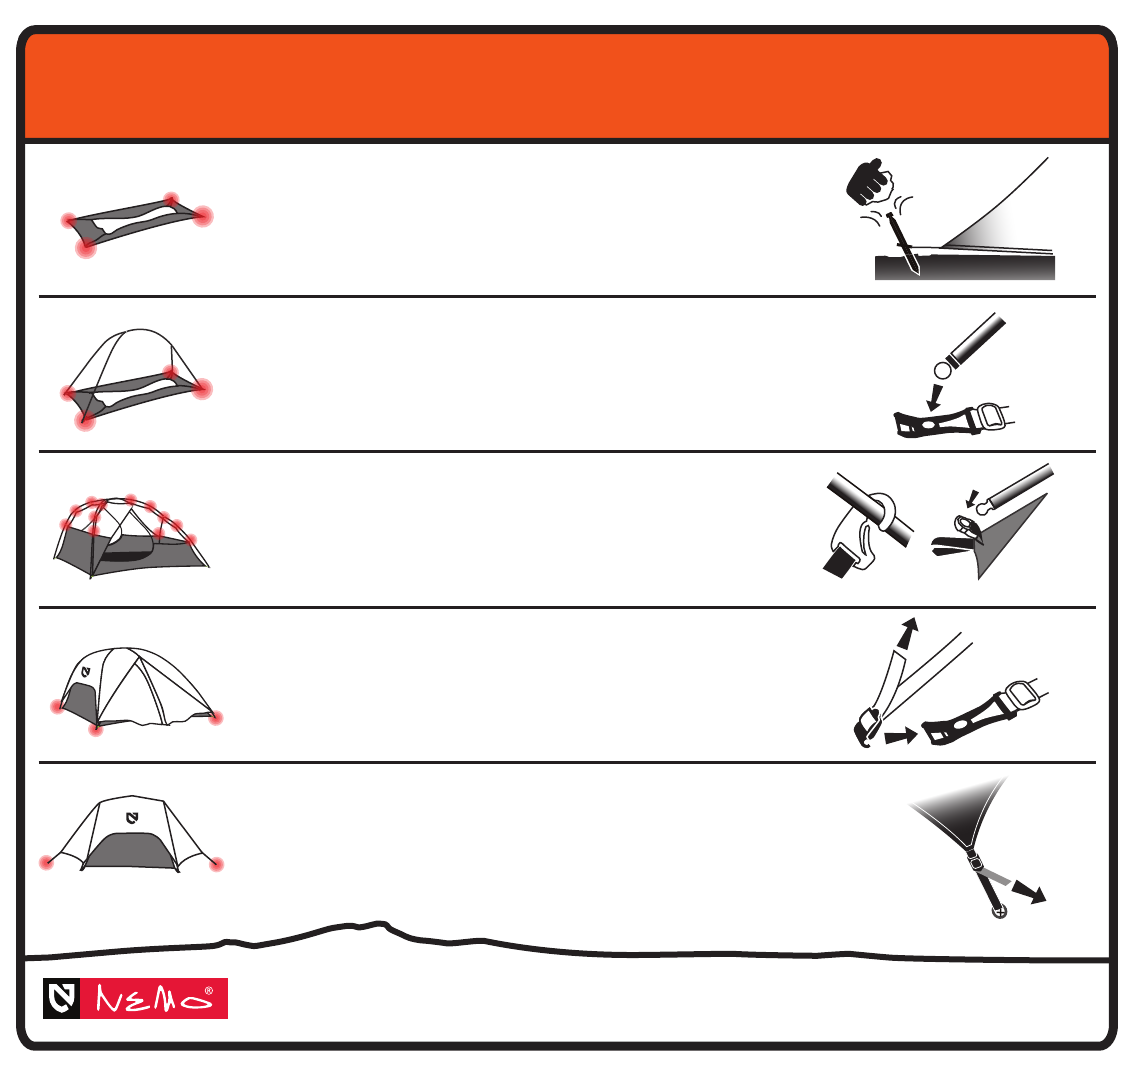
INSTRUCTIONS FOR SETUP
OBI
™
3P
1
2
3
4
5
©2012 NEMO Equipment, Inc.
Clips
Attach the inner tent to the main poles with clear clips.
Attach the brow pole over main poles by snapping both
ends of the ball caps on the sides of the tent.
Stake Corners (optional)
Secure the corner anchors by pounding stakes into the
ground with a rock or hard object. If the ground is too hard, tie
the anchors to a rock or another heavy object.
Press the ball ends of poles into the fittings (Jake’s Feet) at the
corners of the inner tent. To make sure your poles are the correct
direction, match the pole color to the webbing on the anchors.
Attach Jake’s Feet
Attach Fly
Clip the corners of your tent fly to the last bar on the Jake’s Feet.
Pull firmly on the adjustable corner anchors. Proper tension
ensures maximum water shedding and wind resistance.
Stake Vestibules and Tension Fly
Stake the vestibule anchors and pull firmly on the webbing to ensure
proper tension in the fly. Make sure ridge pole is aligned with
reinforcement patches, secure with velcro.