Roof mounted fans, Wall mounted fans – MK Plastics RBK IO&M User Manual
Page 3
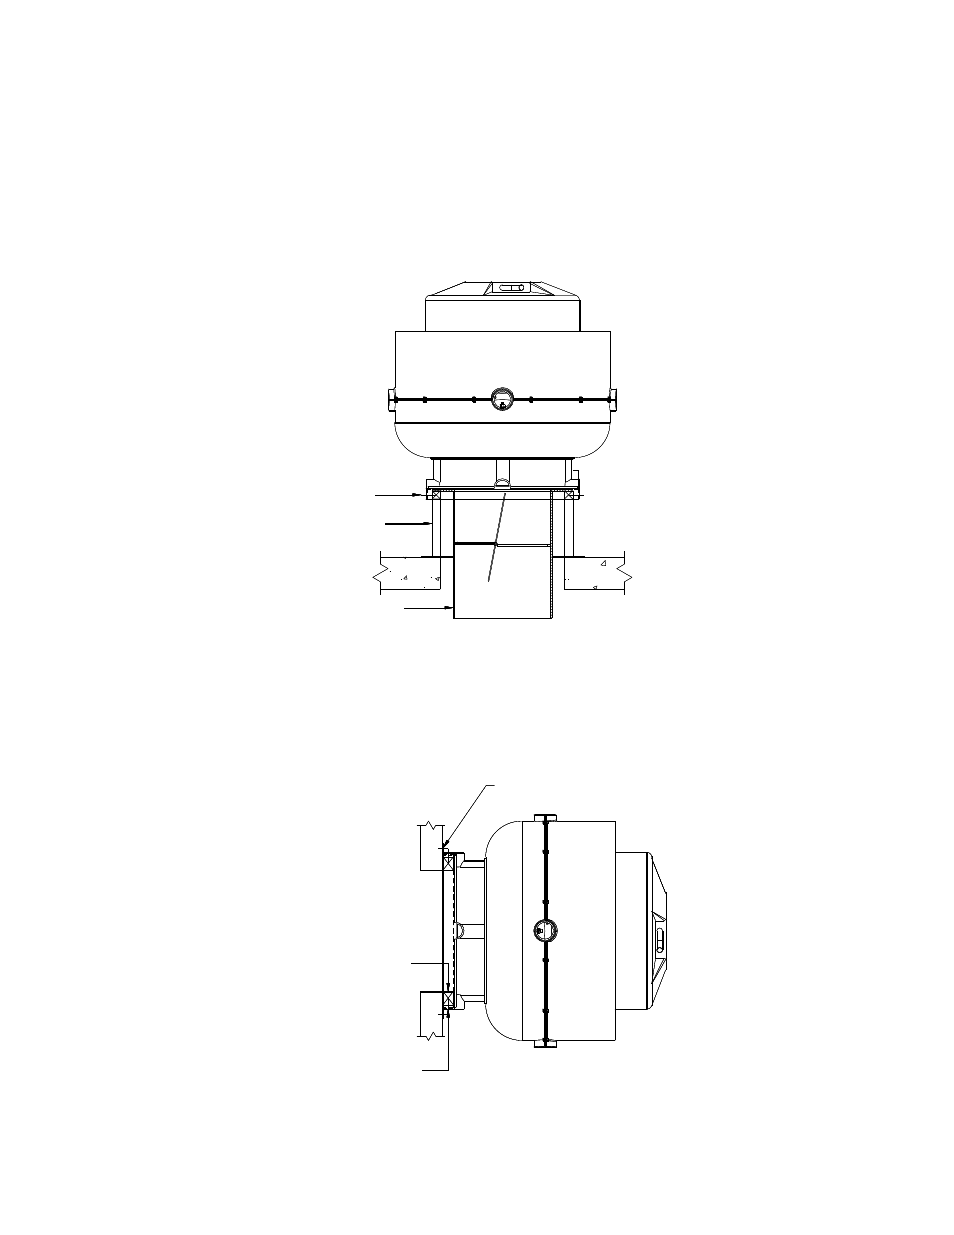
Roof Mounted Fans
Roof mounted fans should normally be attached to equipment support curbs to keep them above the roof line by at least 12”.
Assuming the roof curb is in place….
1. If the unit has been supplied with a backdraft damper, now is the time to install it. The flange of the damper is square
and is sized and designed to sit on the curb wood nailer strip. Fasten down with counter sunk screws.
2. Lift the fan onto the roof curb, refer to page 2. for lifting lug locations for larger size fans. Make sure there is
approximately 1” gap between the inside of the curb cap and the outside of the curb, evenly spaced.
3. Secure the fan to the roof curb using a minimum of eight lag bolts, through the side of the curb cap into the curb wood
nailer strip. Shims may be required depending on the type of curb used.
4. Make connection to the disconnect switch per the electrical instructions.
Damper
Lag Bolts
Roof Curb
Damper
Lag Bolts
Roof Curb
Damper
Lag Bolts
Roof Curb
Damper
Lag Bolts
Roof Curb
Fig. 4 – Roof Curb Mounted
Wall Mounted Fans
The fan is attached in a similar way to roof mounting, except that the curb is replaced by spacer blocks or mounting brackets,
(not supplied). See Fig. 5 for details.
Mounting Spacer Block
Lag Bolts
Mounting Bracket
Mounting Spacer Block
Lag Bolts
Mounting Bracket
Mounting Spacer Block
Lag Bolts
Mounting Bracket
Mounting Spacer Block
Lag Bolts
Mounting Bracket
Mounting Spacer Block
Lag Bolts
Mounting Bracket
Fig. 5 – Wall Mounted
3