Installing batteries, Keypad description, Mounting the keypad – Mighty Mule FM145 User Manual
Page 7: Wiring connections, Keypad - front, Keypad - inside, Status light, Program button, Battery holder, Reset button
6
7
1
2
ABC
3
DEF
4
GHI
5
JKL
6
MNO
7
PRS
8
TUV
9
WXY
0
Knock-out
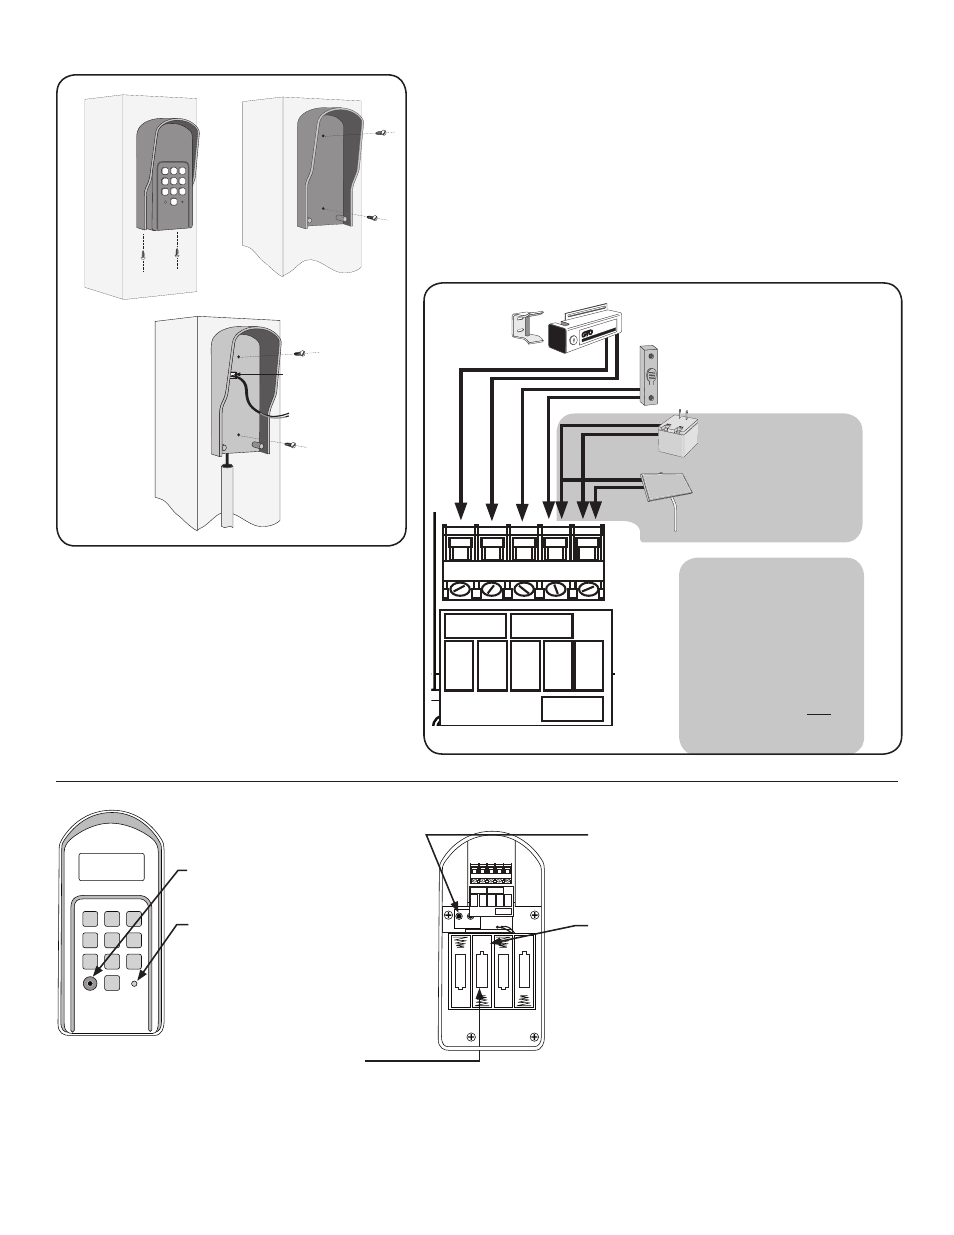
Installing Batteries
Step 1: Remove the two screws from the bottom of
the keypad and separate the keypad from its housing.
Step 2: Install 4 AA batteries as shown.
Keypad Description
1
2
ABC
3
DEF
4
GHI
5
JKL
6
MNO
7
PRS
8
TUV
9
WXY
0
STATUS Light:
This led will blink once when
any key is pressed and
provides visual feedback during
access code programming.
PROGRAM Button:
Used to program access codes.
Keypad - Front
Battery Holder:
Use 4 AA batteries (standard alkaline or
rechargeable)
NOTE: 4 AA batteries are
required to power the keypad.
+
–
–
+
–
+
–
+
RESET
LOCK
SOLENOID
CONTROL
INPUTS
POWER
INPUTS
LOCK -
LOCK+
COM PWR
PWR +
PUSH
BUT
TON
Keypad - Inside
RESET Button:
Pressing this button for 2 seconds will
reprogram key pad to factory settings.
All codes are deleted. Default master code
is 1234.
Mounting the Keypad
+
–
–
+
–
+
–
+
RESET
LOCK
SOLENOID
CONTROL
INPUTS
POWER
INPUTS
LOCK -
LOCK+
COM PWR
PWR +
PUSH
BUT
TON
-
+
AUT
OMA
TIC
GAT
E LO
CK
®
ELECTR
ONIC SECURITY L
OCK
GTO LOCK
TRANSFORMER
OR
SOLAR PANEL
(not included)
DOOR BELL PUSH BUTTON
(use 22 AWG wires minimum)
OPTIONAL
Wiring Connections
IMPORTANT
• DO NOT USE Trans-
former or Solar Panel
with non-rechargeable
batteries.
• DO NOT CONNECT
both transformer and
solar panel.