Cam systems - tru-arc+ cam, Changing tru-arc+ cam draw length continued – Martin Archery Bow User Manual
Page 14
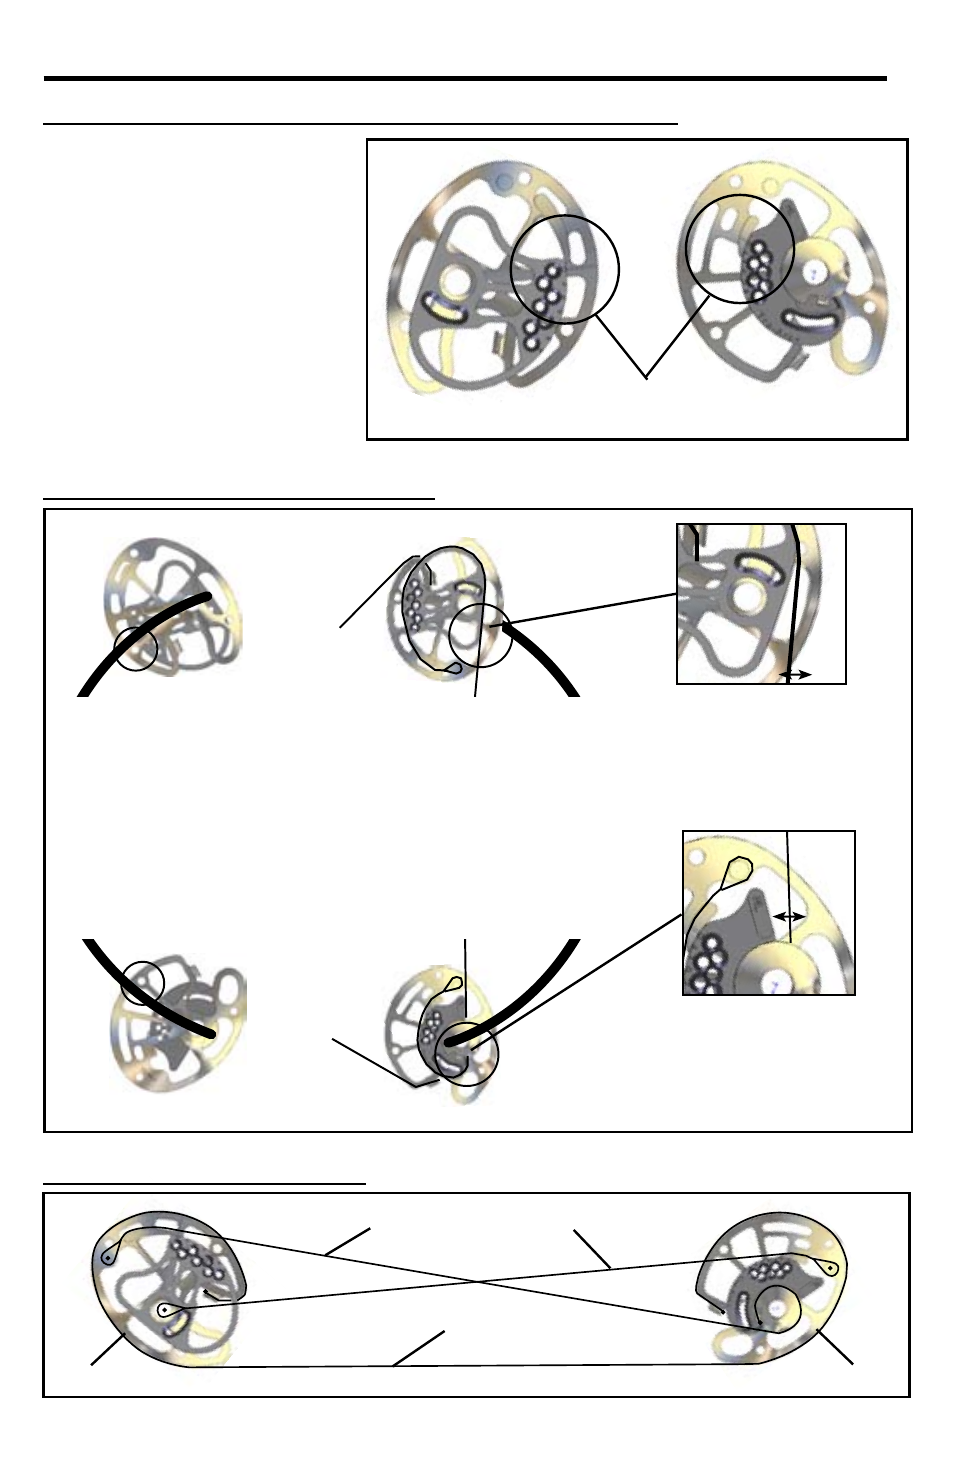
Control String
Split String
Shooting String
Top Module
Bottom Module
•Changing Tru-Arc+ Cam Draw Length Continued
There is no need to press your
bow when changing your draw
length on the new Tru-Arc+. Your
modules are lettered A through G.
Each letter will change your draw
½”. Make sure that both cams are in
the same draw setting to keep them
both working together.
•Checking The Tru-Arc+ Cams
•Tru-Arc+ String Diagram
Cam Systems - Tru-Arc+ Cam
Draw length
indicators
Top
Bottom
At rest, you can use these
holes in the cam and their
relationship with the limb
to be sure that the cams
are working together. The
position of the hole and the
limb will vary based on limb
angle, but as long as the top
matches the bottom, it is ready
to shoot.
You can also check the bow at
full draw. Pull the bow back on
a scale and watch the circled
areas of the cam come to rest on
their cables. They should touch
at the same time. If the top cam
happens to touch first, twist the
split string. If the bottom touches
first, twist the control string.
If the bottom cam is touching
its cable and the top looks
like this, put a twist in the
split string until both cams
touch together.
If the top cam is touching its
cable and the bottom looks
like this, put a twist in the
control string until both cams
touch together.