Quick install guide ags-1016, Ags-1016 installation, Installing the ags-1016 in a rack – Luxul AGS-1016 User Manual
Page 6: Desktop setup, Connecting devices
Quick Install Guide
AGS-1016
a: 14203 Minuteman Drive, Suite 201, Draper, UT 84020-1685 | luxul.com | 801-822-5450
LUX-QIG-AGS-1016 029151020
6
AGS-1016 INSTALLATION
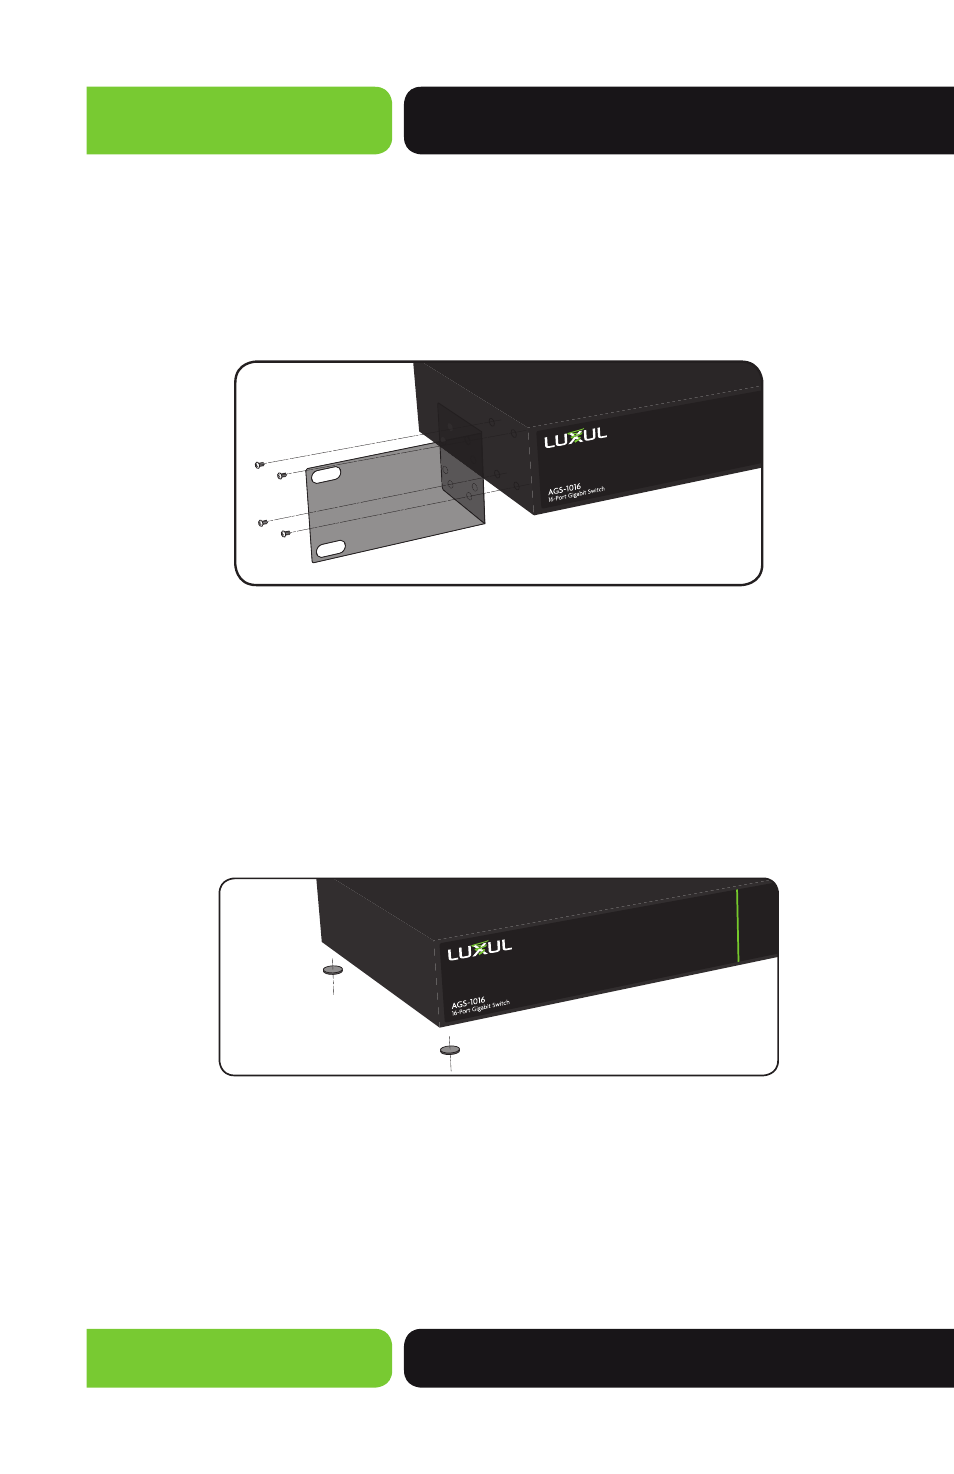
Installing the AGS-1016 in a Rack
The AGS-1016 can easily be installed in a standard 19” rack. The AGS-1016 includes two
mounting ears for installing and stabilizing the switch. When attaching the mounting
ears and installing the switch within a rack, please refer to the following illustration:
Rack-Mounting the AGS-1016
Using the included screws, attach the mounting ears to each side of the switch.
Mount the switch in the rack with the LEDs facing outwards. Be sure the switch is
level and properly secured within the rack.
Desktop Setup
For use as a desktop device, position and apply the included rubber feet to the
bottom of the AGS-1016.
Attaching the Rubber Feet to the AGS-1016
Connecting Devices
Use standard Ethernet CAT5, CAT5e, or CAT6 cable to connect the AGS-1016 to
a device as described below (CAT6 must be used in order to achieve full Gigabit
bandwidth). The AGS-1016 will automatically adjust to the characteristics (speed/
duplex) of the device to which it is connected.