Lodar 2 Function Receiver/Actuator 12 Volt User Manual
Page 2
Actus Manufacturing
www.actusinc.com
+1 651‐487‐8716
240 Arlington Ave East
St. Paul, MN 55117
www.actusinc.com
Manually test the system
With the wireless system turned off the valve handle should operate smoothly; excessive force is not required. Compare the
movement of the handle to an adjacent, non‐actuated handle if applicable. The up and down throw should be the same. If the
throw has been shortened you will need to move the C‐bracket (see step 5).
Connect the actuator to the Lodar controller
Connect the Deutsch connectors of the actuator and the Lodar controller.
Power up the system
With the Actus actuator plugged into the Lodar, and the Lodar being properly installed*, press the green bu on on the
transmi er. You can now press one of the yellow func on bu ons to operate.
*See Lodar Wiring Instruc on to ensure you have the Lodar wireless controller installed correctly
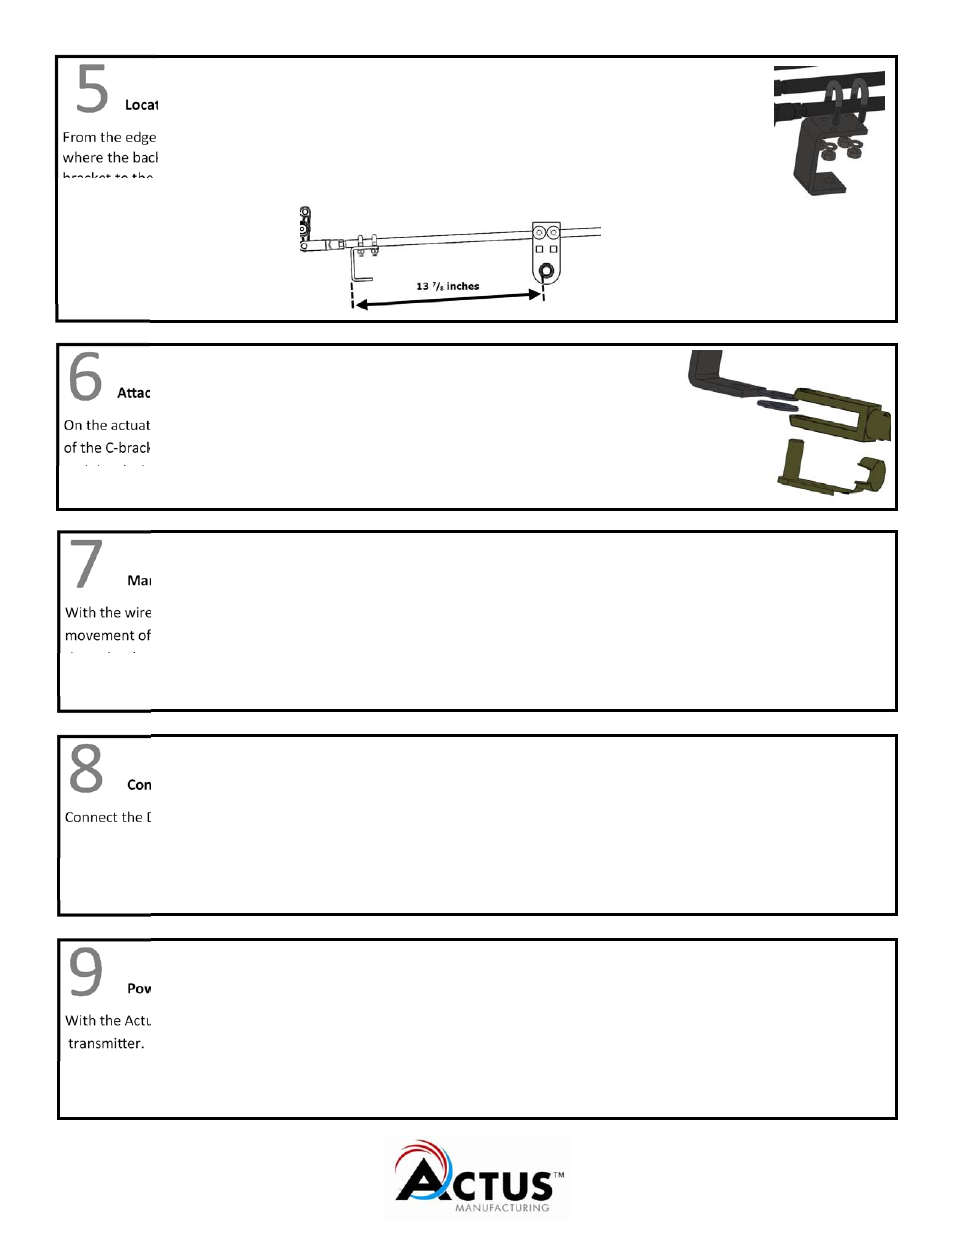
Locate and loosely a ach the C‐bracket to the control rod
From the edge of the pivot rod, measure a distance of 13
7
/
8
inches towards the outside of the truck. This is
where the back of the C‐bracket will be. With the C‐bracket opening facing the pivot rod, loosely mount the C‐
bracket to the control rod using the enclosed U‐bolts, split lock washers and nuts. The C‐bracket should be
poin ng straight down.
A ach the actuator to the C‐bracket
On the actuator clevis, unclasp the clevis pin and pull the pin. Put one nylon washer on each side
of the C‐bracket moun ng hole. Place the clevis pin back through the C‐bracket moun ng hole
and the clevis and re‐clasp. Tighten the C‐bracket.