Lodar 2 Function Receiver/Actuator 12 Volt User Manual
Before you start, Installa on instruc ons
Actus Manufacturing
www.actusinc.com
+1 651‐487‐8716
240 Arlington Ave East
St. Paul, MN 55117
www.actusinc.com
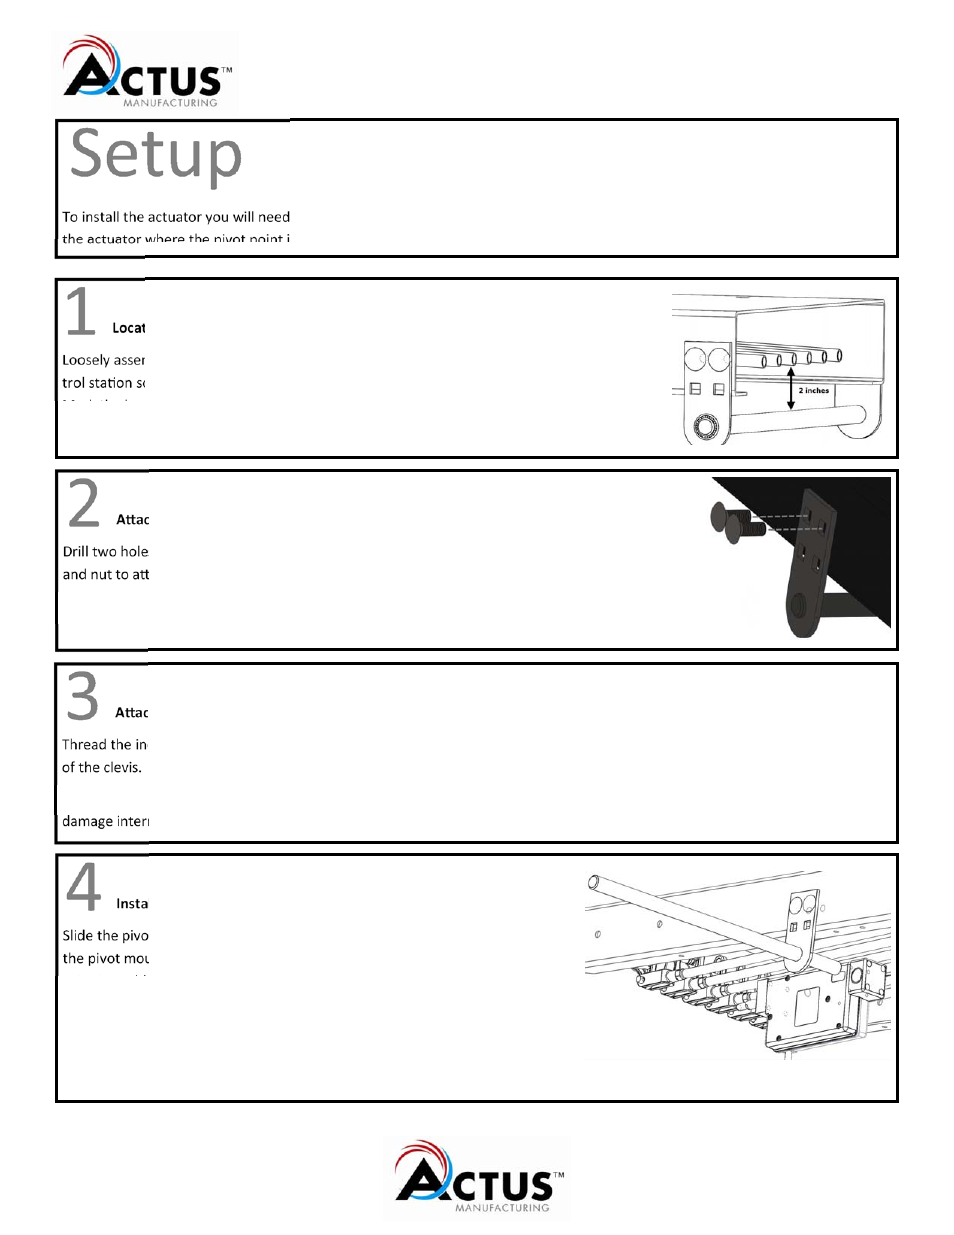
A ach the pivot rod moun ng ears
Drill two holes per pivot rod moun ng ear and use the included 7/16 carriage bolts, lock washer
and nut to a ach the ears to the control sta on side wall.
A ach the clevis to the Actuator
Thread the included 7/16 jam nut followed by the clevis onto the output rod of the actuator. Secure the jam nut against the base
of the clevis.
IMPORTANT— when threading the clevis, do not allow the output rod of the actuator to rotate. Rota on of the output rod can
damage internal actuator components.
Install the electric actuator(s)
Slide the pivot rod through the one of the pivot rod moun ng ears, then through
the pivot mount hole on the actuator. Note the actuator orienta on, the
actuator cable should be on the bo om of the actuator. Use the plas c spacers
to center the actuator below the valve control rod you are connec ng to. Side
the rod through the other moun ng ear and secure using the retaining rings.
NOTE: Depending on the number of actuators and the width of your vehicles
control sta on, you may need to cut some of the spacers to allow for proper fi ng.
Before you start
To install the actuator you will need 17 inches of clear space on the bo om side of the control sta on. We recommend moun ng
the actuator where the pivot point is closest to the center of the truck and on the passenger side of the vehicle.
Locate the pivot rod moun ng ears
Loosely assemble the pivot rod and ears using the retaining rings. Place them under the con‐
trol sta on so the pivot rod has 2 inches of space between it and the valve lever control rods.
Mark the loca on of the ear holes.
Installa on Instruc ons
8678v01
999‐0805